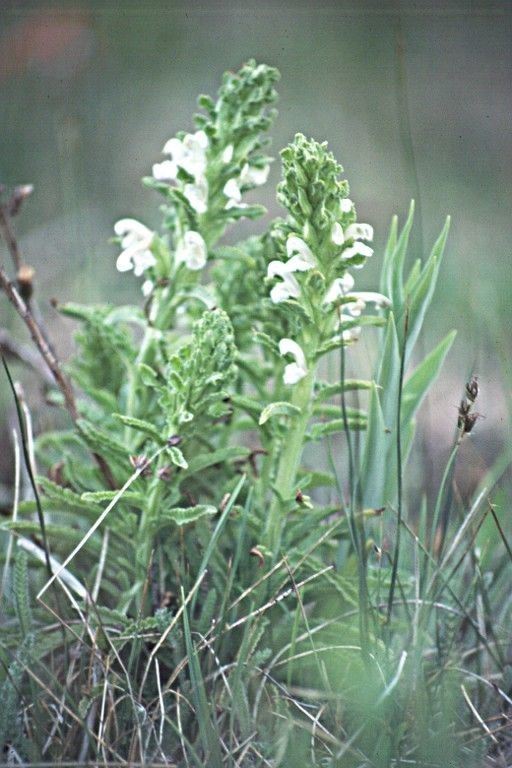
Oh, hello there! Come on in, grab a mug. I’ve been meaning to chat with you about Pedicularis crenulata. Isn’t it just a darling? Those nodding, often vibrant, foxglove-like blooms really bring a touch of wild enchantment to the garden. And the best part? You can actually make more of them! Propagating this beauty is a wonderfully rewarding way to fill your garden beds or share the magic with fellow plant lovers. Now, I’ll be honest, Pedicularis crenulata isn’t quite as hands-off as a ZZ plant, but don’t let that deter you. With a little attention and the right approach, it’s absolutely achievable.
The Best Time to Start
For the highest chance of success, I find that late spring to early summer is your sweet spot. This is when the plant is really putting on a growth spurt and has plenty of energy. You’re looking for fresh, healthy growth, usually from stems that haven’t flowered yet or have just finished. Think soft, pliable stems, not woody ones.
Supplies You’ll Need
Here’s what I usually gather before I dive in:
- Sharp, clean pruning shears or a knife: For making those precise cuts.
- Rooting hormone (optional but helpful): A powder or gel to encourage root development.
- Propagating medium: A well-draining, airy mix. I often use a 50/50 blend of perlite and seed starting mix or a fine-textured compost.
- Small pots or trays: Clean ones, of course!
- Plastic bags or a propagation dome: To create a humid environment.
- Watering can with a fine rose: For gentle watering.
Propagation Methods
While you can try seed, I find the most reliable method for Pedicularis crenulata is from stem cuttings.
Stem Cuttings:
- Take your cuttings: Select a healthy, non-flowering stem. Using your sharp shears, take a cutting about 3-4 inches long. Make the cut just below a leaf node (where a leaf attaches to the stem).
- Prepare the cutting: Gently remove the lower leaves, leaving just a few at the top. If the leaves are very large, you can even cut them in half to reduce water loss.
- Apply rooting hormone (optional): If you’re using it, dip the cut end into the rooting hormone, tapping off any excess.
- Insert into medium: Make a small hole in your propagating mix with a pencil or your finger. Gently insert the cutting, ensuring the nodes where you removed the leaves are now under the surface of the soil. Firm the soil gently around the base of the cutting.
- Provide humidity: Water the soil gently. Then, cover the pot or tray with a plastic bag or propagation dome. Make sure the leaves aren’t touching the plastic.
The “Secret Sauce” (Pro Tips)
Now, for a couple of things I’ve learned over the years that really make a difference:
- Bottom warmth is your friend: While not strictly essential for Pedicularis, placing your cuttings on a heated propagation mat can significantly speed up root formation, especially if your environment isn’t naturally warm. It mimics that lovely, cozy soil temperature.
- Don’t overwater, but don’t let it dry out: This is a tricky balance! The goal is to keep the soil consistently moist but never soggy. Soggy soil is a fast track to rot. I often check the moisture by gently pressing the soil. If it springs back a bit, it’s good. If it feels mushy, you’ve gone too far.
Aftercare & Troubleshooting
Once you’ve got your cuttings nestled in, keep them in a bright spot but out of direct, harsh sunlight. Check for roots in about 4-6 weeks. You can gently tug on a cutting – if there’s resistance, you’ve got roots!
The most common issue you’ll encounter is rot. If you see your cutting turning mushy, black, or wilting despite being in a humid environment, it’s usually a sign of too much moisture and not enough air circulation. If you catch it early, try removing the affected part and letting it air dry slightly before trying again, or ensure your soil mix is extra well-draining.
A Little Patience Goes a Long Way
Propagating plants is a journey, and sometimes they like to take their sweet time. Don’t get discouraged if your first few attempts don’t pan out. Each new plant you grow is a testament to your care and willingness to learn. So, get your hands dirty, experiment a little, and enjoy the wonderful process of bringing more of this lovely Pedicularis into your world! Happy gardening!
Resource:
https://identify.plantnet.org/k-world-flora/species/Pedicularis%20crenulata%20Benth./data