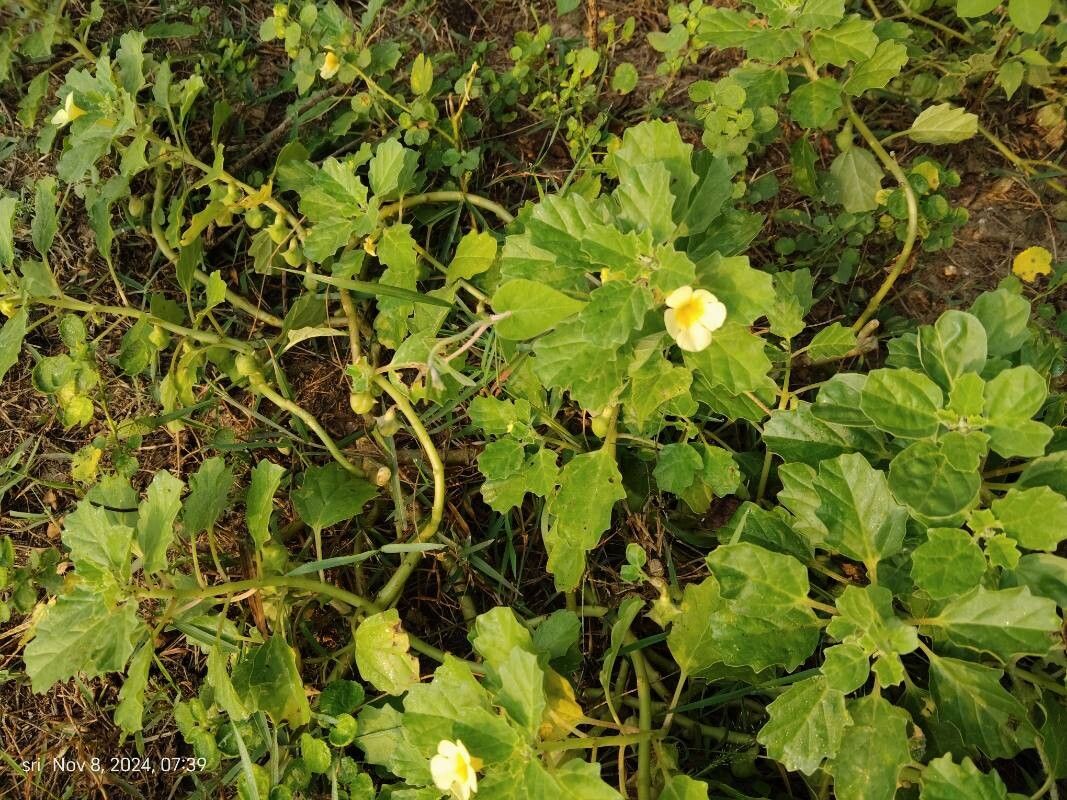
Hello fellow plant lovers! I’m so excited to talk to you today about a plant that has truly captured my heart over the years: Pedalium murex. You might know it by its common name, the “Gokshura” or “Devil’s Thorn,” and while that might sound a little intimidating, this plant is actually quite charming. It boasts beautiful, fleshy leaves and produces delicate, star-shaped flowers that are a joy to behold. And the best part? Propagating it is incredibly rewarding, a wonderful way to share its beauty or just fill your own space with more of these gorgeous plants. For those of you just starting out, I’d say Pedalium murex is a pretty beginner-friendly plant to propagate, which makes it even more appealing!
The Best Time to Start
Timing is everything in the garden, isn’t it? For Pedalium murex, your best bet for successful propagation is during its active growing season. This typically means late spring through summer. When the plant is putting on new growth, it’s full of energy, making it more likely to root and establish quickly. Avoid trying to propagate when the plant is dormant or stressed.
Supplies You’ll Need
Gathering your supplies beforehand makes the whole process so much smoother. Here’s what you’ll want to have on hand:
- Sharp pruning shears or a clean knife: For making neat cuts.
- Rooting hormone (optional but helpful): A powder or liquid to encourage root development.
- Well-draining potting mix: A cactus/succulent mix is perfect, or you can make your own with equal parts potting soil, perlite, and coarse sand.
- Small pots or containers: Make sure they have drainage holes!
- Clear plastic bag or propagation dome: To create a humid environment.
- Watering can or spray bottle: For gentle watering.
Propagation Methods
Pedalium murex is quite adaptable, and I’ve had great success with a couple of methods.
Stem Cuttings
This is my go-to method for Pedalium murex.
- Select a healthy stem: Look for a stem that’s about 4-6 inches long and has at least a couple of sets of leaves. Avoid anything that looks woody or a bit too soft.
- Make a clean cut: Using your sharp shears or knife, cut the stem just below a leaf node. This is a crucial spot where roots are likely to form.
- Remove lower leaves: Gently pull off the leaves from the bottom half of the cutting. This prevents them from rotting in the soil.
- Apply rooting hormone (if using): Dip the cut end into your rooting hormone, tapping off any excess.
- Plant the cutting: Make a small hole in your well-draining potting mix and insert the cut end of the stem. Gently firm the soil around it.
- Water lightly: Give the soil a gentle drink, just enough to moisten it.
Water Propagation
This method can be really satisfying to watch!
- Take stem cuttings: Follow steps 1-3 from the stem cutting method.
- Place in water: Put the cuttings in a clean glass or jar filled with fresh water.
- Position correctly: Ensure that no leaves are submerged in the water. They will rot if they are.
- Change water regularly: Replace the water every few days to keep it fresh and prevent bacterial growth.
- Find a bright spot: Place the container in a location that receives bright, indirect light.
The “Secret Sauce” (Pro Tips)
Here are a few of my little tricks that have made a big difference:
- Patience with the Cuttings: Don’t be tempted to tug on your cuttings to check for roots. They can be fragile initially. Give them plenty of time; some might take several weeks.
- Bottom Heat is Your Friend: If you have a seedling heat mat, using it under your pots with stem cuttings can significantly speed up root development. The warmth mimics natural growing conditions and is a real game-changer.
- Mist, Don’t Drown: When you’re misting your cuttings in pots to maintain humidity, do it lightly. You want to create a humid microclimate, not soak the soil. Overwatering at this stage is a surefire way to invite rot.
Aftercare & Troubleshooting
Once you see those beautiful little roots starting to emerge (either peeking out of the pot’s drainage holes or dangling in your water jar), it’s time for slightly different care.
- For cuttings in pots: Continue to keep the soil lightly moist, but not waterlogged. As the roots grow stronger, you can gradually reduce the frequency of watering, letting the soil dry out slightly between waterings, just like you would for a mature plant. You can remove the plastic bag or dome once roots are established, about 2-3 weeks.
- For cuttings in water: Once the roots are about an inch long, you can transplant them into pots with your well-draining potting mix. Handle them gently!
Now, you might encounter a few hiccups. The most common issue is rot. If your cutting feels mushy or turns black and slimy, it’s likely rotted. This is usually due to too much moisture or poor air circulation. If you see this, discard the affected cutting and re-evaluate your watering and humidity levels. Another sign of trouble is if the leaves start to yellow and droop excessively, which can also point to overwatering or insufficient light.
A Encouraging Closing
Propagating plants is a journey, and like any good journey, it’s about the process as much as the destination. Be patient with your Pedalium murex cuttings. Not every one will make it, and that’s perfectly okay! Celebrate the successes, learn from the challenges, and most importantly, enjoy the magic of watching new life grow. Happy propagating!
Resource:
https://identify.plantnet.org/k-world-flora/species/Pedalium%20murex%20L./data