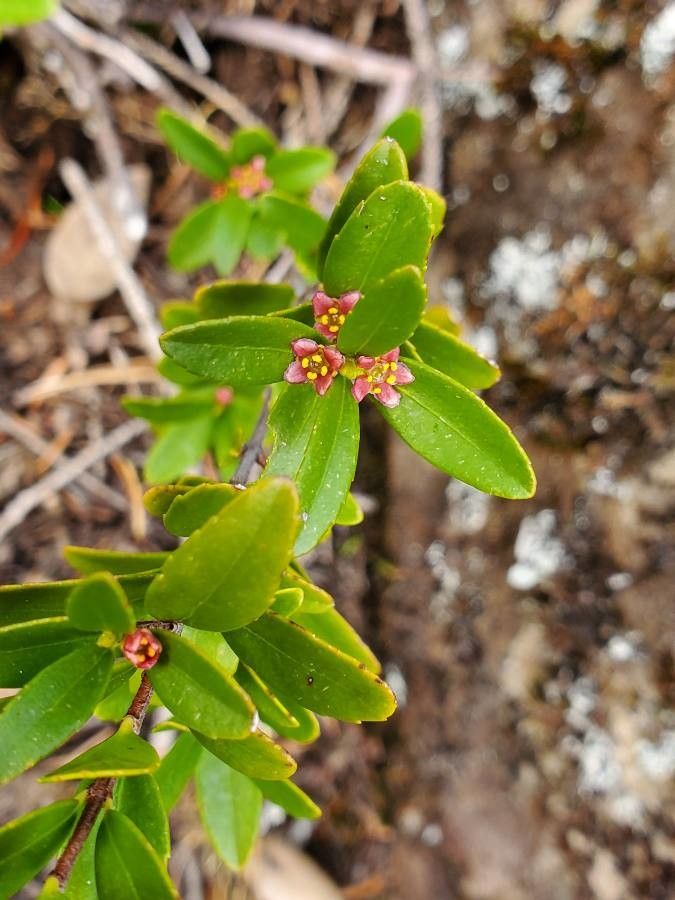
Oh, hello there! So, you’ve fallen for the charms of Paxistima myrsinites, haven’t you? I don’t blame you one bit. This little evergreen beauty, with its glossy, dark green leaves and tidy, mounding habit, is a real gem. It’s tough, drought-tolerant once established, and adds a sophisticated touch to shady nooks or rock gardens. Growing more of them is a wonderfully satisfying endeavor. Now, as for beginners, well, Paxistima can be a tad bit on the patient side. It’s not the quickest to root, but with a little care and know-how, it’s definitely achievable, and the reward of seeing those tiny new plants thrive is truly special.
The Best Time to Start
For the highest chance of success with Paxistima myrsinites, I always aim for late spring to early summer. This is when the plant is actively growing, and you can select young, non-woody stems. Think of it as catching the plant at its most energetic – it has all the vigor it needs to put those efforts into forming roots rather than just producing more leaves. Waiting until the new growth has had a chance to harden off just a little, but is still flexible, is key.
Supplies You’ll Need
Gathering your tools beforehand makes the whole process smoother. Here’s what I usually have on hand:
- Sharp, clean pruning shears or a sharp knife: Crucial for making clean cuts.
- Rooting hormone (powder or gel): This is a big help for species that can be a little stubborn, like Paxistima.
- Well-draining potting mix: A good mix of perlite, peat moss, and coarse sand works wonderfully. You can also buy a commercial seed-starting mix.
- Small pots or containers: Clean ones, ideally with drainage holes.
- Plastic bags or a clear plastic dome: To create a humid environment.
- Watering can or spray bottle: For gentle watering.
- Labels: Don’t forget to label your cuttings!
Propagation Methods
The most reliable way I’ve found to propagate Paxistima myrsinites is through stem cuttings. Division is possible with established clumps, but cuttings give you more new plants to work with.
Stem Cuttings:
- Select your cuttings: Find healthy, current-season stems that are about 4-6 inches long. Look for stems that are flexible but not floppy, with a bit of firm growth. Avoid stems that are still very soft and green.
- Make the cut: Using your sharp pruners or knife, make a clean cut just below a leaf node (where a leaf attaches to the stem). This is where root-forming cells are often concentrated.
- Prepare the cutting: Gently strip off the lower leaves, leaving just a few at the top. This reduces moisture loss and prevents leaves from rotting in the soil.
- Apply rooting hormone: Dip the cut end into your rooting hormone, tapping off any excess. This step really gives them a boost.
- Plant the cuttings: Fill your clean pots with your prepared potting mix. Make a pilot hole using a pencil or a skewer to avoid rubbing off the rooting hormone. Insert the cuttings into the holes, burying about half of their length. Gently firm the soil around them.
- Water gently: Water thoroughly using a gentle spray or by bottom-watering (placing the pots in a tray of water until the soil surface is moist).
- Create humidity: Cover the pots loosely with a plastic bag or a clear dome. Seal it around the edge of the pot to trap moisture. You can prop it up with stakes if needed so the leaves don’t touch the plastic.
- Place in its spot: Find a bright location out of direct sunlight. A bit of shade is perfect.
The “Secret Sauce” (Pro Tips)
Here are a few things I’ve learned over the years that can really make a difference:
- Bottom Heat is Your Friend: Paxistima roots appreciate a little warmth from below. If you have a heat mat designed for seedlings, placing your pots on it can significantly speed up root development. It mimics that cozy spring soil temperature.
- Don’t Drown Them: While humidity is important, overwatering is the enemy. The soil should be consistently moist but never soggy. If you see water pooling on the surface after watering, your mix might be too dense, or you’re watering too much.
- Patience is a Virtue (and Actually Works): I know I said it’s not the quickest, but this is truly the secret. Don’t be tempted to yank them out too soon to check for roots. It can take anywhere from 6 weeks to a few months for Paxistima to show good root development.
Aftercare & Troubleshooting
Once you start to see new leafy growth emerging from the top of your cuttings, it’s a good sign that roots are forming! Gradually acclimate your new plants to lower humidity by opening the plastic bag or dome a little each day over a week or so. Water them as needed, keeping the soil lightly moist.
The most common pitfall is rot. If a cutting turns black and mushy, or if the leaves droop and turn yellow and then brown despite being kept moist, it’s likely rot. This is usually due to too much moisture and not enough air circulation. If you see a cutting succumbing, it’s best to discard it to prevent it from affecting others. If the soil seems consistently too wet, try repotting the remaining healthy cuttings in a fresher, drier mix.
A Little Bit of Green Patience
Propagating Paxistima myrsinites is a project that truly rewards your diligence. It’s a slower plant, yes, but watching those tiny cuttings transform into established little plants is incredibly fulfilling. So, gather your supplies, find a quiet spot, and give it a go. Remember to be gentle, be patient, and most importantly, enjoy the process of bringing more of this lovely evergreen into your garden. Happy growing!
Resource:
https://identify.plantnet.org/k-world-flora/species/Paxistima%20myrsinites%20(Pursh)%20Raf./data