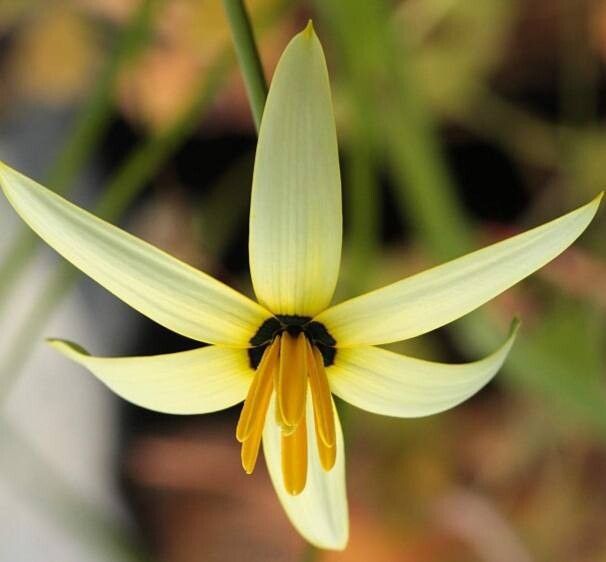
Oh, Pauridia capensis! Isn’t she a stunner? Those delicate, starry blooms are like little whispers of spring, and the foliage has this wonderful texture that adds so much charm to any pot or sunny nook. If you’ve ever admired one and thought, “I wish I had more of those!”, then you’re in the right place. Propagating Pauridia capensis is a truly rewarding experience. It’s not the absolute easiest plant for a complete beginner, I’ll be honest, but with a little patience and these tips, I’m confident you’ll have success.
The Best Time to Start
For Pauridia capensis, the spring growing season is your golden ticket. You want to catch your plant when it’s actively putting on new growth. This means the energy is flowing, and it’s much more receptive to forming roots. Aim for after the potential for frost has passed and the days are getting noticeably longer and warmer.
Supplies You’ll Need
Gathering your supplies beforehand makes the whole process much smoother. Here’s what I always have on hand:
- Sharp, clean pruning shears or a sharp knife: Essential for making clean cuts.
- Well-draining potting mix: A peat-based mix with plenty of perlite or coarse sand is perfect. You want good aeration.
- Small pots or trays: Clean, shallow containers are ideal for starting out.
- Rooting hormone (optional but recommended): This can give your cuttings a little boost. Look for a powder or gel.
- Watering can with a fine rose or a spray bottle: For gentle watering.
- Plastic bags or a propagation dome: To create a humid environment.
- Labels and a permanent marker: To keep track of your experiments!
Propagation Methods
Pauridia capensis typically does best with division and is also amenable to stem cuttings. Let’s dive into how to do both.
Division: The Heart of Propagation
This is usually my go-to method for Pauridia capensis because it’s so effective and less prone to failure.
- Gently remove the parent plant from its pot. I like to do this when the soil is slightly dry, making it easier to handle.
- Inspect the root ball. You’ll be looking for distinct clumps of growth with their own root systems.
- Carefully tease apart the divisions. You can use your fingers, or if things are really dense, a clean, sharp knife or trowel to cut through the roots. Make sure each division has at least a few healthy-looking leaves and a decent root system.
- Pot up each division into its own small pot filled with your well-draining mix.
- Water gently to settle the soil around the roots.
- Place the new divisions in a bright, indirect light location. Avoid direct sun for the first week or two while they re-establish.
Stem Cuttings: A Bit More Delicacy
This method requires a bit more attention to detail, but the reward of a whole new plant from a small piece is amazing.
- Take your cuttings in spring. Look for healthy, non-flowering stems that are about 3-4 inches long.
- Make a clean cut just below a leaf node. This is where new roots are most likely to form.
- Remove the lower leaves. You want to expose the nodes where roots can develop. Leave just a couple of leaves at the top.
- Dip the cut end in rooting hormone (if you’re using it). Tap off any excess.
- Insert the cuttings into small pots filled with your prepared potting mix. You can plant several cuttings in one pot, but make sure they aren’t touching each other.
- Water gently to moisten the soil.
- Cover the pot with a plastic bag or a propagation dome to create a mini-greenhouse. This is crucial for maintaining humidity.
- Place in a warm spot with bright, indirect light. Avoid direct sun, which can scorch the tender cuttings.
The “Secret Sauce” (Pro Tips)
Here are a couple of things I’ve learned over the years that really seem to help Pauridia capensis cuttings along:
- Don’t let the leaves touch the water (in water propagation, which I generally avoid for this plant, but it’s a good general tip): If you were to try water propagation (which I find less successful for this particular species compared to soil), make sure no leaves dip into the water. They’ll rot faster than you can say “root ball.”
- Bottom heat is your friend for cuttings: If you have a small seedling heat mat, placing your cutting pots on it can significantly speed up root development. It mimics the warmth of spring soil and encourages those roots to form. Just make sure the heat isn’t too intense.
Aftercare & Troubleshooting
Once you see new growth emerging from your divisions or cuttings, that’s your signal that roots are forming!
- For divisions: Continue to water them when the top inch of soil feels dry. Gradually introduce them to more light as they get stronger.
- For cuttings: This is where you need to be patient. As new leaves start to unfurl, it’s time to slowly acclimate them to normal air humidity. This means gradually opening the plastic bag or dome over a week or so. Once they are growing well, you can remove the cover entirely and treat them like small, established plants.
Now, the tricky part: what if things go wrong? The most common sign of trouble is rot. This usually happens if the soil stays too wet, or if the environment is too humid for too long without good airflow, especially with cuttings. If you see stems turn mushy and brown, or if your cuttings wilt and go limp without any sign of life, it’s likely rot. Don’t be discouraged; compost it and try again. Sometimes, you’ll see nothing happen for a while. Patience is key!
A Encouraging Closing
So there you have it! Propagating Pauridia capensis is totally achievable. Embrace the process, learn from each attempt, and don’t be afraid to get your hands a little dirty. The joy of watching a tiny cutting or division transform into a beautiful, blooming plant is absolutely worth it. Happy gardening, my friends!
Resource: