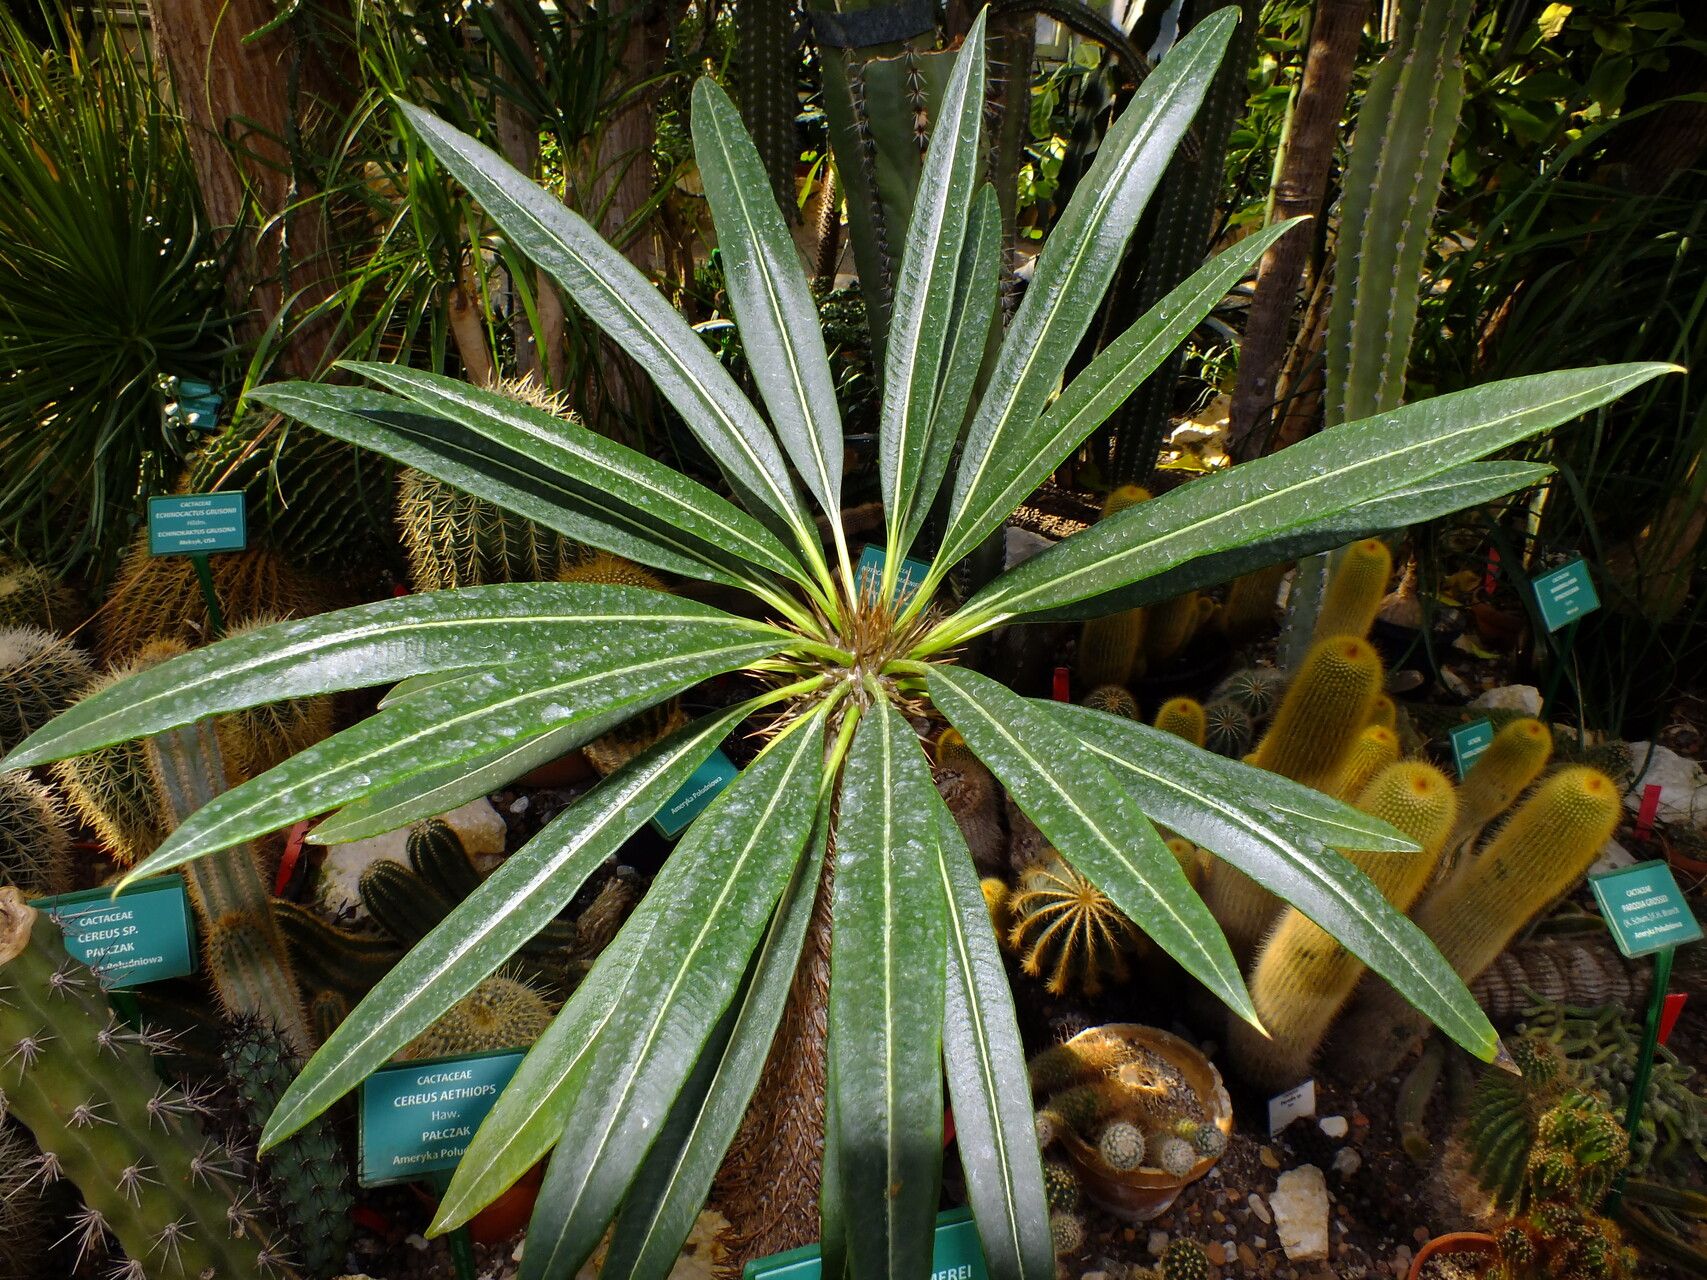
Hello, fellow plant lovers! It’s so wonderful to have you join me today. We’re diving into the world of Pachypodium geayi, also known as the Madagascar Palm. These unique succulents, with their spiky trunks and crown of glossy leaves, have a way of capturing the imagination. If you’ve ever admired one of these beauties, you might be wondering if you could grow your own. The good news is, yes, you can! Propagating Pachypodium geayi is a fantastic way to expand your collection or share these fascinating plants with friends. Now, I won’t sugarcoat it – this isn’t the easiest plant to propagate, and it requires a bit of patience, but the reward of seeing a new baby plant sprout is absolutely worth the effort.
The Best Time to Start
Timing is everything in the garden, and it’s especially true for propagating succulents. For Pachypodium geayi, you’ll have the best luck starting your propagation endeavors during the active growing season. This typically falls in the late spring through summer. You want to work with healthy, vigorous plant material when it’s actively producing energy and has the best chance of healing and rooting. Trying to propagate when the plant is dormant or stressed is a recipe for disappointment.
Supplies You’ll Need
Before we get our hands dirty, let’s gather our supplies. Having everything ready beforehand makes the process so much smoother.
- Sharp, Sterilized Pruning Shears or a Knife: A clean cut is crucial to prevent disease. I like to give mine a quick wipe with rubbing alcohol.
- Rooting Hormone (Optional but Recommended): This can give your cuttings an extra boost. Look for one that’s specifically for succulents or cacti.
- Well-Draining Potting Mix: A mix of potting soil, perlite, and pumice in roughly equal parts is ideal. You want something that drains water quickly to prevent rot.
- Pots or Containers: Choose pots with drainage holes. Small nursery pots or even shallow trays work well for cuttings.
- Watering Can with a Fine Rose or Spray Bottle: Gentle watering is key.
- Patience! This is the most important tool you’ll need.
Propagation Methods
Pachypodium geayi can be propagated through stem cuttings, which is the most common and generally successful method.
Stem Cuttings
- Select Your Cutting: Look for a healthy, mature stem on your Pachypodium geayi. You want a section that’s at least 4-6 inches long and has some leaves. Ideally, choose a side shoot or the tip of a branch.
- Make the Cut: Using your sterilized pruning shears or knife, make a clean cut. Try to get a piece that includes the growth point if you’re taking a tip cutting.
- Allow to Seal: This is a critical step for succulents. You need to let the cut end callus over. Place the cutting in a dry, bright spot, out of direct sun, for several days to a week. You’ll see the cut end dry and form a protective scab. This prevents rot when you plant it.
- Apply Rooting Hormone (Optional): Once callused, you can dip the cut end into rooting hormone, tapping off any excess.
- Plant the Cutting: Fill your small pot with your well-draining potting mix. Make a small hole in the center with your finger or a pencil. Gently insert the callused end of the cutting into the soil. You want it to be stable enough to stand on its own.
- Initial Watering: Water very sparingly after planting. A light misting is usually enough to settle the soil. You don’t want to drench it.
- Placement: Place the pot in a bright, warm location, but out of direct, scorching sun.
The “Secret Sauce” (Pro Tips)
Here are a few things I’ve learned over the years that really help boost success with Pachypodium propagation:
- Don’t Rush the Callus: I cannot stress this enough. If you skip or rush the callusing process, you’re practically inviting rot. Let that cut end dry completely. Trust the process!
- Bottom Heat is Your Friend: Pachypodium roots love warmth to get going. If you have a seedling heat mat, placing your pots on it can significantly speed up rooting. It mimics the warm soil conditions they thrive in.
- Observe the Leaves: Once the cutting is planted, keep an eye on the leaves. If they start to shrivel and look sad, it’s often a sign that the plant is trying to root and is using its stored water reserves. If they look plump and happy but you see no signs of rooting after several weeks, you might need to water very lightly again.
Aftercare & Troubleshooting
Once you start to see signs of rooting – new leaf growth or a gentle tug on the cutting revealing resistance – you can increase watering slightly. Water thoroughly when the soil starts to dry out, but always ensure it drains well. Gradually introduce your new plant to more direct sunlight if it’s been in a shadier spot.
The most common problem you’ll encounter is rot. If your cutting turns mushy, black, or smells foul, it’s usually due to too much moisture and not enough drainage. Unfortunately, this is often a sign the cutting is lost. If you catch it early, you can try to cut away the rotted section and let the remaining healthy part callus again, but it’s a tough battle. Another less common issue is a cutting that just refuses to root. This can happen if the cutting was unhealthy to begin with or if it’s just not the right time. Don’t get discouraged; try again with a fresh cutting when conditions are better.
A Encouraging Closing
Propagating Pachypodium geayi is a journey, not a race. It can take weeks, sometimes even a couple of months, for roots to form. Be patient with your new little ones, and celebrate every bit of progress. The joy of nurturing a new life from a simple cutting is one of the most rewarding aspects of gardening. Happy propagating, everyone!
Resource:
https://identify.plantnet.org/k-world-flora/species/Pachypodium%20geayi%20Costantin%20&%20Bois/data