Hey there, fellow plant lovers! It’s so wonderful to have you join me today. I’m thrilled to share a bit of my passion for growing things, and today, we’re diving into the delightful world of Oreostemma alpigenum.
Welcome to the Wonderful World of Oreostemma Alpigenum!
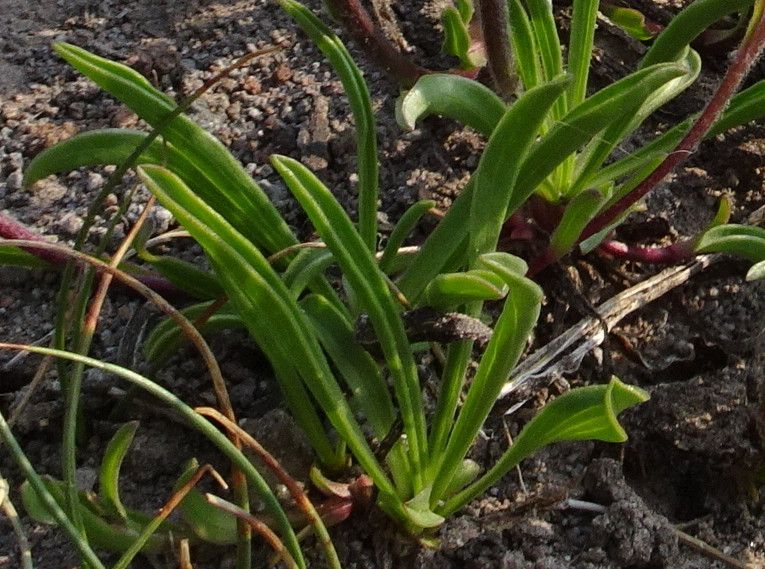
Have you ever spotted a plant that just makes you stop and admire its charm? That’s Oreostemma alpigenum for me. With its delicate starry flowers that seem to twinkle, and its ability to bring a touch of alpine beauty to your garden, it’s truly a gem. Propagating these beauties is wonderfully rewarding. You get to share the joy, fill more spots in your garden, or even surprise a green-thumbed friend. For beginners, I’d say this one falls into the moderately easy category. It’s not overly fussy, but a little attention to detail goes a long way.
When to Get Your Hands Dirty: The Best Time to Start
The absolute best time to start propagating Oreostemma alpigenum is in late spring to early summer. This is when the plant is actively growing, and new stems are vigorous and full of life. You want to take cuttings from healthy, non-flowering shoots. Think of it like getting a head start while nature is in full swing!
Your Propagator’s Toolkit: What You’ll Need
Gathering your supplies beforehand makes the whole process smoother. Here’s what I usually have on hand:
- Sharp Pruning Shears or a Clean Knife: For making clean cuts. We don’t want to damage the parent plant or the cuttings.
- Rooting Hormone (Optional but Recommended): A little boost can really help encourage root development.
- Well-Draining Potting Mix: A good blend is essential. I like to mix equal parts peat moss or coco coir with perlite or coarse sand. This keeps things airy and prevents waterlogging.
- Small Pots or Seed Trays: Clean, individual pots are great for cuttings.
- Clear Plastic Bags or a Propagator Lid: To create a humid environment for your cuttings.
- Watering Can with a Fine Rose: For gentle watering.
- Labels and a Pen: To keep track of what you’ve planted and when!
My Favorite Ways to Grow More Oreostemma
I find that two methods work particularly well for Oreostemma alpigenum: stem cuttings and division.
1. Stem Cuttings: The Classic Approach
This is my go-to method for multiplying these beauties.
- Select Your Cuttings: Look for healthy, new growth that’s about 4-6 inches long. Gently bend a stem; if it snaps cleanly, it’s likely ready. Avoid woody or very soft, new growth.
- Make the Cut: Using your clean shears or knife, make a cut just below a leaf node. A leaf node is where a leaf attaches to the stem. This is where roots are most likely to form.
- Prepare the Cutting: Remove the lower leaves, leaving just a few at the very top. This prevents leaves from rotting while buried in the soil. If the remaining leaves are very large, you can even cut them in half to reduce water loss.
- Apply Rooting Hormone (Optional): Dip the cut end of the stem into your rooting hormone powder, tapping off any excess.
- Plant Your Cuttings: Fill your small pots with the prepared, moistened potting mix. Make a small hole with your finger or a pencil. Insert the cut end of the stem into the hole, about an inch deep, and gently firm the soil around it.
- Water Gently: Water from the bottom if possible, or use a watering can with a fine rose to moisten the soil without dislodging the cuttings.
- Create Humidity: Cover the pot with a clear plastic bag (supported by stakes so it doesn’t touch the leaves) or place it under a propagator lid. This traps moisture and creates the humid environment cuttings love.
- Place in Bright, Indirect Light: Find a warm spot that gets bright, but avoid direct sunlight, which can scorch the delicate cuttings.
2. Division: When Your Plant is Mature
If your Oreostemma alpigenum has been happily growing for a few years and looks a bit crowded, division is a fantastic way to revitalize it and get more plants.
- Dig Up the Plant: The best time for this is in early spring before significant new growth begins, or in early fall after flowering has finished. Carefully dig around the plant, lifting the entire root ball from the soil.
- Gently Separate: Brush away excess soil from the roots. You should be able to see natural divisions in the root system. You can often gently pull apart these sections with your hands. For tougher divisions, a clean trowel or knife can help.
- Inspect and Trim: Check the divided sections for any damaged roots and trim them off with clean shears.
- Replant Immediately: Plant each division in its new location or in pots, using your well-draining potting mix. Ensure the crown of the plant (where the stems emerge from the roots) is at soil level.
- Water Thoroughly: Give your newly planted divisions a good watering to help settle the soil.
The “Secret Sauce”: My Insider Tips
Over the years, I’ve picked up a few tricks that seem to make a real difference.
- Bottom Heat is a Boon: If you’re struggling to get cuttings to root quickly, try placing your pots on a heat mat. Bottom warmth really encourages those roots to get going. It mimics the warmth of spring soil.
- Don’t Drench, Just Dampen: When watering cuttings, the key is consistent moisture, not sogginess. Overwatering is one of the quickest ways to lose a cutting to rot. Think of it as a well-wrung-out sponge.
- Air It Out: While humidity is crucial, don’t let it get stagnant. Once a day, lift the plastic bag for a few minutes to allow for some air circulation. This helps prevent fungal issues.
Aftercare and What to Watch For
Patience is your best friend here! It can take anywhere from 3 weeks to a couple of months for cuttings to develop a good root system.
- Check for Roots: You can gently tug on a cutting. If there’s resistance, it’s a good sign roots have formed. Alternatively, you can carefully peek into the drainage hole of the pot.
- Gradual Acclimation: Once new growth appears on your cuttings and you’re confident they’re rooted, it’s time to gradually acclimatize them to drier air. Start by removing the plastic bag for longer periods each day.
- Potting Up: When the new plants have a strong root system and are growing well, you can carefully pot them up into larger containers with fresh potting mix.
- Troubleshooting: The most common problem you’ll face is rot. If a cutting turns mushy, black, or detached from the soil, it’s likely time to discard it and start fresh. This is usually due to overwatering or insufficient airflow. Wilting without any signs of rot might just mean it needs a bit more humidity or has not yet rooted.
Happy Propagating!
Creating new life from existing plants is one of the most satisfying aspects of gardening. Don’t be discouraged if not every cutting takes. Gardening is a journey of learning and experimentation. Observe your plants, adapt your approach, and most importantly, enjoy the process. Happy propagating, and may your Oreostemma alpigenum flourish!
Resource: