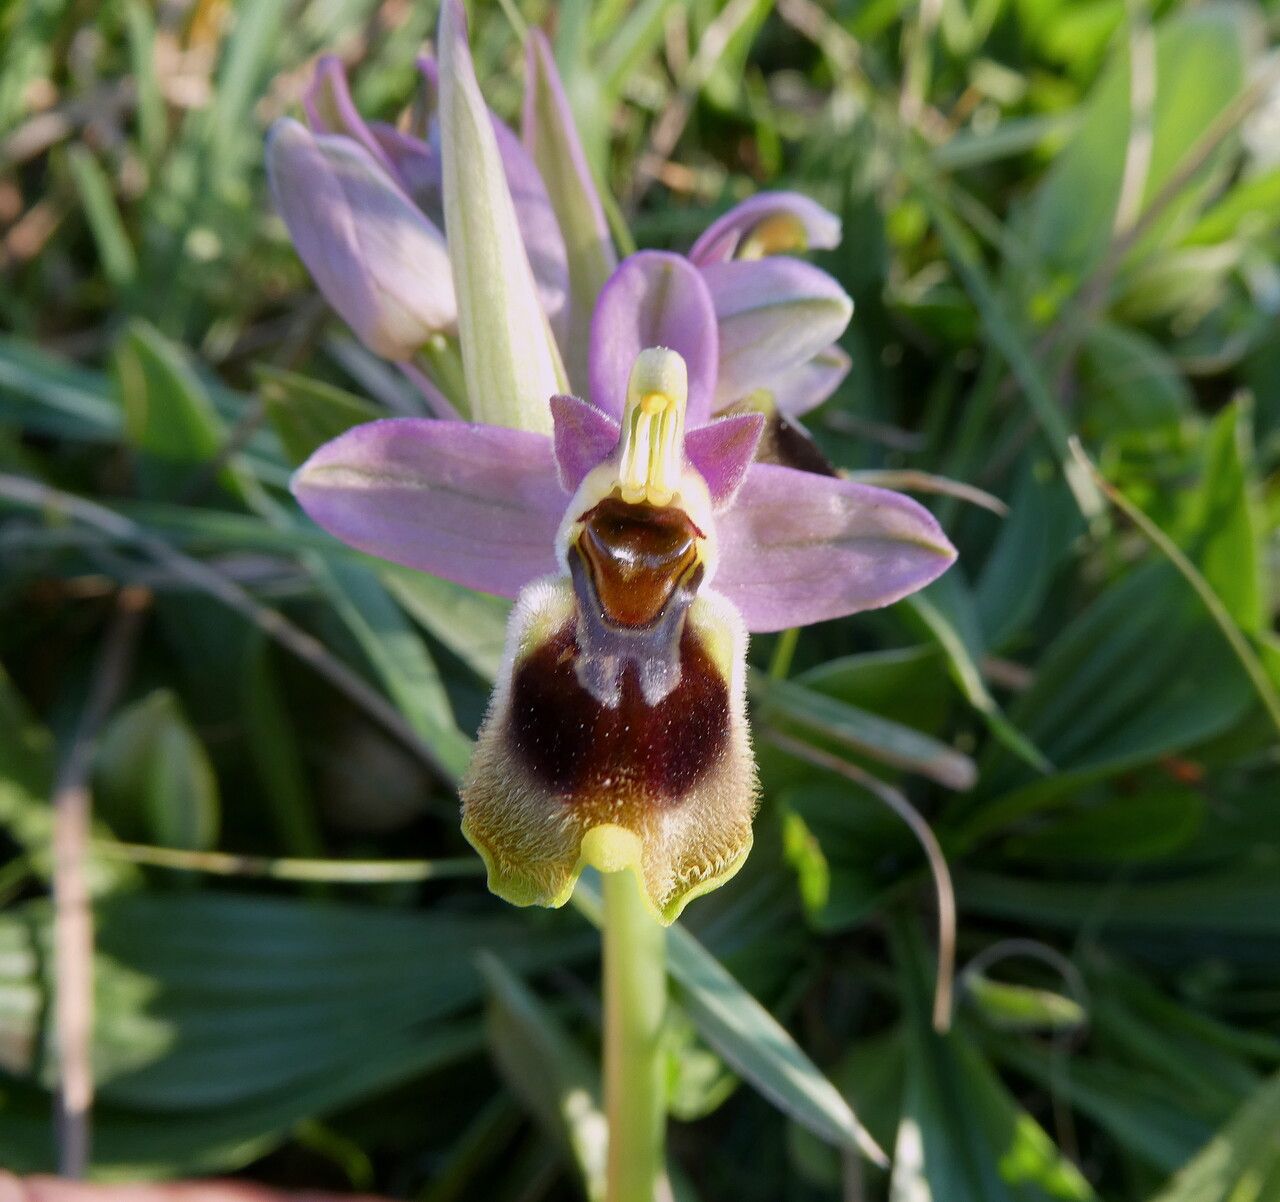
Oh, hello there, fellow plant lover! Come on in, grab a mug of your favorite brew – we’ve got some exciting gardening to chat about today. I’m so thrilled you’re interested in Ophrys tenthredinifera, often called the Sawfly Orchid. It’s truly a marvel with its delicate, bee-like flowers, drawing you in with its intricate beauty.
Now, if you’re thinking about adding more of these beauties to your collection, you’ve come to the right place. Propagating them can feel a little daunting at first glance, but with a bit of know-how and a generous helping of patience, it’s a journey incredibly worth taking. For beginners, I’d say it’s a moderately challenging endeavor. It’s not as straightforward as snipping a pothos, but the satisfaction you’ll feel when you do get it right is immense.
The Best Time to Start
For Ophrys tenthredinifera, timing is everything. The absolute best time to attempt propagation is in the late spring or early summer, right after the plant has finished flowering. This is when the plant is actively transitioning into its vegetative growth phase, and its energy is focused on developing new shoots and roots, which bodes well for successful cuttings. You want to catch it at this energetic stage.
Supplies You’ll Need
Gathering your tools ahead of time makes the whole process so much smoother. Here’s what I always have on hand:
- Sharp, sterilized pruning shears or a sharp knife: Cleanliness is paramount to prevent disease.
- A well-draining potting mix: I like a good blend of peat moss, perlite, and a bit of orchid bark. Drainage is your best friend here.
- Rooting hormone (optional, but recommended): This can give your cuttings a helpful boost. Look for one formulated for leafy cuttings.
- Small pots or trays with drainage holes: Size it appropriately for your cuttings.
- A clear plastic bag or propagation dome: To create a humid microclimate.
- Water: Clean, room-temperature water.
- A small trowel or dibber: For gently making holes in the soil.
Propagation Methods: Taking Cuttings
The most reliable method I’ve found for Ophrys tenthredinifera is through stem cuttings. It requires a gentle touch and a bit of observation.
- Identify the Right Stem: Look for a healthy, vigorous stem that’s not flowering. You want a stem that has at least two or three leaf nodes – those are the little bumps where leaves emerge.
- Make the Cut: Using your sterilized shears, make a clean cut just below a leaf node. Aim for a cutting that’s about 4-6 inches long.
- Prepare the Cutting: Gently remove the lower leaves from the cutting, leaving just a couple at the top. This reduces water loss and energy drain. If you’re using rooting hormone, dip the cut end into the powder according to the product’s instructions.
- Planting Your Cutting: Fill your small pot with your prepared, well-draining mix. Make a hole with your dibber or trowel, then gently insert the cut end of your Ophrys stem. Firm the soil gently around it to ensure good contact.
- Creating Humidity: Water the soil lightly. Then, place the pot inside a clear plastic bag or cover it with a propagation dome. This is crucial for maintaining high humidity, which keeps the cutting from drying out while it roots.
The “Secret Sauce” (Pro Tips)
Alright, between you and me, here are a few things I’ve learned over the years that can really make a difference:
- Don’t Let the Leaves Touch the Water: If you ever try water propagation with other plants, this is a big one. For Ophrys cuttings, ensuring the leaves aren’t submerged in water is vital to prevent rot. Keep them above the soil line.
- Bottom Heat is Your Friend: If you have a seedling mat, placing your potted cuttings on it can significantly speed up root development. A gentle, consistent bottom warmth mimics ideal natural conditions and encourages robust root growth.
- Watch for “Sugar Bubbles”: Sometimes, especially with woody cuttings, you might see tiny droplets of clear sap form on the cut end. This is a good sign! It means the plant is actively producing callus tissue, a precursor to root formation.
Aftercare & Troubleshooting
Once your cutting is planted, the real waiting game begins. Keep the soil consistently moist but not waterlogged. The humidity inside the bag or dome should be high. Place the pot in a bright spot with indirect sunlight. Direct sun can be too harsh and scorch the delicate cutting.
You’ll know your cutting is rooting when you see new leaf growth or feel a slight resistance when you gently tug on the cutting. This can take anywhere from a few weeks to a couple of months.
The most common issue you might encounter is rot. If the cutting starts to turn mushy, smells unpleasant, or develops black spots, it’s likely succumbed to rot. This usually happens due to overwatering or poor drainage. If you spot it early, try removing the affected part and repotting in fresh, dry mix. But sometimes, it’s a sign to try again. Don’t get discouraged!
So there you have it! Propagating Ophrys tenthredinifera is a labor of love. It’s a process that rewards careful attention and immense patience. Each successful new plant is a tiny triumph, a testament to your growing skills. Enjoy the journey, learn from any setbacks, and before you know it, you’ll have a whole little orchid family to admire. Happy gardening!
Resource:
https://identify.plantnet.org/k-world-flora/species/Ophrys%20tenthredinifera%20Willd./data