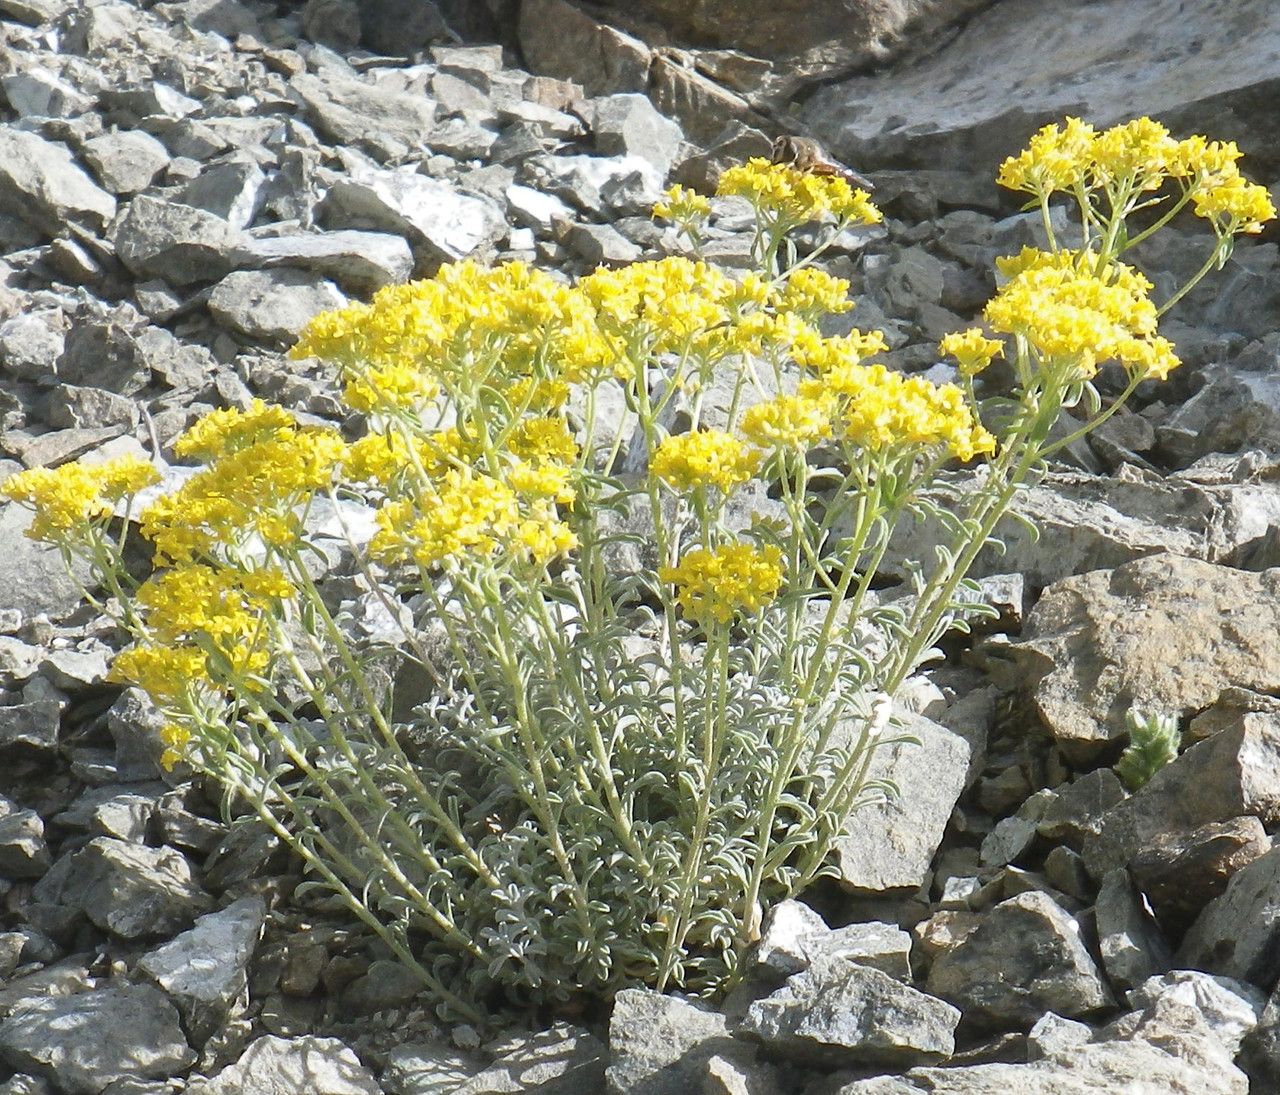
Oh, hello there! Come on in and pull up a chair. I’ve got a lovely pot of chamomile brewing. Today, we’re going to chat about a real gem of a plant: Odontarrhena troodi. If you’ve ever seen this little beauty, you know its charm. Those delicate, often fragrant flowers, the way it drapes so gracefully… it’s truly a joy to have in the garden or on a sunny windowsill. And guess what? You can absolutely grow more of them yourself! Propagating Odontarrhena troodi is a wonderfully rewarding experience, bringing the satisfaction of nurturing new life from an existing plant. While it’s not the absolute easiest for a complete beginner, with a little attention and these tips, you’ll be well on your way to success.
The Best Time to Start
For the most promising results, I find that late spring to early summer is your sweet spot. This is when the plant is actively growing, full of vigor, and has plenty of young, pliant material to work with. Waiting until after the main flush of flowering is also a good strategy, as the plant will be less stressed and focused on recovery and new growth.
Supplies You’ll Need
Gathering your tools beforehand makes the whole process smooth sailing. Here’s what I always have on hand:
- Sharp Pruning Shears or a Craft Knife: Clean cuts are crucial for preventing disease.
- Rooting Hormone (Optional but Recommended): A little boost can make a big difference. Look for a powder or gel.
- Well-Draining Potting Mix: A blend of peat moss, perlite, and a bit of coarse sand works wonderfully. You can also buy specific succulent or cactus mixes.
- Small Pots or Seed Trays: Clean ones are a must!
- Misting Bottle: For keeping things humid without making them soggy.
- Plastic Wrap or a Clear Plastic Bag: To create a mini-greenhouse effect.
- Labels and a Marker: So you remember what’s what!
Propagation Methods
Odontarrhena troodi is quite responsive to stem cuttings, which is my go-to method.
-
Taking Stem Cuttings:
- First, identify a healthy stem that’s at least 3-4 inches long. Look for one that’s not flowering heavily.
- Using your sharp shears or knife, make a clean cut just below a leaf node. A leaf node is where a leaf attaches to the stem – this is where the magic of root development often happens!
- Gently remove the lower leaves from the cutting, leaving just a few at the very top. This prevents them from rotting when they touch the soil.
- If you’re using rooting hormone, dip the cut end of the stem into it, tapping off any excess.
-
Planting Your Cuttings:
- Fill your small pots or trays with your well-draining potting mix.
- Make a small hole in the center of the mix with your finger or a pencil.
- Insert the stem cutting into the hole, ensuring the leaf nodes are submerged in the soil. Gently firm the soil around the base.
- Water lightly until the soil is moist but not waterlogged.
-
Creating a Humid Environment:
- To keep those cuttings happy and hydrated while they try to root, cover the pots with plastic wrap or place them inside a clear plastic bag. You want to create a humid little environment.
- Place these in a bright spot that receives indirect sunlight. Direct sun can scorch those tender cuttings.
The “Secret Sauce” (Pro Tips)
Here are a few things I’ve learned over the years that really seem to give cuttings a kickstart:
- Don’t let those leaves touch the water! Seriously, if you’re doing water propagation (which is less ideal for this plant, but if you try it, remember this!), make sure only the stem is submerged. Rot is the enemy! Even with soil, trimming those lower leaves is your best defense.
- Bottom heat! If you have a gentle heat mat designed for seedlings, placing your pots on it can significantly speed up root development. It mimics the warmth of spring soil and really encourages those roots to grow.
- Patience, darling, patience! Some cuttings might look like they’re doing nothing for weeks. Don’t despair. If they’re still firm and haven’t turned mushy, they’re likely working below the surface.
Aftercare & Troubleshooting
Once you start to see signs of new growth – maybe a tiny new leaf unfurling at the top or a gentle tug on the cutting indicates resistance – you’re likely on your way!
- Gradual Acclimation: Carefully remove the plastic wrap or bag for a few hours each day, gradually increasing the time over a week. This helps the new plant adjust to your home’s humidity levels.
- Watering: Continue to water sparingly, allowing the soil to dry out slightly between waterings. Overwatering is the most common killer of young cuttings, leading to that dreaded root rot. You’ll notice mushy stems, yellowing leaves, and a generally sad, wilting appearance if rot sets in.
- Transplanting: Once your new little Odontarrhena troodi has a decent root system and is showing healthy new growth, you can pot it up into a slightly larger container with fresh, well-draining soil.
A Encouraging Closing
See? It’s a process, but a truly delightful one. Don’t be discouraged if your first attempt isn’t an overnight success. Every gardener has their moments! Enjoy the journey of nurturing these beautiful plants, and when you see those tiny roots begin to form, you’ll feel an immense sense of accomplishment. Happy propagating!
Resource: