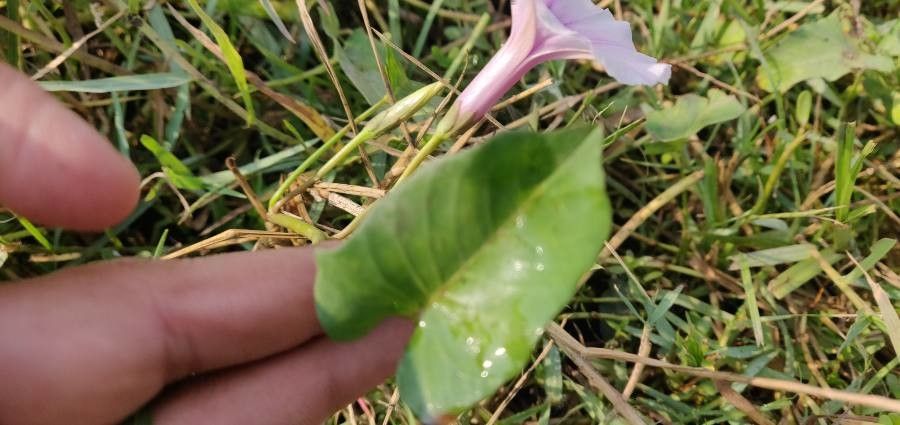
Oh, Ipomoea blepharophylla! If you’ve ever fallen for those gorgeous, almost heart-shaped leaves and the promise of delicate blooms (though honestly, it’s the foliage that truly captivates me!), then you’re in for a treat. Propagating this beauty is incredibly rewarding. Seeing a tiny cutting unfurl its first new leaf feels like a little miracle. For beginners? I’d say it’s moderately easy. There are a couple of tricks to it, but with a little care, you’ll be successful.
The Best Time to Start
My favorite time to get started with propagating Ipomoea blepharophylla is in the late spring to early summer. This is when the plant is actively growing, pushing out all that fresh, vibrant foliage. The days are longer, the temperatures are warm but not scorching, and the cuttings have plenty of energy to put into developing roots. You can also try in the early fall, but you might find they take a little longer to establish before cooler weather sets in.
Supplies You’ll Need
Gathering your tools beforehand makes the whole process much smoother. Here’s what I reach for:
- Sharp Pruning Shears or a Clean Knife: For taking clean cuts.
- Rooting Hormone (Optional but Recommended): A little powder or gel can give your cuttings a boost.
- Potting Mix: I prefer a well-draining mix. A good blend of potting soil, perlite, and a bit of coco coir works wonders for aeration. You can also use a seed-starting mix for smaller cuttings.
- Small Pots or Trays: Clean pots or even repurposed containers with drainage holes are perfect.
- Water: For moistening the soil and for water propagation.
- Clear Plastic Bag or Dome: To create a humid environment for cuttings.
- Spray Bottle: For misting.
Propagation Methods
I find two methods work best for Ipomoea blepharophylla: stem cuttings and (though less common but sometimes successful) leaf-and-stem cuttings.
Stem Cuttings
This is my go-to method, and it’s usually the most reliable.
- Select a Healthy Stem: Look for a vigorous, non-flowering stem that’s about 4-6 inches long. It should be semi-hardwood – not too soft and floppy, but not old and woody either.
- Make the Cut: Using your clean shears or knife, make a clean cut just below a leaf node. A leaf node is where a leaf attaches to the stem; this is where roots are most likely to form.
- Prepare the Cutting: Remove the lower leaves from the cutting, leaving just one or two at the very top. This reduces moisture loss and prevents leaves from rotting in the soil.
- Apply Rooting Hormone (Optional): If you’re using rooting hormone, dip the cut end into the powder or gel. Tap off any excess.
- Plant the Cutting: Gently insert the cut end into your prepared, pre-moistened potting mix. Make sure at least one leaf node is buried beneath the surface.
- Create a Humid Environment: Water lightly to settle the soil. Then, cover the pot loosely with a clear plastic bag or a propagation dome. This traps humidity, which is crucial for cuttings. Poke a few holes in the bag for airflow if it looks too steamy.
- Provide Light: Place the pot in a bright spot with indirect light. Avoid direct sun, which can scorch the delicate cuttings.
Leaf-and-Stem Cuttings
This is a bit more experimental but worth a try if you have a particularly lush plant.
- Select a Leaf and Stem Section: Take a cutting that includes a healthy leaf attached to a small section of stem, about an inch long.
- Make the Cut: Cut just below the leaf node on the stem.
- Prepare: Remove any lower leaves if present (though usually, you’re just taking one leaf).
- Plant: Dip the stem end in rooting hormone if using, then plant it in your well-draining potting mix, ensuring the leaf node is buried.
- Humidity and Light: Cover and place in indirect light, just like with stem cuttings.
The “Secret Sauce” (Pro Tips)
Here are a few things I’ve learned over the years that really make a difference:
- Don’t Let Leaves Touch the Water: If you’re experimenting with a water propagation method (though I find soil is better for blepharophylla), always make sure the leaves themselves are not submerged in the water. Only the stem end should be in contact. Rotting leaves are a sure way to invite trouble.
- Bottom Heat is Your Friend: If you have a heating mat designed for seedlings, placing your pots on it can drastically speed up root development. It mimics the warmth of summer soil and gives those little roots a real boost. Just be sure the top of the soil doesn’t dry out too much with the extra warmth.
- Patience with Foliage: Sometimes, you’ll see new leaf growth on a cutting before you see much root development. Don’t be discouraged! It’s a sign the cutting is healthy and trying to photosynthesize. You might not have enough roots to support that new growth yet, but it’s a good sign.
Aftercare & Troubleshooting
Once your cuttings have developed a good root system, you’ll notice it when you gently tug on the cutting. If there’s resistance, congratulations! Roots are forming.
- Transplanting: Carefully transplant your new plant into its own small pot with fresh potting mix.
- Watering: Water thoroughly after transplanting, then allow the top inch of soil to dry out between waterings.
- Light: Continue to provide bright, indirect light. As it grows, you can gradually introduce it to more direct morning sun.
- Troubleshooting: The most common issue is rot. If your cutting turns black and mushy, it’s usually too much moisture and not enough airflow. If it wilts and looks dry, it may not have rooted properly or is getting too much direct sun. Sometimes, even with the best care, a cutting just won’t take. Don’t take it personally! Garden magic isn’t always predictable. Just try again.
A Encouraging Closing
Propagating Ipomoea blepharophylla is such a satisfying way to expand your collection or share these beauties with friends. Be patient with your cuttings, observe them closely, and celebrate every new leaf and root. Happy propagating – I can’t wait to see your success!
Resource:
https://identify.plantnet.org/k-world-flora/species/Ipomoea%20blepharophylla%20Hallier%20f./data