Hello there, fellow plant lovers! It’s so lovely to have you join me today. As we’re deep into the gardening season (or perhaps just dreaming about it!), I thought we’d dive into a truly charming little gem: Muscari maritimum, or the Sea Grape Hyacinth.
Why Grow and Propagate Sea Grape Hyacinth?
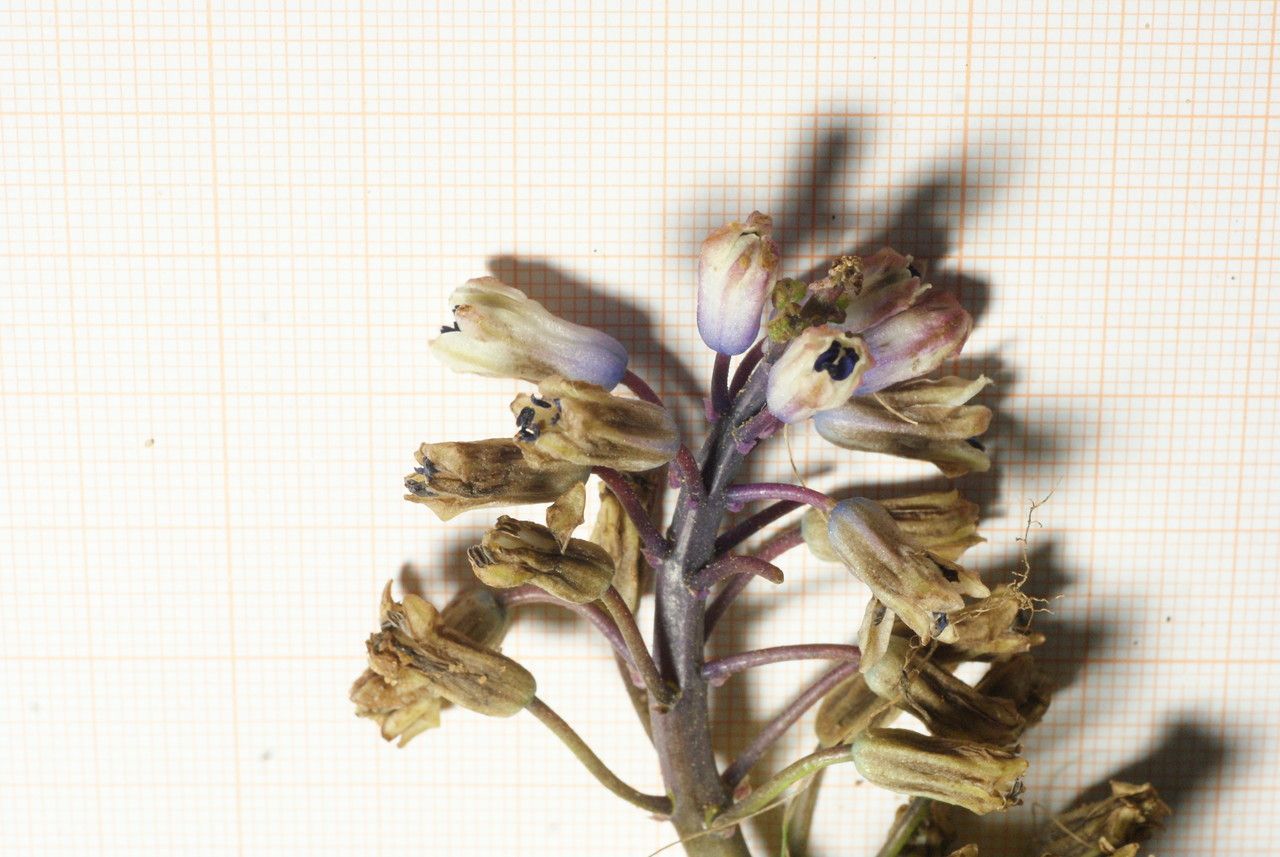
These little beauties are a breath of fresh air in the spring garden. Their delicate, bell-shaped flowers, often in soft blues and whites, bring a whisper of the sea to your landscape. They’re compact, wonderfully fragrant, and they naturalize so well, returning year after year to amaze you. And the best part? Propagating them is incredibly rewarding. It’s a fantastic way to fill your garden with more of their charm, or to share them with friends. For beginners, I’d say Muscari maritimum is quite forgiving. You won’t have to pull your hair out with this one!
The Best Time to Start
The absolute sweetest spot for propagating Muscari maritimum is right after they’ve finished flowering, usually in late spring to early summer. This is when the plant has put all its energy into its bloom and is beginning to prepare for its dormant period. It’s the perfect moment to gently encourage new life from the parent plant.
Supplies You’ll Need
To get your Sea Grape Hyacinths off to a flying start, gather these goodies:
- Sharp pruning shears or a clean knife: For making neat cuts.
- Well-draining potting mix: I like a blend of potting soil with about a third perlite or coarse sand.
- Small pots or trays: Clean ones, please! This helps prevent disease.
- Watering can with a fine rose nozzle: For gentle watering.
- Rooting hormone (optional, but helpful): Especially if you’re dividing bulbs.
- A trowel: For working with soil.
- Labels and a marker: So you don’t forget what you’ve planted where!
Propagation Methods: Let’s Get Our Hands Dirty!
For Muscari maritimum, the most straightforward and successful method is division. These plants grow from bulbs, and as they mature, they naturally produce offsets, or baby bulbs, around the base of the main bulb.
Here’s how we do it:
- Gently Dig Them Up: As I mentioned, wait until the foliage has started to yellow and die back, but before the plant completely disappears underground. Carefully dig around the clump of Muscari maritimum with your trowel, lifting the entire bulb cluster out of the soil. Be gentle; we don’t want to damage those precious bulbs.
- Separate the Offsets: You’ll see the main bulb and then smaller bulbs attached. Gently wiggle and tease them apart with your fingers. If they’re stubborn, a clean knife can help, but usually, they come apart with a bit of persuasion. You can also dust the cut surfaces with a bit of rooting hormone at this stage if you like, though it’s not strictly necessary for Muscari.
- Inspect Your Bulbs: Before replanting, give each bulb a quick look. Discard any that are soft, mushy, or show any signs of rot or disease. Healthy bulbs should feel firm.
- Pot Them Up: Fill your clean pots with your well-draining potting mix. Plant each offset about 2-3 inches deep, pointy end up. Make sure they have a little room to grow. You can plant a few together in a larger pot, giving them about an inch of space each.
- Water Gently: Water them in nicely. Use that fine rose nozzle on your watering can so you don’t disturb the newly planted bulbs.
The “Secret Sauce” (Pro Tips!)
Now, for a couple of little tricks I’ve picked up over the years:
- Let Them Dry a Bit First: After separating the bulbs, I sometimes let them sit out on a piece of newspaper in a cool, dry, shaded spot for a day or two. This helps the cut ends callus over and can reduce the risk of rot when they go back into the soil.
- Think About Succession Planting: While we divide now, I also like to mark where my Muscari are so I can leave some of the smaller offsets in place. They might not flower grandly this year, but they will grow into strong flowering bulbs over the next season or two, giving you a continuous show.
Aftercare & Troubleshooting
Once your newly divided bulbs are in their pots, find them a spot with bright, indirect light. Keep the soil consistently moist but not waterlogged. Think of it as a gentle drink whenever the top inch of soil starts to feel dry.
You’ll know they’re happy when you start to see tiny shoots emerge from the soil. This might take a few weeks. Once they are actively growing, you can start reducing watering slightly, letting the soil dry out more between waterings, mimicking their natural summer dormancy.
The main thing to watch out for is rot. If you see any bulbs turning soft and mushy, or if the soil stays soggy for too long, you might have a rot issue. This is usually a sign of overwatering or poor drainage. If you catch it early, you might be able to remove the affected bulb and improve your watering habits or soil mix for the remaining ones.
Happy Planting!
Propagating Muscari maritimum is such a joy. It’s a simple process that brings so much beauty. Be patient with your new little bulbs; they’re working their magic beneath the soil. Enjoy the anticipation, and soon enough, you’ll be rewarded with a sea of delicate blooms. Happy gardening!
Resource:
https://identify.plantnet.org/k-world-flora/species/Muscari%20maritimum%20Desf./data