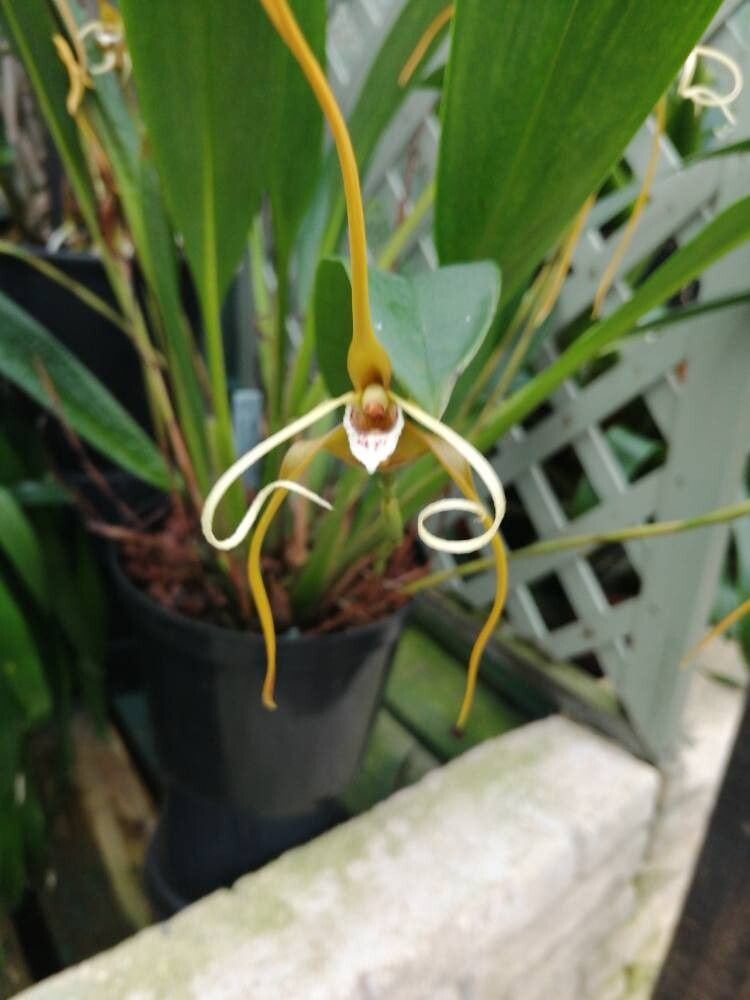
Oh, hello there! Pull up a chair and let’s chat about one of my absolute favorite orchids: Maxillaria fractiflexa. Isn’t she a beauty? Those uniquely twisted pseudobulbs and lovely, often fragrant, flowers just bring such a charm to any collection. And the best part? Propagating your own Maxillaria fractiflexa is a wonderfully rewarding endeavor. Even if you’re new to the orchid world, I think you’ll find this particular gem quite approachable. It’s not a fussy plant, and with a little guidance, you’ll be well on your way to a whole new family of these delightful orchids.
The Best Time to Start
When it comes to giving your new orchid babies the best start, timing is everything. I find the late spring or early summer is your golden window. This is when the plant is actively growing after its rest period and has plenty of energy to put into developing new roots and shoots. You’ll see new growth emerging, and that’s your cue!
Supplies You’ll Need
Let’s gather our tools. Having everything ready makes the process so much smoother.
- Sharp, sterilized pruning shears or a clean knife. We want clean cuts to prevent disease.
- Orchid bark mix. A good blend of medium-grade bark, perlite, and maybe a bit of charcoal works wonderfully. Something that offers good drainage is key.
- A small pot or container. For divisions, choose something appropriately sized for the new piece. For cuttings, a small pot with well-draining mix is perfect.
- Water. Clean, room-temperature water. If your tap water is very hard, consider using filtered or rainwater.
- Optional: Rooting hormone. While not strictly necessary for Maxillaria fractiflexa, a little dip can give your new cuttings a helpful boost.
- A spray bottle. For misting.
Propagation Methods
The most effective way to multiply your Maxillaria fractiflexa is through division. This is where you’ll be splitting a mature plant into smaller, manageable sections.
- Prepare Your Plant: Gently remove your Maxillaria fractiflexa from its pot. You might need to loosen the edges with your knife if it’s tightly bound.
- Inspect the Rhizome: Look for the thick, woody stem connecting the pseudobulbs – that’s the rhizome. You want to identify sections that have at least two to three healthy pseudobulbs attached and ideally, some signs of new growth (little nubs or developing leaves).
- Make the Cut: Using your sterilized shears or knife, carefully cut through the rhizome. Try to make a clean cut. If there are any stubborn connections, it’s okay to gently twist and pull, but always aim for a clean separation.
- Potting Your New Divisions: Once you have your new sections, plant each division in its own small pot filled with your orchid bark mix. Ensure the pseudobulbs are just slightly above the surface of the mix. Don’t pack the bark too tightly; we want air circulation.
- Watering (Initially): For the first few days after division, it’s best to water sparingly. You don’t want to shock the freshly divided plant. A light misting every other day is usually sufficient until you see signs of new root activity.
The “Secret Sauce” (Pro Tips)
Now, for a couple of things I’ve learned over the years that really make a difference.
- Don’t Be Afraid to Clean Up: When you’re dividing, if you see any old, shriveled leaves or spent pseudobulbs that are just taking energy, go ahead and trim them off. This allows the plant to focus its resources on new growth.
- Bottom Heat Works Wonders: If you have a heating mat for seedlings or propagation, placing your newly potted divisions on it can significantly speed up root development. Just a gentle warmth, not scorching heat!
Aftercare & Troubleshooting
Once your new divisions are potted, keep them in a location with bright, indirect light. Avoid direct sun, as this can scorch the leaves. Continue with your misting routine, allowing the potting medium to dry out slightly between waterings. You’ll know you’re on the right track when you start seeing new roots emerge from the base of the pseudobulbs or new leaf growth.
The most common issue you might encounter is rot. This usually happens if the plant is kept too wet, especially right after division. If you notice a pseudobulb looking mushy or discolored, act quickly. You might need to remove the affected part, sterilize your tools, and repot in fresh, dry medium. Don’t be discouraged if one doesn’t make it; it’s all part of the learning process!
A Little Encouragement
Propagating Maxillaria fractiflexa is truly a joy. It’s like nurturing little lives, and watching them grow is incredibly fulfilling. Be patient with your new plants. They need time to establish themselves, just like we do. Enjoy the journey, and soon you’ll have more of these gorgeous orchids to share or simply to admire all around your home. Happy growing!
Resource:
https://identify.plantnet.org/k-world-flora/species/Maxillaria%20fractiflexa%20Rchb.f./data