Oh, hello there! Come on in, grab a mug. We’re going to chat about something truly special today: Magnolia mexicana.
The Allure of Magnolia mexicana
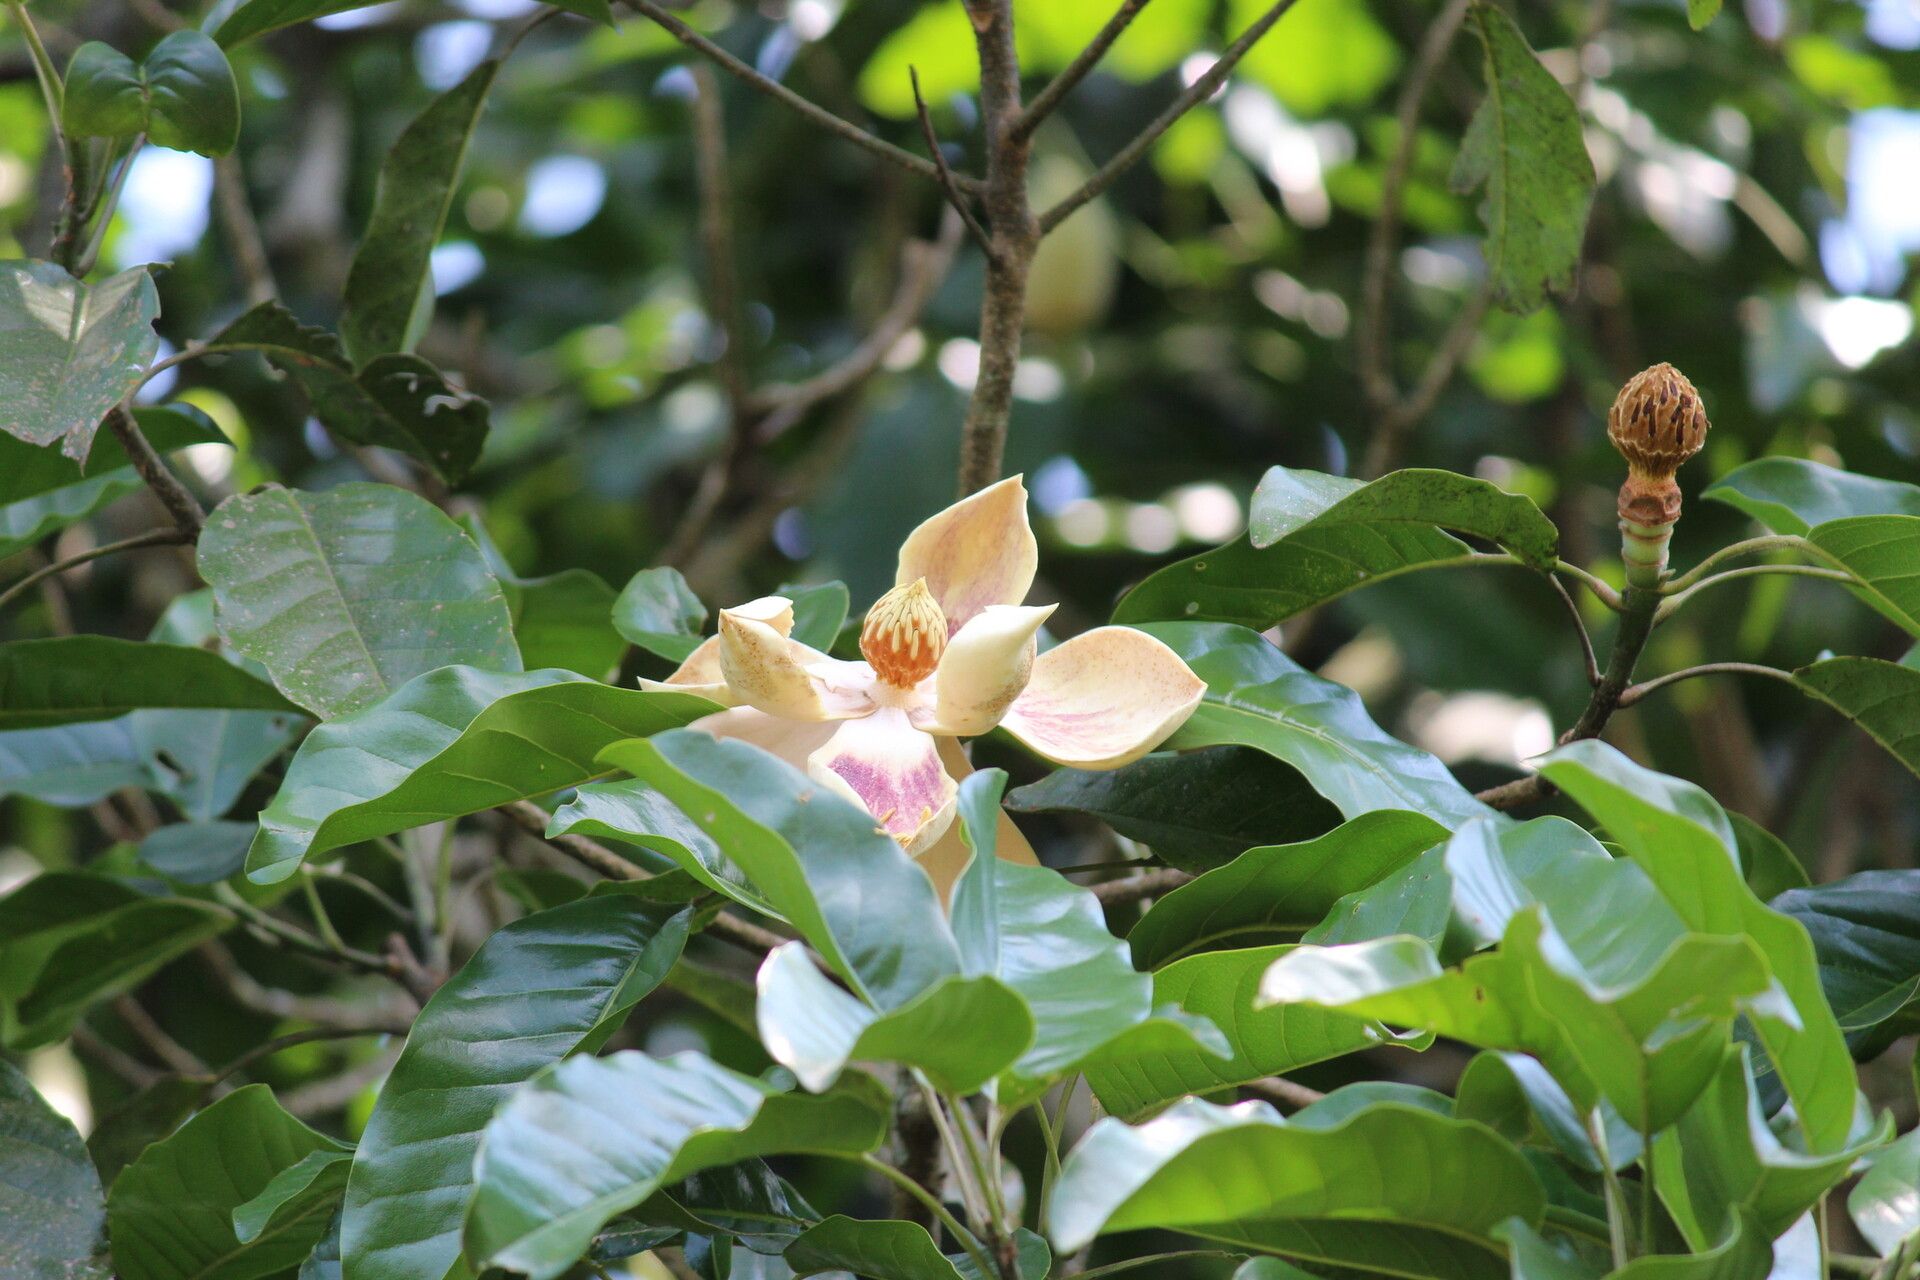
There’s something undeniably magical about magnolias, isn’t there? And Magnolia mexicana, with its intoxicatingly fragrant, creamy white flowers and glossy, leathery leaves, is a real showstopper. It brings a touch of the exotic to any garden, and trust me, coaxing a new plant from an existing one is incredibly satisfying. It’s a project that can be tackled by most gardeners, though I’ll be honest, it requires a bit of finesse, especially for absolute beginners. But don’t let that deter you! We’ll walk through it together.
When is the Magic Time to Propagate?
For Magnolia mexicana, the sweet spot for taking cuttings is usually in late spring to early summer. You want to focus on semi-hardwood cuttings, which means the growth from this year that has started to firm up but isn’t yet woody and hard. Think of it as the perfect stage of growth – not too soft and floppy, not too tough and rigid.
Your Propagation Toolkit
Here’s what you’ll want to have on hand before we get started:
- Sharp, clean pruning shears or a sharp knife: For making clean cuts. Sterilize them with rubbing alcohol first!
- Rooting hormone: This isn’t strictly essential, but it definitely gives your cuttings a helping hand. Look for one formulated for semi-hardwood cuttings.
- A good rooting medium: I like a mix of 50% perlite and 50% peat moss or coco coir. It provides drainage and aeration, which magnolias absolutely adore.
- Small pots or propagation trays: With drainage holes, of course.
- A plastic bag or humidity dome: To keep humidity levels high around your cuttings.
- Labels: So you don’t forget what you planted where!
Bringing a New Magnolia to Life: Stem Cuttings
This is my go-to method for Magnolia mexicana.
- Select your stem: Find healthy, vigorous stems on your mature plant. Look for that semi-hardwood stage mentioned earlier.
- Take the cutting: Using your sterilized shears, cut a stem that’s about 4-6 inches long. Make a clean cut just below a leaf node (where a leaf attaches to the stem).
- Prepare the cutting: Gently remove the lower leaves, leaving just one or two at the very top. This helps the cutting conserve energy. If you have particularly large leaves at the top, you can even cut them in half horizontally – this reduces water loss through transpiration.
- Apply rooting hormone: Dip the cut end of the stem into the rooting hormone, tapping off any excess.
- Plant it up: Make a hole in your prepared rooting medium with your finger or a pencil. Insert the cutting so that the bottom leaf nodes are buried. Firm the medium gently around the stem.
- Water gently: Water the medium thoroughly but avoid making it waterlogged.
- Create a humid environment: Place the potted cutting inside a clear plastic bag, sealing it loosely to create a mini-greenhouse. Alternatively, use a propagation tray with a clear lid. You can also stick a few stakes around the pot to keep the plastic bag from touching the leaves.
My “Secret Sauce” for Success
Here are a couple of things I’ve learned over the years that really seem to help:
- Bottom heat is your friend! Magnolias are slow to root, and providing gentle bottom heat can significantly speed things up. A heating mat designed for seedlings is perfect for this. It encourages root development from below.
- Don’t rush the process. Patience is a virtue in gardening, and it’s especially true with magnolias. They can take several months to show signs of rooting. Resist the urge to pull them up and check too often – you’ll disturb any developing roots.
Nurturing Your Little Magnolia
Once you start to see new growth appearing on your cutting, that’s a good sign roots are forming! You can gently tug on the cutting; if you feel resistance, roots are likely developing.
- Acclimatize: Slowly begin to acclimatize your new plant to normal humidity. Gradually open the plastic bag over a week or two.
- Watering: Continue to keep the soil consistently moist but not soggy. Water when the top inch of soil feels dry.
- Light: They’ll appreciate bright, indirect light. Avoid direct, hot sun for the first few months.
If you notice your cutting wilting excessively, turning black and mushy at the base, or there’s mold on the surface, these are usually signs of rot. This often happens from overwatering or poor drainage. Don’t be discouraged; it’s part of the learning process. Sometimes, a cutting just doesn’t make it, and that’s okay.
The Joy of Growing
Propagating a plant like Magnolia mexicana is such a rewarding journey. It connects you deeply to the plant and the natural world. Be patient with yourself, enjoy the process of watching little shoots emerge, and celebrate every bit of progress. Happy propagating!
Resource:
https://identify.plantnet.org/k-world-flora/species/Magnolia%20mexicana%20DC./data