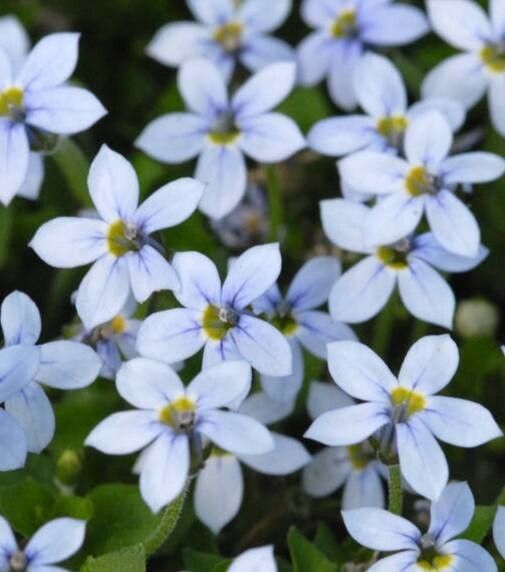
Hello fellow garden enthusiasts! Today, I want to talk about one of my absolute favorite groundcovers: Lobelia pedunculata. If you haven’t grown it, let me tell you, it’s a charmer. It forms a dense carpet of glossy, often blue-tinged foliage, punctuated by delicate, usually blue or purple flowers that create a stunning visual effect. It’s fantastic for spilling over rock walls, edging pathways, or just filling in those tricky bare spots.
Propagating Lobelia pedunculata is a wonderfully rewarding project. Seeing a tiny cutting transform into a flourishing new plant is one of gardening’s greatest joys. And the good news is, it’s quite beginner-friendly! You’ll likely have a lot of success with this one.
The Best Time to Start
For the best chance of success, I always recommend propagating Lobelia pedunculata in late spring or early summer. This is when the plant is actively growing and has plenty of energy to invest in new root development. You’ll want to take cuttings from healthy, non-flowering shoots.
Supplies You’ll Need
Don’t worry, you won’t need a whole professional nursery setup! Here’s what you’ll want to have on hand:
- Sharp pruning shears or secateurs: Clean cuts are crucial.
- A rooting hormone powder or gel (optional but helpful): This gives your cuttings a little boost.
- Well-draining potting mix: A mix specifically for cuttings or seeds is ideal, or you can create your own with equal parts peat moss or coco coir and perlite.
- Small pots or seed trays: Clean containers are a must to prevent disease.
- A spray bottle: For misting.
- A clear plastic bag or dome: To create a humid environment.
- Labels: So you remember what you’ve planted!
Propagation Methods
Lobelia pedunculata is a pro at reproducing, and thankfully, doing it ourselves is pretty straightforward.
Stem Cuttings
This is my preferred method for this plant.
- Take your cuttings: In late spring or early summer, select healthy, non-flowering stems. Use your clean secateurs to snip off pieces about 3-4 inches long. Make your cut just below a leaf node, which is where roots are most likely to form.
- Prepare the cuttings: Gently remove the lower leaves from the cutting, leaving just a few at the top. This helps prevent them from rotting in the soil. If you’re using rooting hormone, dip the cut end into the powder or gel now.
- Pot them up: Fill your small pots or tray with your well-draining potting mix. Make a small hole with your finger or a pencil, and insert the cut end of the stem. Gently firm the soil around it.
- Water gently: Give them a good but gentle watering. You want the soil moist, not waterlogged.
- Create humidity: Cover the pots with a clear plastic bag or a propagation dome. This keeps the humidity high, which is essential for cuttings to root. Place them in a bright spot, but out of direct sunlight. Too much sun will scorch the delicate cuttings.
Water Propagation
This is a fun one to watch!
- Take cuttings: Follow the same steps as above for taking cuttings.
- Place in water: Instead of potting them, place the cuttings in a glass or jar of clean water. Make sure the leaf nodes where you removed the leaves are submerged.
- Change water regularly: Change the water every few days to keep it fresh and prevent bacterial growth.
- Watch for roots: You’ll begin to see tiny white roots forming from the nodes. This can take a few weeks.
- Pot up: Once the roots are about an inch long, you can carefully transplant them into pots filled with your potting mix. Treat them as you would a newly potted cutting.
The “Secret Sauce” (Pro Tips)
Here are a couple of tricks I’ve picked up over the years that really help:
- Don’t let the leaves touch the water (in water propagation): If you’re propagating in water, any leaves submerged will rot and can infect the whole cutting. Pinch them off or position the cutting so only the nodes are in the water.
- Bottom heat is your friend: Lobelia, like many plants, roots much faster when the soil is kept warm. If you have a seedling heat mat, placing your pots on top of it can make a big difference, especially if your house is on the cooler side.
- Mist, mist, mist! Even with a bag or dome, the air inside can dry out. A light misting with your spray bottle every day or two helps keep things consistently humid.
Aftercare & Troubleshooting
Once those little roots start to appear – and you’ll know because new growth will emerge from the top – it’s time for a little more care.
- Gradually acclimatize: If you’ve used a plastic bag, start by opening it for a few hours each day, then remove it completely over a week. This helps the new plant adjust to the drier air.
- Move to brighter light: Once they’re established, you can slowly move them into a brighter spot, but still no scorching direct sun for a while.
- Water as needed: Keep the soil consistently moist but not soggy. As the plants grow larger, you can water them more thoroughly.
The most common problem you might encounter is rot. If a cutting turns mushy and black, it’s usually a sign of too much moisture or poor air circulation. Don’t be discouraged if some don’t make it; it’s part of the learning process. You can often prevent rot by ensuring excellent drainage, not overwatering, and providing good air movement.
Happy Propagating!
There you have it! Propagating Lobelia pedunculata is a fantastic way to expand your garden or share these beautiful plants with friends. Be patient with your cuttings, and remember that every little bit of growth is a victory. Enjoy the process, and soon you’ll have a whole carpet of blue to admire! Happy gardening!
Resource:
https://identify.plantnet.org/k-world-flora/species/Lobelia%20pedunculata%20R.Br./data