Oh, hello there! Come on in, pull up a chair. I’ve got a fresh pot of coffee brewing, and I’m just itching to share some gardening joy with you. Today, we’re diving into the wonderful world of Linum rigidum, or Roughstem Flax, as it’s sometimes called.
Why You’ll Love Propagating Linum Rigidum
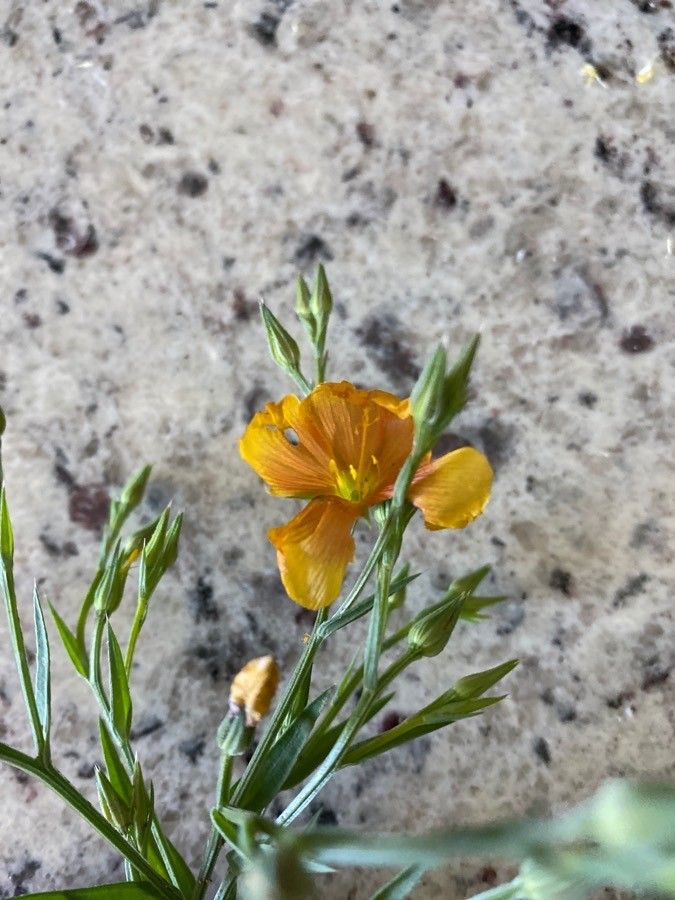
This little gem is just a delight. It’s got these sunny, bright yellow flowers that just seem to radiate happiness, and it’s a tough cookie too, often thriving in drier conditions. Propagating it is incredibly rewarding. There’s something magical about coaxing a brand new plant into existence from a tiny piece of the original. For beginners, I’d say Linum rigidum falls into the moderately easy category. It’s not as foolproof as, say, a spider plant, but with a little care and attention, you’ll be well on your way to success.
The Best Time to Start
For Linum rigidum, the late spring or early summer is your sweet spot. This is when the plant is actively growing, and young, healthy stems are readily available. Waiting until after the plant has had a good chance to establish itself after flowering will give you the best material to work with.
Supplies You’ll Need
Gathering your supplies beforehand makes the whole process much smoother. Here’s what I usually have on hand:
- Sharp, clean pruning shears or a craft knife: Cleanliness is key to preventing disease.
- Rooting hormone powder (optional but recommended): It really gives cuttings a boost. I like to use one with a fungicide mixed in, just as an extra layer of protection.
- Small pots or seed starting trays: Ensure they have good drainage holes.
- Well-draining potting mix: A good blend for me is equal parts perlite, coco coir, and a bit of compost. Avoid heavy, moisture-retentive soils.
- Watering can with a fine rose or a spray bottle: Gentle watering is a must.
- Labels and a permanent marker: Don’t skip this! You’ll thank yourself later.
- Plastic bags or a propagation dome: To create a humid environment.
Propagation Methods
Linum rigidum is best propagated from stem cuttings. It’s straightforward and usually yields good results.
- Select Your Cuttings: Look for healthy, non-flowering stems that are about 3-5 inches long. Gently snap or cut them off just below a leaf node (the point where a leaf attaches to the stem).
- Prepare the Cuttings: Remove the lower leaves from the cutting, leaving just a few at the top. This prevents them from rotting in the soil or water. If you’re using rooting hormone, dip the cut end into the powder, tapping off any excess.
- Plant the Cuttings: Fill your pots or trays with your prepared potting mix. Use a pencil or your finger to make small holes for the cuttings. Gently insert the cuttings into the holes, ensuring the nodes where you removed the leaves are below the soil surface. Firm the soil gently around the base of each cutting.
- Water Gently: Water thoroughly but gently. You want the soil to be moist but not soggy. A watering can with a fine rose is perfect for this.
- Create Humidity: Cover the pots or trays with a clear plastic bag supported by stakes, or use a propagation dome. This traps moisture and creates a mini-greenhouse effect. Make sure the leaves aren’t touching the plastic.
- Find a Warm Spot: Place the pots in a bright location, but out of direct, scorching sunlight. A windowsill that gets bright, indirect light is ideal.
The “Secret Sauce”
Here are a couple of little tricks I’ve learned over the years that can really make a difference:
- Bottom Heat is Your Friend: If you have a heat mat designed for seedlings, place your pots on it. This gentle warmth from below encourages root development much faster than just relying on ambient air temperature. It’s not strictly necessary for Linum rigidum, but it’s a game-changer for consistent success.
- Don’t Over-Water: I know I mentioned moist soil, but seriously, avoid waterlogged conditions at all costs. Root rot is the most common enemy of cuttings, and it happens when the soil stays wet for too long. Check the soil moisture regularly; it should feel slightly damp to the touch. If it feels wet, hold off on watering.
Aftercare & Troubleshooting
Once your cuttings have been planted, the waiting game begins!
- Check for Roots: After about 3-6 weeks, you can gently tug on a cutting. If there’s resistance, it means roots are forming! You might also see tiny new leaves emerging, which is a fantastic sign.
- Acclimatize Gradually: Once you see good root development, you’ll need to gradually acclimatize your new plants to less humid conditions. Start by opening the plastic bag for a few hours each day, slowly increasing the time over a week or so. Then, remove the bag entirely.
- Repotting: When the new plants are robust enough to handle, with a good root system, you can transplant them into their own small pots.
- Signs of Trouble: The biggest red flag is wilting and mushy stems or leaves. This is usually a sign of root rot, often caused by overwatering or poor drainage. If you see this, try to dry out the soil and ensure good airflow. Sometimes, you might see the leaves turn yellow and drop off; this can be a sign of insufficient light or shock. Don’t get discouraged if a few don’t make it – it happens to all of us!
Happy Growing!
Propagating plants is a journey, and it’s all about observation and a little bit of patience. Don’t be afraid to experiment, and celebrate every little success. With your new Linum rigidum cuttings, I have a feeling you’ll be enjoying those cheerful yellow blooms in no time. Now, go on and give it a try! You’ve got this.
Resource:
https://identify.plantnet.org/k-world-flora/species/Linum%20rigidum%20Pursh/data