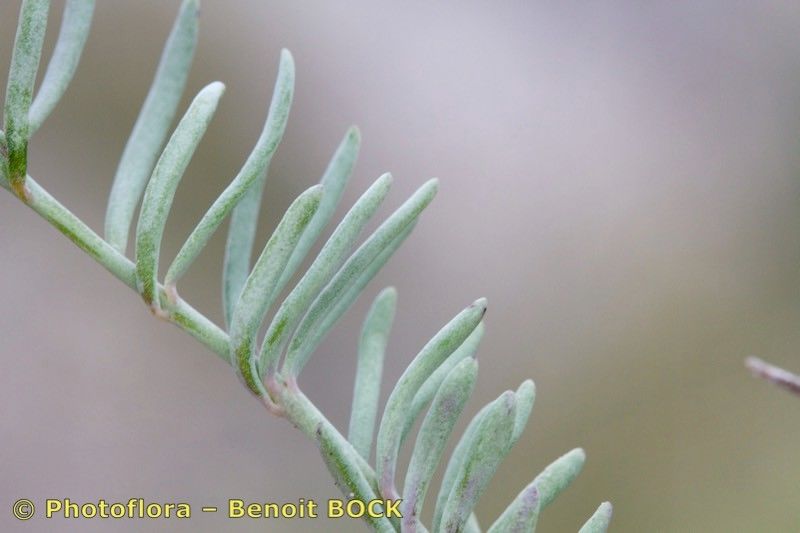
Oh, hello there! So you’ve fallen for Linaria saturejoides, haven’t you? I don’t blame you one bit. With its delicate, snapdragon-like blooms that can cascade or creep, it brings such a whimsical charm to any garden border, hanging basket, or rockery. And the best part? Learning to propagate it is a truly delightful way to fill your garden with even more of this beauty. Honestly, it’s a pretty forgiving plant to get started with, so don’t let the thought of propagating intimidate you.
The Best Time to Start
For the best chances of success with Linaria saturejoides, I always recommend aiming for late spring to early summer. This is when the plant is actively growing and has plenty of fresh, pliable stems ready to root. You can also have success with cuttings taken in early autumn, but be mindful of the cooler temperatures; they might just take a little longer to get going.
Supplies You’ll Need
Before we get our hands dirty, let’s gather our tools:
- Sharp pruning shears or a clean knife: For taking clean cuts on your parent plant.
- Potting mix: A well-draining mix is key. I often use a blend of peat moss or coir, perlite, and a bit of sand. You can also buy specific seed-starting or succulent mixes.
- Small pots or trays: Clean containers with drainage holes.
- Watering can with a fine rose: To water gently without disturbing your cuttings.
- Rooting hormone (optional but recommended): This is like a little booster shot for your cuttings.
- Plastic bags or a mini-greenhouse: To create a humid environment.
Propagation Methods
Linaria saturejoides is usually happiest when propagated by stem cuttings. It’s straightforward and yields excellent results.
1. Taking Stem Cuttings:
- First, look for healthy, non-flowering stems on your established Linaria saturejoides. You want stems that are somewhat soft and flexible, not woody and old.
- Using your sharp pruning shears or knife, take cuttings that are about 3-4 inches long. Try to make your cuts just below a leaf node (where a leaf attaches to the stem).
- Gently remove the lower leaves from the cuttings, leaving just a couple of leaves at the top. This helps prevent them from rotting in the soil.
2. Preparing the Cuttings:
- If you’re using rooting hormone, dip the cut end of each stem into the powder or gel. Tap off any excess.
- Now, take your clean pots and fill them with your prepared potting mix. Make a small hole in the center of the soil with your finger or a pencil.
- Gently insert the cut end of each Linaria saturejoides cutting into the hole, ensuring the leaves at the top aren’t buried. Firm the soil gently around the base of the cutting.
3. Creating a Humid Environment:
- Water the soil lightly but thoroughly. You want it to be moist, not waterlogged.
- The magic ingredient here is humidity! Cover the pots loosely with a plastic bag or place them inside a mini-greenhouse. Make sure the plastic doesn’t touch the leaves of the cuttings. You can use small stakes to prop it up if needed.
- Place the pots in a bright spot, but out of direct, harsh sunlight. A sunny windowsill that gets indirect light is perfect.
The “Secret Sauce” (Pro Tips)
Here are a couple of things I’ve learned over the years that really make a difference for finicky cuttings:
- Bottom Heat is Your Best Friend: If you can, placing your pots on a heated propagator mat will significantly speed up root development. It mimics the warmth of spring soil and encourages those roots to form faster.
- Don’t Drown Them! I see this mistake so often. While cuttings need moisture, they absolutely loathe sitting in soggy soil. Ensure excellent drainage and water only when the top inch of soil feels dry to the touch. If you get condensation building up heavily inside the plastic, lift the bag for a few hours to let them breathe.
Aftercare & Troubleshooting
Once your Linaria saturejoides cuttings have started to root – you’ll know when you see new leaf growth or feel a gentle resistance when you tug on the cutting – it’s time for a bit more care.
- Gradually remove the humidity cover over a few days to allow the new plants to acclimate to normal room humidity.
- Continue to water them gently when the soil dries out.
- You can pot them up into slightly larger individual pots once they’ve developed a good root system.
Now, what if things go wrong? The most common culprit is rot. If your cuttings turn mushy, black, or fall over, that’s usually a sign of too much moisture, poor drainage, or even a fungal infection. If you see any signs of rot, sadly, it’s best to discard that cutting and start again, making sure your soil and watering are spot on next time.
A Little Patience Goes a Long Way
Propagating plants is a beautiful dance between you and nature. There’s a real satisfaction in watching a tiny cutting transform into a vibrant new plant. Don’t get discouraged if your first few attempts aren’t perfect. Keep experimenting, keep observing, and most importantly, enjoy the process! Soon enough, you’ll have a whole garden bursting with your own Linaria saturejoides. Happy growing!
Resource:
https://identify.plantnet.org/k-world-flora/species/Linaria%20saturejoides%20Boiss./data