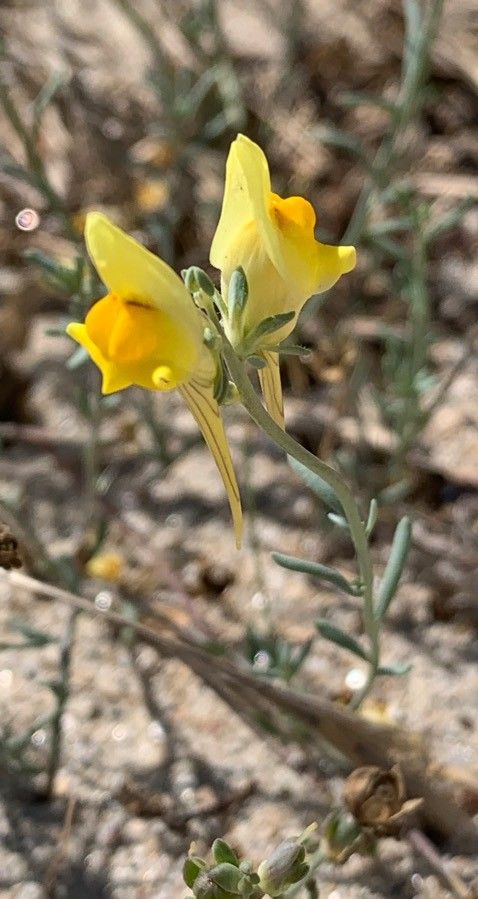
Oh, Linaria polygalifolia! You know, the one with those charming little snapdragon-like flowers cascading over the edges of pots or spilling through rock gardens. It’s a real charmer, isn’t it? I’ve been growing it for years, and honestly, watching it multiply and spread is one of those simple gardening joys that never gets old. It’s a fantastic plant to share with friends too! If you’re new to propagating, I’d say Linaria polygalifolia is a pretty beginner-friendly option for adding more of this beauty to your life.
The Best Time to Start
For the highest success rate, I always aim to propagate Linaria polygalifolia in late spring to early summer. This is when the plant is in its most vigorous growth phase. You’ll find plenty of fresh, new stems that are perfect for taking cuttings. Mid-spring, as things are really waking up, can also work well.
Supplies You’ll Need
Gathering your tools beforehand makes the whole process much smoother. Here’s what I usually have on hand:
- Sharp, clean pruning shears or a sharp knife: For making clean cuts.
- A well-draining potting mix: A blend of peat moss, perlite, and a little bit of coir works wonderfully. You can also use a seed-starting mix.
- Small pots or seed trays: Clean ones are crucial to prevent disease.
- Rooting hormone (optional but recommended for stem cuttings): A good quality powder or gel will give your cuttings a nice boost.
- A watering can or spray bottle: For gentle watering.
- A clear plastic bag or dome: To create a humid environment for cuttings.
- A small trowel or dibber: For making holes for cuttings.
Propagation Methods
Linaria polygalifolia is quite adaptable, but I find two methods work best for me: stem cuttings and division.
Stem Cuttings: This is my go-to method for getting a lot of new plants quickly.
- Select your cuttings: Look for healthy, non-flowering stems that are about 3-4 inches long. Pinch or cut them from the parent plant, making your cut just below a leaf node (where a leaf attaches to the stem).
- Prepare the cuttings: Gently remove the lower leaves from the stem, leaving just a few at the top. This prevents them from rotting when they’re in the soil.
- Apply rooting hormone (if using): Dip the cut end of each stem into the rooting hormone, tapping off any excess.
- Plant the cuttings: Make a hole in your prepared potting mix with a small trowel or dibber. Insert the cut end of the stem into the hole and gently firm the soil around it. You can fit several cuttings in one pot, but give them a little space.
- Water and cover: Water the soil lightly. Then, cover the pot with a clear plastic bag or place it under a dome to maintain high humidity. This is vital for preventing the cuttings from drying out before they can root.
Division: This is a great option if you have an established clump that’s looking a bit crowded.
- Dig up the plant: In spring or early fall, carefully dig around the clump of Linaria and lift it gently from the soil.
- Separate the roots: Gently shake off excess soil so you can see the root system. You can usually tease apart the clump with your fingers into smaller sections. If the roots are tangled, use a sharp knife or trowel to divide the root ball into manageable pieces, ensuring each division has roots and some top growth.
- Replant immediately: Plant each division into its new spot, whether that’s another pot or a new spot in the garden, watering it in well.
The “Secret Sauce” (Pro Tips)
Here are a couple of things I’ve learned over the years that really make a difference:
- Don’t overwater when rooting: This is a big one! For stem cuttings, it’s better to have soil that’s consistently moist rather than soggy. Overwatering is the quickest way to invite rot. Let the very surface of the soil dry slightly between waterings, but don’t let the cuttings wilt completely.
- Bottom heat is a game-changer: If you have the space, placing your pots of cuttings on a gentle heat mat can significantly speed up root formation. It mimics the warmth of spring from below, encouraging those roots to get going.
Aftercare & Troubleshooting
Once your cuttings start showing signs of life – you might see tiny new leaves emerging or feel a gentle resistance when you tug on a stem – it’s time to wean them off their humid environment. Gradually introduce them to the open air by a few hours each day for a week or so. Let the soil dry out a little more between waterings. If you’ve divided a plant, water it well and keep an eye on it.
The most common sign of failure? Wilting or mushy stems. This usually points to overwatering or a lack of humidity. If you see this, check your watering habits and ensure the humidity is still adequate. Sometimes, sadly, a cutting just doesn’t take. Don’t get discouraged! It’s all part of the gardening journey.
A Encouraging Closing
Propagating Linaria polygalifolia is a truly rewarding experience. It’s a chance to see nature’s magic unfold in your own hands and to fill your garden with even more of this delightful plant. Be patient with your new babies, offer them consistent care, and enjoy the process. Happy propagating!
Resource: