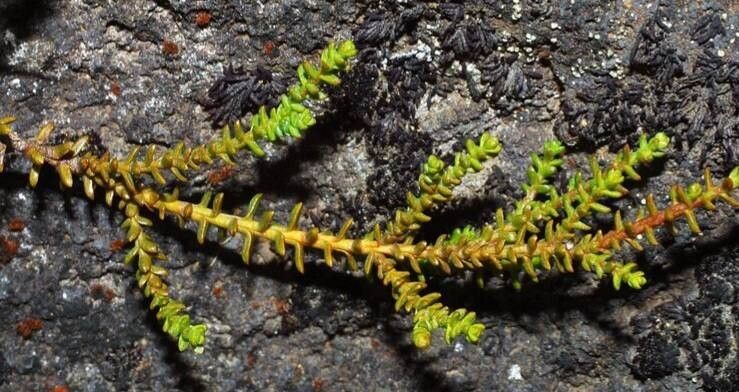
Oh, hello there! Pull up a chair. Let’s chat about Lepidothamnus laxifolius, or as some of us affectionately call it, the tiny, tenacious coprosma. If you’ve ever admired its wonderfully crinkled, often jewel-toned foliage spilling out of a pot or clinging to a rocky crevice, you know just how special it is. Bringing more of these little beauties into your garden is incredibly satisfying, like nurturing a whole new family from just one parent. Now, being honest, Lepidothamnus laxifolius can be a tad fussy, so it might not be your absolute first foray into propagation if you’re brand new to this. But with a little know-how and patience, you can absolutely master it.
The Best Time to Start
For the highest success rate with Lepidothamnus laxifolius, I always recommend working with semi-hardwood cuttings taken during the late spring to early summer. This is when the plant is actively growing but the stems have started to firm up a bit. You want them to be bendy, not brittle, and not so soft that they’ll just flop over. Avoid taking cuttings during hot, dry spells, or when the plant is in full bloom; you want its energy focused on rooting, not flowering.
Supplies You’ll Need
Here’s what you’ll want to have on hand before you begin:
- Sharp, clean pruning shears or a sharp knife: For making clean cuts.
- Rooting hormone powder or gel: This really gives your cuttings a helping hand.
- A well-draining potting mix: I like a blend of equal parts perlite and peat moss, or a good quality seed-starting mix. The key is good aeration; we don’t want soggy bottoms!
- Small pots or a tray with divisions: About 7-10cm (3-4 inches) pots are perfect.
- A plastic bag or a propagator lid: To create a humid environment.
- A sprinkling can or mister: For gentle watering.
- Labeling tags and a pen: Don’t skip this; trust me!
Propagation Methods
The most reliable way to multiply Lepidothamnus laxifolius is through stem cuttings. It’s straightforward once you get the hang of it.
- Select Your Cuttings: Gently look for healthy stems that are about 7-10 cm (3-4 inches) long. You want wood that is firm but still flexible – think of it like a slightly softened pencil eraser.
- Make the Cut: Using your clean shears or knife, make a clean cut just below a leaf node. The leaf node is where a leaf joins the stem; this is where the magic happens, where those roots will emerge.
- Prepare the Cutting: Carefully remove the leaves from the bottom half of your cutting. You only want to leave about two sets of leaves at the very top. This prevents them from rotting in the soil and encourages the plant to send its energy downwards. If the remaining leaves are quite large, you can even snip them in half to reduce water loss.
- Dip in Rooting Hormone: Dip the cut end of the stem into your rooting hormone. Tap off any excess. This step is crucial for boosting success.
- Plant Your Cuttings: Gently insert the treated end of the cutting about 2-3 cm (1 inch) deep into your prepared potting mix. Firm the soil around it gently.
- Create Humidity: Lightly water the soil, then cover the pot loosely with a plastic bag or place it in a propagator with a lid. Make sure the leaves aren’t touching the plastic if possible. This creates a mini-greenhouse, keeping the humidity high, which cuttings love.
- Find a Bright Spot: Place your cuttings in a spot with bright, indirect light. Avoid direct sun, which can scorch the delicate leaves and overheat the cuttings.
The “Secret Sauce” (Pro Tips)
Now, for those little extra bits of wisdom that make all the difference:
- Bottom Heat is Your Friend: If you can, place your pots on a warm propagation mat. This gentle bottom heat really encourages root development. It’s like giving their feet a cozy little hug, speeding things along considerably.
- Don’t Drown Them: While humidity is key, overwatering is the enemy. Let the surface of the potting mix dry out slightly between waterings. It’s better to let them be a little dry than waterlogged, which can lead to rot. A gentle misting is often all they need initially.
- Patience with the Potting Mix: Don’t be tempted to use heavy garden soil. A light, airy mix is paramount. If your mix looks a bit dense, don’t hesitate to add more perlite or grit. Your roots need to breathe!
Aftercare & Troubleshooting
Once your cuttings have started to show signs of new growth – that’s your cue that roots are forming! It usually takes anywhere from 4 to 8 weeks, sometimes longer. You’ll see tiny new leaves unfurling or the stem looking healthier and more robust.
When they’re well-rooted, meaning you can feel a slight resistance when you gently tug on a cutting, it’s time to pot them up individually into their own small pots. Continue to keep them in bright, indirect light and water them as you would a young plant.
The most common sign of failure is wilting and blackening stems, which usually points to rot. This is almost always due to overwatering and poor drainage. If you see this, sadly, that cutting is likely lost. On the flip side, if your cuttings look perfectly fine but just aren’t rooting, they might simply need more time, or perhaps a bit more warmth or humidity.
A Little Encouragement
Propagating Lepidothamnus laxifolius is a journey. Some cuttings will take off beautifully, while others might be a little more reluctant. Don’t get discouraged if not every single one makes it. The joy is in the process, in tinkering, and in the sweet satisfaction of nurturing a new life from a simple stem. Be patient, observe your little charges, and enjoy the magic unfolding before your eyes. Happy propagating!
Resource: