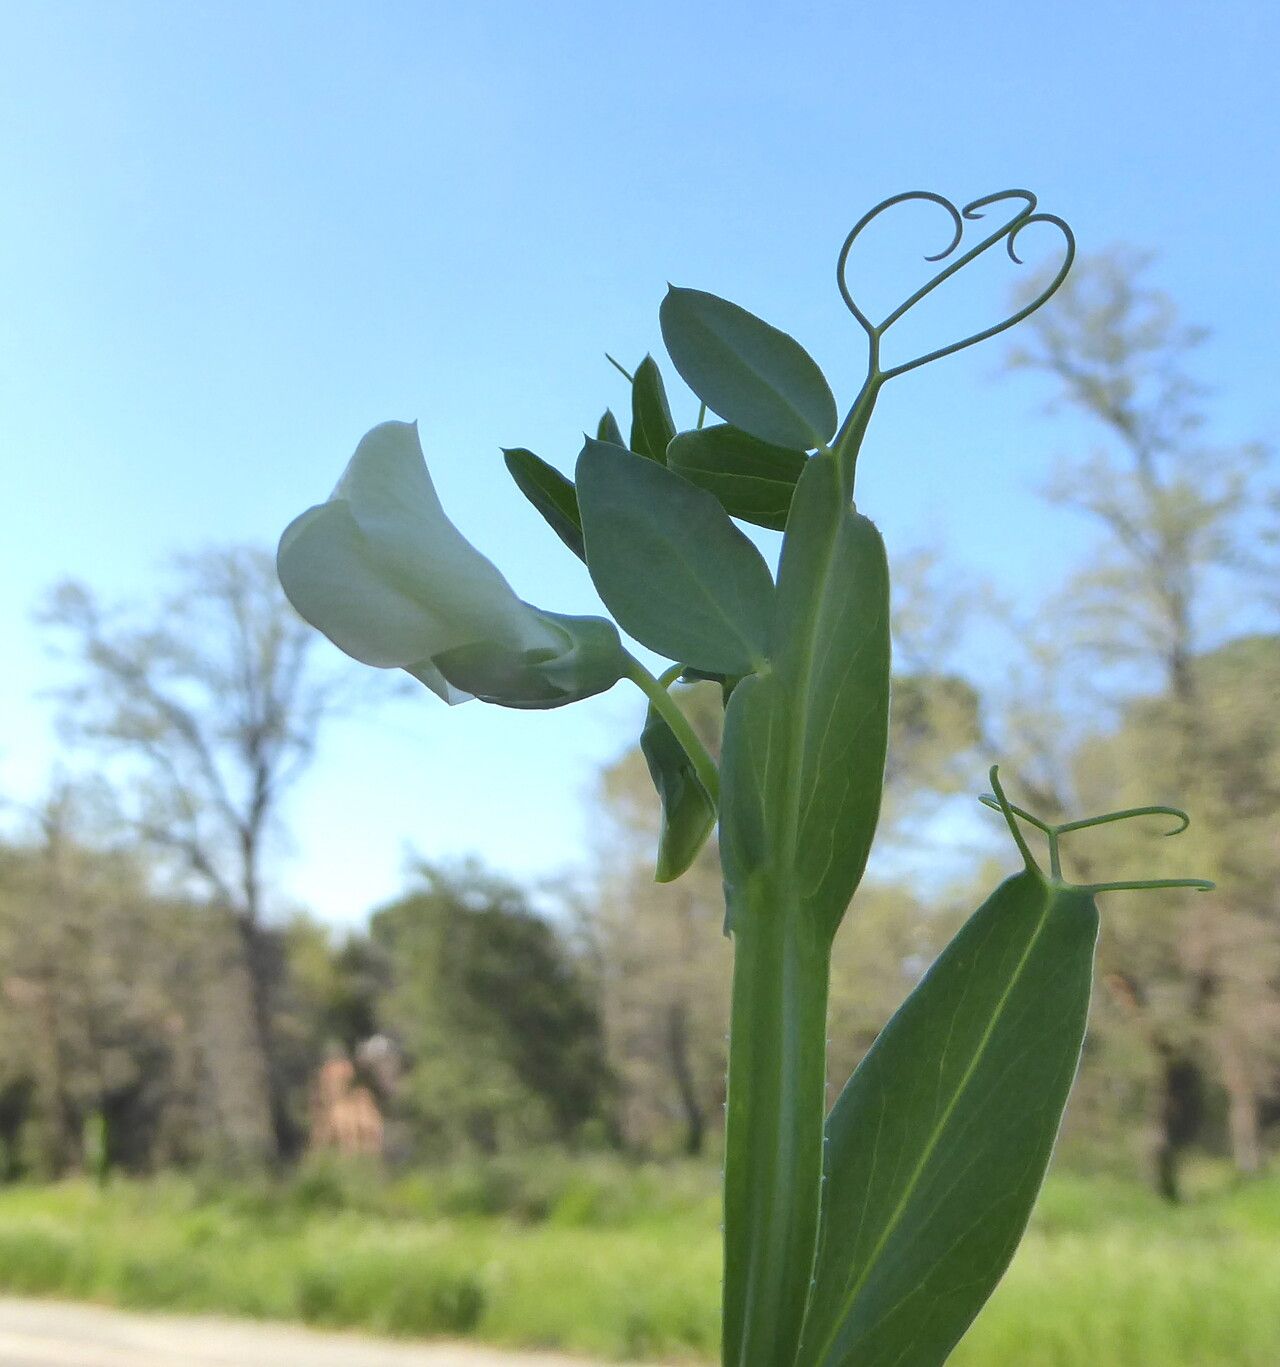
Oh, Lathyrus ochrus! Isn’t it a beauty? Those pale yellow, almost ethereal pea flowers are just something else in the garden, aren’t they? I’ve been captivated by this unique sweet pea relative for years. The way it scrambles and drapes, with those delicate tendrils and that soft green foliage, it truly adds a touch of understated elegance.
And the best part? You can easily share that beauty! Propagating Lathyrus ochrus is a wonderfully rewarding experience. It’s not a fiddly plant at all, which I think is fantastic news for beginners. You’ll find it quite forgiving, and the satisfaction of seeing your own little propagation success story unfold is just immense.
The Best Time to Start
For Lathyrus ochrus, late spring to early summer is usually your golden window. This is when the plant is actively growing and has plenty of energy to put into new roots. Starting a little later in the season, say after the main flowering flush is over but while the days are still long and warm, can also work well. You’re looking for vibrant, healthy, non-woody growth to work with.
Supplies You’ll Need
Gathering your supplies ahead of time makes the whole process so much smoother. Here’s what I usually reach for:
- Sharp, clean secateurs (pruning shears): Essential for clean cuts.
- Small pots or seed trays: With good drainage holes, of course.
- A good quality seed-starting mix: I like a blend that’s light and airy, offering excellent drainage. You can also mix your own with potting soil, perlite, and a bit of sand.
- Rooting hormone (optional but helpful): A powder or gel to give your cuttings a little boost.
- A watering can with a fine rose or a spray bottle: For gentle watering.
- Clear plastic bags or a propagator lid: To maintain humidity.
- Labels and a permanent marker: To keep track of what’s what!
Propagation Methods
Lathyrus ochrus is pretty straightforward to propagate, and I find stem cuttings to be the most reliable method.
- Take Your Cuttings: On a healthy Lathyrus ochrus plant, look for new, leafy growth that is somewhat firm but not yet woody. Using your clean secateurs, take 4-6 inch cuttings just below a leaf node (where a leaf grows from the stem).
- Prepare the Cuttings: Gently remove the lower leaves from the cutting, leaving just the top two or three sets. This prevents them from rotting when they’re in the soil or water. If your cuttings are long, you can even cut the remaining leaves in half horizontally to reduce water loss, especially if your environment isn’t as humid.
- Apply Rooting Hormone (If Using): Dip the cut end of the stem into the rooting hormone. Tap off any excess.
- Pot Them Up: Fill your small pots or trays with your prepared soil mix. Make a small hole in the soil with a pencil or your finger. Insert the cut end of the Lathyrus ochrus cutting into the hole, ensuring the node where you removed the leaves is buried.
- Firm and Water: Gently firm the soil around the cutting to ensure good contact. Water thoroughly but gently, allowing excess water to drain away.
- Create a Humid Environment: Cover the pots with a clear plastic bag or a propagator lid. This is crucial for keeping the humidity high, which encourages the cuttings to root. Make sure the plastic doesn’t touch the leaves of your cuttings if possible – a few small stakes can help keep it propped up.
- Provide Light and Warmth: Place the pots in a bright location out of direct sunlight. A greenhouse, a bright windowsill in a cool room, or even a dedicated heat mat can be beneficial.
The “Secret Sauce” (Pro Tips)
After years of tinkering, I’ve picked up a few tricks that seem to make all the difference with Lathyrus ochrus cuttings:
- Bottom Heat is Your Friend: While not strictly essential, placing your pots on a gentle heat mat can significantly speed up rooting. Think of it as giving them a cozy warm bed to encourage root development. It really does make a difference!
- Don’t Overwater: This is a common mistake. While humidity is key, soggy soil will lead to rot. Let the top of the soil dry out slightly between waterings. It’s better to err on the side of slightly too dry than too wet when you’re trying to root cuttings.
- Be Patient with the “Pull Test”: After a few weeks, you can give a very gentle tug on a cutting. If you feel resistance, it means roots are starting to form! Don’t pull it out to check; just a very light feel.
Aftercare & Troubleshooting
Once you start seeing new growth or feel that resistance with the pull test, it’s a good sign! You can gradually acclimatize your cuttings to normal room humidity by opening the plastic bag or propagator lid for a few hours each day over a week. Once they seem robust, they are ready to be transplanted into larger pots of good potting soil. Water them well and continue to care for them as you would any young plant.
The most common issue you’ll face is rot. If your cuttings turn black and mushy at the base, it’s usually a sign of too much moisture and not enough air circulation. Remove any rotting cuttings immediately to prevent it from spreading. If the leaves start to yellow and wilt, it could mean they aren’t getting enough humidity or light, or the soil is too dry.
A Encouraging Closing
Growing Lathyrus ochrus from cuttings is such a rewarding journey. It’s a chance to connect with your plants and understand their life cycle on a deeper level. Don’t be discouraged if a few don’t take; that’s all part of the learning process. Just keep nurturing them, be patient, and I promise, you’ll soon be enjoying armfuls of those beautiful, fragrant blooms, all thanks to your own green-thumbed efforts! Happy propagating!
Resource:
https://identify.plantnet.org/k-world-flora/species/Lathyrus%20ochrus%20(L.)%20DC./data