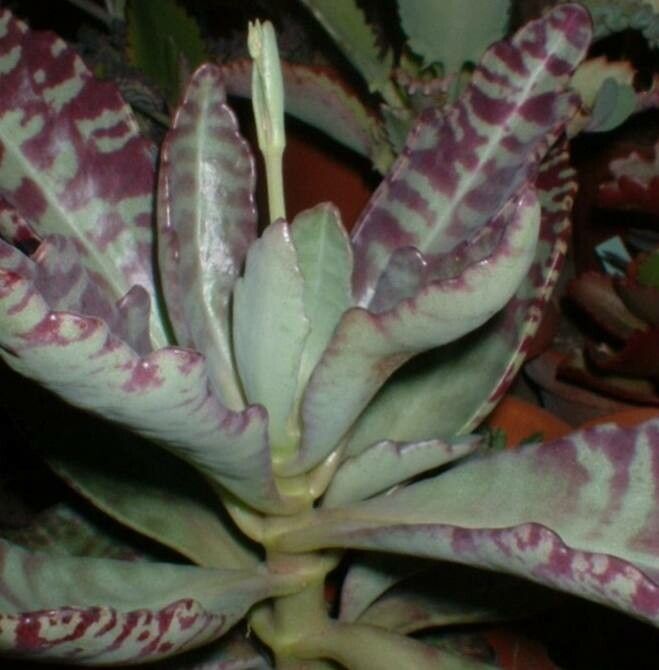
Oh, hello there! Pull up a chair – I’ve got a fresh pot of coffee brewing. Today, we’re going to chat about a real gem: Kalanchoe prasina. You know, those stunners with their fuzzy, silver-dusted leaves? They’re just so elegant, almost like something you’d find in a fairytale. And the best part? They’re surprisingly easy to share! Propagating Kalanchoe prasina is a wonderfully rewarding way to grow your collection or brighten up a friend’s windowsill. Honestly, if you’re new to the gardening game, this is a fantastic plant to start with.
The Best Time to Start
When it comes to getting these beauties to take root, spring and early summer are your absolute best friends. Think of it as their growing prime time. The days are getting longer, and the plant is full of energy, ready to put out new growth. You’ll have the best luck taking cuttings when the plant is actively growing, not when it’s stressed or dormant in the cooler months.
Supplies You’ll Need
Gathering your tools is half the fun, right? Here’s what I usually have on hand:
- Clean, sharp pruning shears or a sharp knife. A clean cut is crucial to prevent disease.
- Well-draining potting mix. I often use a cactus and succulent blend, or I’ll mix my own with equal parts potting soil, perlite, and coarse sand.
- Terra cotta pots or trays. These breathe nicely and help prevent waterlogged roots.
- Rooting hormone (optional but helpful). It gives them an extra little boost.
- Watering can with a fine spout or a spray bottle. Gentle watering is key.
- Labels and a pen. Always good to know what you’ve planted and when!
Propagation Methods
Kalanchoe prasina is pretty flexible, but here are my go-to methods:
Stem Cuttings
This is my absolute favorite way to go.
- Find a healthy stem. Look for a longer, mature stem, ideally one that’s a good 4-6 inches long.
- Make the cut. Using your clean shears or knife, take a clean cut just above a leaf node. This is where the plant naturally wants to sprout new growth.
- Remove lower leaves. Gently peel off the bottom few leaves from the cutting. This helps expose the node, which is where the roots will form.
- Let it callus. This is a super important step! Leave the cuttings in a dry, airy spot for a few days to a week. You’ll see the cut end dry out and form a little scab. This prevents rot when you plant it.
- Dip in rooting hormone (optional). If you’re using it, lightly dip the callused end into the rooting hormone powder. Tap off any excess.
- Plant your cutting. Stick the callused end about an inch deep into your prepared well-draining soil. Don’t water immediately. I like to wait a day or two.
Leaf Cuttings (Less Common, but Possible!)
While stem cuttings are more reliable for Kalanchoe prasina, you can sometimes get lucky with leaves.
- Select a healthy leaf. Choose a plump, mature leaf.
- Carefully remove the leaf. Gently twist or cut it from the stem, making sure to get a tiny bit of the stem attached if possible.
- Let it callus. Just like stem cuttings, allow the leaf to callus over for a day or two.
- Lay it on soil. Place the callused leaf on top of your damp potting mix. You can gently press the callused end into the soil.
- Mist regularly. Keep the soil lightly moist by misting. Roots and tiny plantlets will eventually form at the base of the leaf.
The “Secret Sauce” (Pro Tips)
Here are a few little tricks I’ve learned over the years:
- Don’t overcrowd your cuttings. Give them a little breathing room in their pot or tray. This helps with air circulation and reduces the risk of fungal issues.
- Consider bottom heat. If you’re propagating in a cooler spot, popping your pots on a gentle heating mat (the kind for seedlings) can really speed up root development. It mimics that nice, warm soil temperature they love.
- Patience is paramount with leafless cuttings. If you’ve taken a stem cutting and it looks a bit sad initially, don’t fret. Sometimes, the plant needs a little time to settle in and realize it’s time to grow roots.
Aftercare & Troubleshooting
Once you see those first tiny roots peeking out or new growth forming, you’re doing great!
- Start watering gently. Don’t drench them, but keep the soil consistently lightly moist – not soggy. I usually wait until the top inch of soil feels dry before I water again.
- Gradually introduce light. Move your new plants to a brighter spot, but avoid direct, harsh sunlight initially. Think bright, indirect light.
- Watch for rot. The biggest enemy of cuttings is rot. If your cutting turns mushy, black, or starts to smell foul, it’s likely rot. Unfortunately, it’s usually a sign that the cutting is a goner and you may need to start again. Ensuring good drainage and allowing cuttings to callus properly are your best defenses against this.
Keep Growing!
Propagating Kalanchoe prasina is such a satisfying journey. It’s a wonderful way to connect with your plants and witness that magical process of new life springing forth. Be patient, enjoy the little victories, and don’t be afraid to experiment. Happy propagating, and may your new little Kalanchoes flourish!
Resource:
https://identify.plantnet.org/k-world-flora/species/Kalanchoe%20prasina%20N.E.Br./data