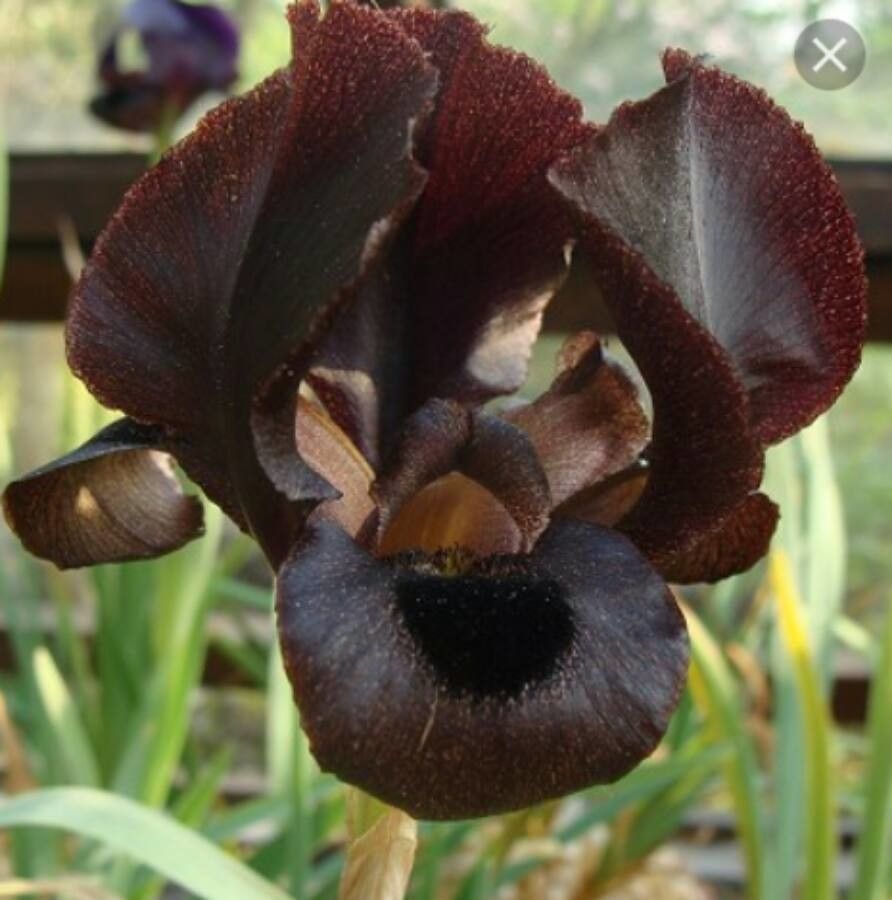
Oh, hello there! Come on in, grab a cup of tea. Today, I want to chat about a plant that’s captured my heart over the years: Iris bostrensis. There’s something truly magical about those elegant blooms, isn’t there? They bring a touch of the exotic to any garden. And the best part? You can easily bring more of this beauty into your life by propagating it yourself! For beginners, I’d say Iris bostrensis is a moderately easy plant to propagate. A little patience and the right approach, and you’ll be rewarded with plenty of new friends for your garden.
The Best Time to Start
For the highest success rate with Iris bostrensis, the sweet spot is right after it finishes blooming, usually in late spring or early summer. This is when the plant has accumulated good energy reserves and is actively growing, making it more receptive to propagation. You want to work with healthy, vigorous material, so don’t try to chop up a plant that’s looking a bit sad.
Supplies You’ll Need
Gathering your tools beforehand makes the whole process so much smoother. Here’s what I always have on hand:
- Sharp, clean pruning shears or a sharp knife. Sterilize them with rubbing alcohol between cuts to prevent disease.
- A good quality potting mix. I like a blend of peat moss, perlite, and a bit of compost for excellent drainage.
- Small pots or trays with drainage holes.
- Rooting hormone (optional, but it can give your cuttings a boost).
- A dibber or a pencil to make planting holes.
- A spray bottle for misting.
- Labels to keep track of what you’ve propagated!
Propagation Methods
There are a couple of ways to get your Iris bostrensis to multiply, but my favorite is using stem cuttings.
- Take Your Cuttings: Look for healthy, non-flowering stems that are about 4-6 inches long. Using your clean shears, make a cut just below a leaf node (that little bump where a leaf grows from the stem). Remove the lower leaves, leaving just a couple at the top.
- Prepare the Cuttings: If you’re using rooting hormone, dip the cut end of the stem into it, tapping off any excess.
- Plant Your Cuttings: Fill your pots with your well-draining potting mix. Use your dibber or pencil to make a hole deep enough for the cutting. Gently insert the cutting into the hole, pressing the soil firmly around it. Make sure the leaves aren’t buried.
- Water and Cover: Water the pot gently until the soil is moist but not waterlogged. To create a humid environment, which cuttings love, you can cover the pot with a clear plastic bag or place it in a propagation tray with a lid. Ensure the leaves don’t touch the plastic.
The “Secret Sauce” (Pro Tips)
Here are a few little tricks I’ve picked up over the years that really help:
- Bottom Heat is Your Friend: If you can, place your pots on a propagation mat or in a warm spot. Iris bostrensis cuttings root much faster and more reliably with a bit of gentle bottom heat.
- Don’t Be Afraid to Pinch: Once your cuttings have started to root and you see new growth, pinch off the very tip of the stem. This encourages the plant to branch out, making it bushier and more robust.
- Patience, Patience, Patience: This is the biggest secret. Don’t be tempted to yank on your cuttings to see if they have roots. Give them at least 4-6 weeks. You’ll often see new leaf growth long before you feel a tug.
Aftercare & Troubleshooting
Once you start to see signs of new growth, your cuttings are likely rooting. Gradually acclimate them to normal humidity by opening the plastic bag or lid a little each day. Water them as needed, letting the soil dry out slightly between waterings.
The most common issue you might face is rot. This usually happens if the soil is too wet and there’s not enough air circulation. If you see a cutting turning black and mushy, it’s best to discard it to prevent it from affecting others. Always ensure good drainage and don’t overwater. If your cuttings shrivel up and die, it could be that they didn’t get enough moisture, or they dried out too much before rooting.
A Warm Invitation
Propagating Iris bostrensis is such a rewarding experience. It’s like giving the gift of life to your garden. Be patient with the process, celebrate the small victories, and don’t be discouraged if not every cutting takes. You’ll learn so much from each attempt. Happy propagating, and enjoy the beauty that blooms from your own efforts!
Resource:
https://identify.plantnet.org/k-world-flora/species/Iris%20bostrensis%20Mouterde/data