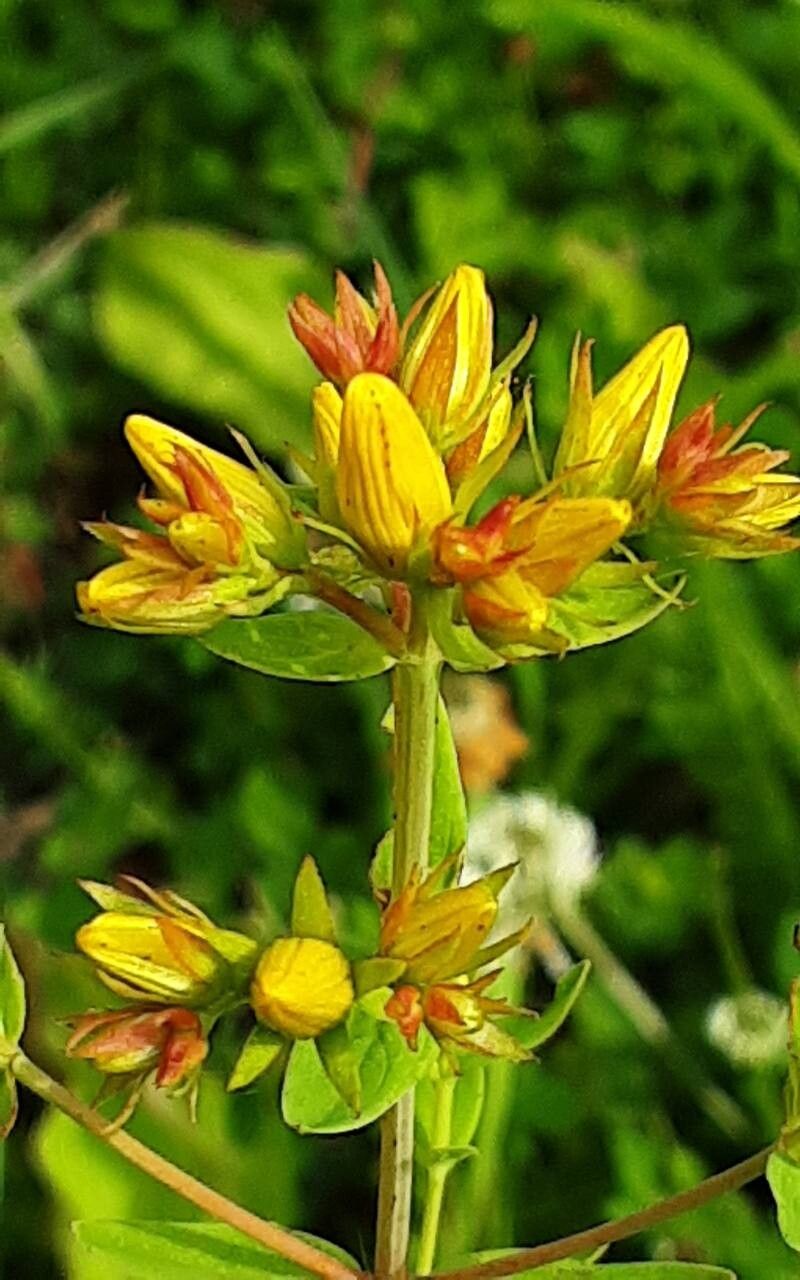
Oh, Hypericum elegans! What a gem. You know, when I first started gardening seriously, I was drawn to its delightful little star-shaped flowers, those pops of sunshine in the garden. They have this delicate, yet persistent charm, and they smell divine when the sun hits them just right. Propagating them? It’s a truly rewarding experience that lets you multiply that joy. And guess what? I’ve found this one to be quite amenable to propagation, even for those just dipping their toes into the gardening world. You’ve got this!
The Best Time to Start
Timing is everything, as my grandma used to say. For Hypericum elegans, I find the sweet spot is late spring to early summer. This is when the plant is actively growing, and new shoots are sturdy but not yet woody. You want to catch them at that vibrant, energetic stage. Waiting until after the main flush of flowering has passed is also a good option; the plant can still spare some energy for propagation then.
Supplies You’ll Need
Before we get our hands dirty, let’s gather our tools. It’s always better to be prepared!
- Sharp Pruning Shears or a Craft Knife: Clean cuts are crucial.
- Small Pots or Seed Trays: About 3-4 inches in size work well.
- Rooting Hormone: Gel or powder. I find the gel a bit more forgiving to work with.
- Well-Draining Potting Mix: A good blend is 50% peat moss or coir and 50% perlite or vermiculite. This aeration is key!
- Clear Plastic Bag or propagator lid: To create a humid microclimate.
- Watering Can with a Fine Rose: Gentle watering is important.
- Labels and a Marker: So you don’t forget what you’ve planted where!
Propagation Methods
Hypericum elegans is wonderfully cooperative, and I’ve had great luck with stem cuttings. Here’s how I do it:
1. Taking the Cuttings:
Gently select healthy, non-flowering shoots from your mature plant. You want stems that are flexible but not spindly. Using your sharp pruning shears or craft knife, make a clean cut just below a leaf node (where a leaf attaches to the stem). Aim for cuttings that are about 3-4 inches long. Remove the lower leaves, leaving just a few at the very top. This reduces moisture loss.
2. Preparing for Rooting:
Dip the cut end of each cutting into your rooting hormone, tapping off any excess. This little boost really encourages root development.
3. Planting the Cuttings:
Fill your small pots or trays with your well-draining potting mix. Make a small pilot hole in the center of the mix with a pencil or your finger. Gently insert the cutting into the hole, ensuring the nodes where you removed the leaves are buried. Firm the soil gently around the base.
4. Creating the Humid Environment:
Water the soil gently but thoroughly. Then, create a greenhouse effect by covering the pots with a clear plastic bag or placing a propagator lid over them. Make sure the leaves aren’t touching the plastic if possible, as this can lead to rot. If using a plastic bag, you can support it with a few stakes or chopsticks.
5. Placement:
Place the pots in a bright spot that doesn’t receive direct, harsh sunlight. A windowsill that gets morning sun is often perfect.
The “Secret Sauce” (Pro Tips)
Now for those little tricks I’ve picked up over the years:
- Bottom Heat is Your Friend: While not strictly essential for Hypericum elegans, placing your pots on a gentle heating mat can significantly speed up root formation. It mimics the warmth of spring soil and really gives those roots a get-up-and-go!
- Watch for the “Wiggle Test”: Once you start seeing new leaf growth on your cuttings, it’s a good sign. But don’t get too excited just yet! The definitive test for successful rooting is when you can gently tug on the cutting and feel a slight resistance – a gentle wiggle. It means roots have anchored themselves.
- Don’t Overwater, but Keep It Moist: This is a delicate balance. The soil should feel consistently moist, like a wrung-out sponge, but never waterlogged. Soggy soil is a fast track to rot, and we definitely don’t want that!
Aftercare & Troubleshooting
Once you see those first roots appearing (you might even see them peeking out the drainage holes!), it’s time to ease them out. Gradually remove the plastic bag or propagator lid over a few days to acclimatize them to normal humidity. Continue to water gently when the top inch of soil feels dry.
What if things don’t go as planned? The most common foe here is rot. If your cuttings turn black and mushy, it’s usually a sign of too much moisture and not enough air circulation. Ensure your soil mix is good and well-draining, and avoid overwatering. If you see any signs of mold, remove the affected cutting immediately. Don’t be discouraged if a few don’t make it; nature has a way of weeding out the weak.
A Encouraging Closing
Propagation is a journey, and patience is your most valuable tool. Each successful cutting is a small victory, a testament to your green thumb and your willingness to learn. So, gather your supplies, take a deep breath, and enjoy the process of nurturing new life. You’ll be marveling at your own little Hypericum elegans abundance before you know it! Happy gardening!
Resource:
https://identify.plantnet.org/k-world-flora/species/Hypericum%20elegans%20Stephan%20ex%20Willd./data