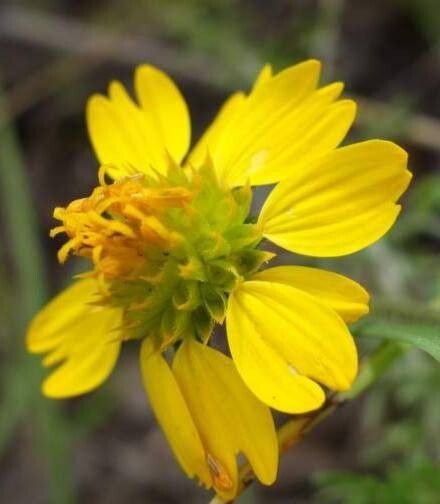
Hey there, fellow plant lovers! Today, I want to talk about a California native that truly brightens up any garden with its sunny disposition: Holocarpha macradenia. You might also know it as the Goldfields. Its cheerful, daisy-like blooms are such a welcome sight, especially when they carpet a sunny patch. And the best part? Propagating these beauties is a wonderfully rewarding experience. I’ve found Holocarpha macradenia to be a pretty forgiving plant to propagate, making it a great choice even if you’re just starting out on your propagation journey.
The Best Time to Start
For the highest success rate with Goldfields, I always aim to propagate them in the late spring or early summer. This is when the plants are actively growing and have plenty of energy to put into developing new roots. You’ll want to take cuttings from healthy, vigorous stems that haven’t yet flowered. Look for stems that are firm and green, not woody or already spent.
Supplies You’ll Need
Here’s what I usually have on hand when I’m ready to get my hands dirty:
- Sharp Pruning Shears or a Craft Knife: Cleanliness is key to preventing disease.
- Rooting Hormone (Optional but Recommended): This little helper can give your cuttings a significant boost.
- Well-Draining Potting Mix: A good seed-starting mix or a blend of equal parts perlite and peat moss works wonders.
- Small Pots or Seedling Trays: Make sure they have drainage holes.
- Plastic Bags or a Propagator Lid: To create a humid environment.
- Watering Can with a Fine Rose: For gentle watering.
- Labels: To keep track of what you’ve planted and when!
Propagation Methods
Goldfields are wonderfully amenable to stem cuttings. It’s my go-to method for these cheerful bloomers.
- Take Your Cuttings: Using your clean shears or knife, take cuttings that are about 4-6 inches long. Make your cut just below a leaf node (where a leaf attaches to the stem).
- Prepare the Cuttings: Gently remove the lower leaves from the cutting, leaving just a couple of leaves at the top. If any flower buds are present, pinch them off. They’ll just drain energy from root development.
- Apply Rooting Hormone (If Using): Dip the cut end of the stem into your rooting hormone powder or gel. Tap off any excess.
- Plant Your Cuttings: Make a small hole in your prepared potting mix with your finger or a pencil. Insert the cut end of the stem into the hole, ensuring it’s firm. Gently firm the soil around the base of the cutting.
- Create a Humid Environment: Water the potting mix thoroughly but gently. Then, cover the pots or trays with a plastic bag or propagator lid. Make sure the leaves don’t touch the sides of the bag if possible – this can encourage rot.
- Provide Light and Warmth: Place your cuttings in a bright location out of direct sunlight. They appreciate a bit of warmth, so placing them on a heat mat can be beneficial, though it’s not strictly necessary if your house is warm enough.
The “Secret Sauce” (Pro Tips)
Here are a couple of things I’ve learned over the years that can really make a difference:
- Change the Water Regularly (if water propagating): While I prefer soil for Goldfields, if you decide to try water propagation, it’s crucial to change the water every couple of days. Stagnant water is a breeding ground for bacteria that can kill your cuttings.
- Don’t Overwater (even in soil): This is probably the biggest killer of cuttings. The soil should be consistently moist, not soggy. You want to mimic that humid greenhouse feel, but drowning them is a fast track to failure!
Aftercare & Troubleshooting
Once your cuttings have calloused over (you might see a little bit of healing at the cut point), it’s time to check for roots. After a few weeks, you can give a gentle tug on a cutting. If you feel resistance, you’ve got roots!
At this point, you can slowly acclimate them to drier air by opening the plastic bag or propagator lid for a few hours each day, gradually increasing the time. Once they seem robust and you see new leaf growth, they’re ready for their own small pots. Continue to keep them moist and in bright, indirect light.
The most common issue you’ll encounter is rot. If you see stems turning mushy and black, it’s usually a sign of overwatering or poor air circulation. If caught early, you might be able to salvage a cutting by snipping off the rotted part and trying again with better watering practices.
A Encouraging Closing
Propagating Holocarpha macradenia is a chance to multiply the joy these sunny flowers bring. Be patient with your cuttings; nature has its own timetable. Even if not every one takes, the process itself is incredibly rewarding. So go ahead, give it a try, and enjoy the magic of growing your own Goldenfields! Happy gardening!
Resource:
https://identify.plantnet.org/k-world-flora/species/Holocarpha%20macradenia%20Greene/data