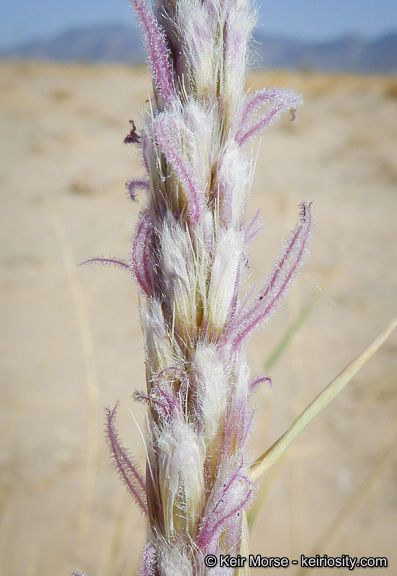
Oh, I’m so glad you’re interested in Hilaria rigida! This tough, beautiful native grass, also known as Big Galleta grass, is such a gem for our arid landscapes. Its architectural form and striking golden seed stalks bring a unique texture and color to any garden. Plus, being able to clone your favorites feels like pure gardening magic, doesn’t it? While it might not be as foolproof as some houseplants, propagating Hilaria rigida is absolutely achievable, and incredibly rewarding. You’ve got this!
The Best Time to Start
For Hilaria rigida, your best bet is to begin in late spring or early summer, as the plant is hitting its stride in active growth. This is when the plant has plenty of energy to put into developing new roots. Waiting until after the harshest summer heat has passed, perhaps late summer or early fall, can also work, giving the new divisions or cuttings a chance to establish before winter sets in.
Supplies You’ll Need
Here’s a little kit to get you started for successful propagation:
- Sharp, clean pruning shears or a sharp knife. We want nice, clean cuts!
- Rooting hormone (optional, but helpful!). Look for one formulated for woody plants or general use.
- A well-draining potting mix. I usually go for a blend of coarse sand, perlite, and a good quality potting soil, or a specialized cactus/succulent mix.
- Small pots or trays. Make sure they have drainage holes.
- Watering can with a fine rose or a spray bottle. Gentle watering is key.
- For division: A sturdy spade or garden fork.
Propagation Methods
Hilaria rigida is most commonly and successfully propagated through division. It’s a straightforward process that gives you the best chance of quick success.
Method: Division
- Prepare the Parent Plant: Water your Hilaria rigida thoroughly a day or two before you plan to divide it. This helps the plant handle the stress and makes the soil easier to work with.
- Carefully Excavate: Using your spade or garden fork, gently dig around the base of the mature plant, loosening the soil. Lift the entire clump out of the ground or pot. You want to minimize root disturbance as much as possible.
- Separate the Clumps: Once the plant is out, you’ll see natural divisions within the root ball. You can often gently pull these apart with your hands. If the roots are very tightly intertwined, use your spade or knife to carefully cut through the root ball, ensuring each division has plenty of healthy roots and a few shoots. Aim for divisions that are about the size of your fist, or slightly larger.
- Prepare the New Divisions: Trim any damaged roots. If you’re using rooting hormone, dip the cut ends of the roots into it, tapping off any excess.
- Planting Time: Fill your new pots with your well-draining mix. Make a small well in the center and place your division in it, spreading the roots out naturally. Backfill with soil, firming gently around the base. The top of the root ball should be at soil level, just as it was before.
- Water Gently: Water the newly potted divisions thoroughly to settle the soil and encourage root contact.
The “Secret Sauce” (Pro Tips)
Here are a couple of little tricks I’ve picked up over the years that really make a difference:
- Give those roots breathing room: When you’re planting your divisions, don’t pack the soil too tightly. Hilaria rigida loves good drainage, and compact soil can lead to soggy roots. A looser soil structure allows for better air circulation, which is crucial for root health.
- Patience with the “dormant” look: Sometimes, after division, a clump might look a little sad or even seem to have lost its vigor for a few weeks. Don’t fret! This is normal. The plant is prioritizing root establishment underground. Keep it watered consistently (but not waterlogged) and let it do its thing. You’ll see new shoot growth emerge when it’s ready.
Aftercare & Troubleshooting
Once your divisions are planted, give them a good watering and place them in a spot that gets partial shade for the first week or two. This protects them from intense sun while they settle in. After that, you can gradually move them to their permanent sunny location.
Keep the soil consistently moist but not soggy for the first few weeks. As the plant establishes, you can slowly increase the watering intervals, treating it like your mature Hilaria rigida.
The most common sign of trouble is root rot, which usually shows up as a mushy, foul-smelling base and wilting foliage that doesn’t perk up after watering. This is almost always due to overwatering and poor drainage. If you suspect rot, you might need to unpot the division, trim away the affected parts, and repot in fresh, dry, well-draining soil, being much more careful with watering.
A Little Encouragement
So there you have it! Propagating Hilaria rigida is a journey, and like any good garden project, it’s about the process as much as the result. Be patient with yourself and your new little grass babies. Soon enough, you’ll have more of this wonderful plant to enjoy and share. Happy propagating!
Resource: