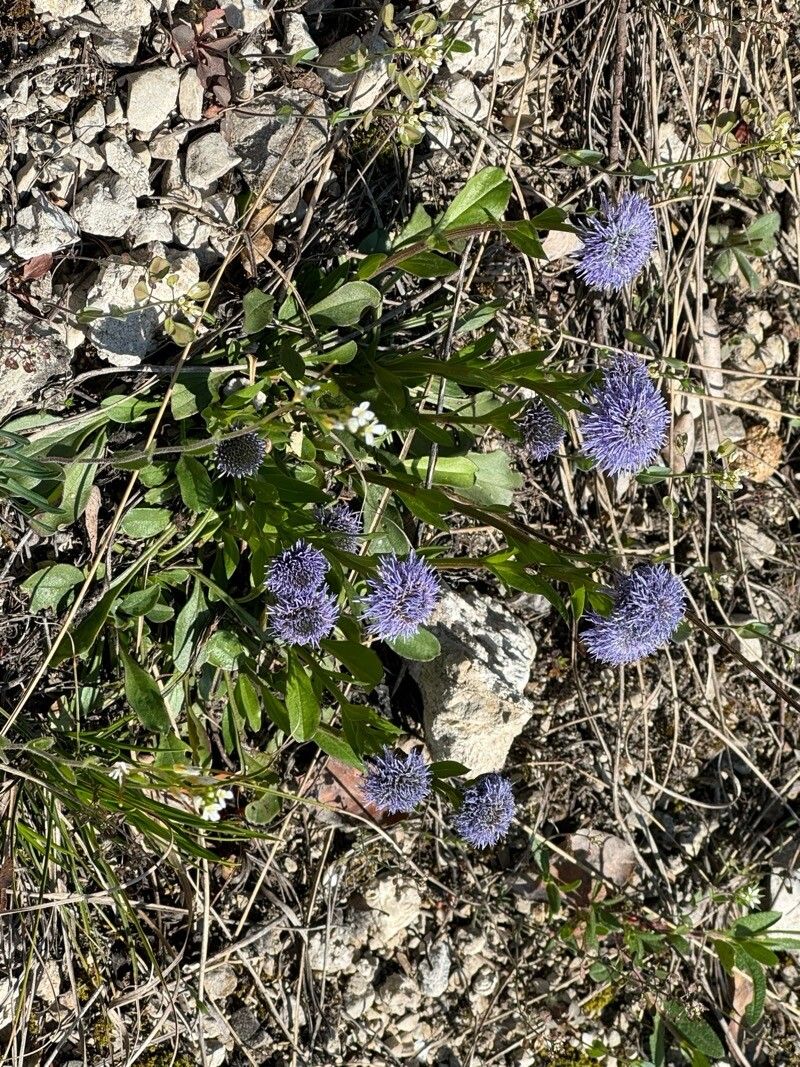
Oh, Globularia bisnagarica! What a treasure. I always get a little thrill when I see those delightful little blue pom-poms gracing a garden. They bring such a unique texture and color, especially against softer, fuzzier foliage. Their charm lies in their simple elegance, and the fact that they’re quite tough once established. Propagating them just multiplies that joy, and honestly, it’s a wonderfully rewarding experience. Now, are they a beginner’s dream? I’d say they’re moderately easy, which means a little care goes a long way.
The Best Time to Start
For Globularia bisnagarica, timing is crucial, and late spring to early summer is generally your sweet spot. This is when the plant is actively growing and has plenty of energy to put into rooting. You’re looking for young, non-flowering shoots that are still a bit flexible but not overly soft. Think of it as capturing that vibrant growth spurt.
Supplies You’ll Need
Gathering your tools beforehand makes the whole process smoother. Here’s what I usually have on hand:
- Sharp pruning shears or a clean knife: For taking precise cuttings.
- Rooting hormone (optional but recommended): Helps speed things up.
- A well-draining potting mix: A good blend of perlite and peat moss is my go-to. About a 50/50 mix works wonders.
- Small pots or trays: Clean and with drainage holes, of course.
- A watering can or spray bottle: For gentle watering.
- Plastic bags or a propagation dome: To create a humid environment.
- Labels: So you don’t forget what’s what!
Propagation Methods
While you could try division, I find that stem cuttings are the most reliable and rewarding way to propagate Globularia bisnagarica.
Stem Cuttings:
- Select your cuttings: Find healthy, leafy shoots that are about 3-4 inches long. Avoid flowering stems, as they’re putting energy into blooms, not roots. Make your cut just below a leaf node (where a leaf attaches to the stem).
- Prepare the cuttings: Gently remove the lower leaves, leaving just a few at the top. This prevents leaves from rotting when buried. If you’re using rooting hormone, dip the cut end into the powder, tapping off any excess.
- Plant your cuttings: Fill your small pots with your prepared, moistened potting mix. Make a small hole with your finger or a pencil and insert the cutting. Firm the soil gently around the stem.
- Create humidity: Water gently from the base. Then, place a plastic bag loosely over the pot or cover it with a propagation dome. This traps humidity, which is vital for successful rooting. If you don’t have one, you can use a clear plastic grocery bag and some small sticks to keep it from touching the leaves.
- Find a good spot: Place the pots in a bright location but out of direct, harsh sunlight. A warm spot is ideal.
The “Secret Sauce” (Pro Tips)
After years of coaxing plants to grow, a few things stick out:
- Don’t drown them! While humidity is key, you don’t want soggy soil. The mix should be consistently moist, but never waterlogged. Let the very top layer dry slightly between waterings.
- Bottom heat is your friend. If you have the space, placing your pots on a heat mat can significantly speed up root development. It mimics the warmth of spring soil and really gives those roots a kickstart.
- Patience is a virtue (and sometimes a necessity). Globularia can be a little slow to root. Don’t be tempted to dig them up too soon to check for roots. Wait at least 3-4 weeks. You’ll know they’re rooting when you see new leaf growth.
Aftercare & Troubleshooting
Once you see those little roots peeking out of the drainage holes or feel a gentle tug when you try to lift the cutting, it’s time for a little more attention.
Start by gradually acclimating your new plant to less humid conditions. Open the plastic bag for a few hours each day, then slowly increase the time. Once it’s robust, you can remove the bag entirely. Water when the top inch of soil feels dry.
The most common issue you’ll encounter is rot. This usually happens if the cuttings are kept too wet. If you see a cutting turning black and mushy, unfortunately, it’s likely a goner. Remove it immediately to prevent it from affecting others. Another sign of failure is if the cutting simply shrivels up and doesn’t show any signs of new growth after several weeks.
A Encouraging Closing
Propagating Globularia bisnagarica is a joyful journey. There’s something incredibly satisfying about nurturing a tiny cutting into a healthy, blooming plant. Be patient with yourself and your little charges. Even if a few don’t make it, learn from the experience, and keep trying. Happy gardening!
Resource:
https://identify.plantnet.org/k-world-flora/species/Globularia%20bisnagarica%20L./data