Ah, hello there, fellow garden enthusiasts! It’s so lovely to chat with you today. I’ve been tending to my plants for two decades now, and honestly, there’s rarely a day that goes by without me learning something new. Today, I want to talk to you about a real gem: Gladiolus atroviolaceus.
Why You’ll Fall in Love with Gladiolus atroviolaceus
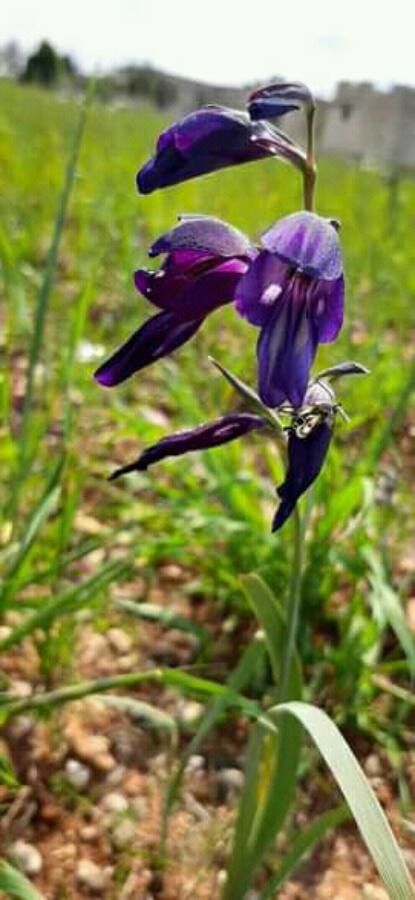
This little beauty, with its deep, dusky purple blooms and elegant form, is a true standout. It’s not as common as some of its gladiolus cousins, which makes growing it yourself even more special. Plus, sharing these unique flowers with friends or expanding your own garden makes propagating them incredibly rewarding. Now, is it a walk in the park for absolute beginners? I’d say Gladiolus atroviolaceus leans a little towards the intermediate side. It requires a bit of care, but with these pointers, you’ll be well on your way.
When to Get Your Hands Dirty
The best time to think about propagating Gladiolus atroviolaceus is generally in the late winter or early spring. This is just before they kick into their main growth spurt. You’re looking to work with dormant or just-sprouting corms. Think of it as giving them a head start into the new growing season.
What You’ll Want to Have Ready
Before you dive in, let’s gather our tools. Having everything at hand makes the process much smoother.
- Sharp pruning shears or a clean knife: For making precise cuts. Sterilize them with rubbing alcohol to prevent disease.
- Well-draining potting mix: A blend of perlite, vermiculite, and peat moss or coco coir is ideal. You want good aeration.
- Small pots or seed trays: Clean ones, of course!
- Rooting hormone (optional, but helpful): This can give your cuttings a bit of a boost.
- Watering can with a fine rose: To water gently without disturbing things.
- Labels or markers: To keep track of what you’ve planted.
Let’s Get Propagating!
For Gladiolus atroviolaceus, the most effective method is corm division. These plants produce little offset corms, much like potatoes, and separating them is how you get new plants.
- Gently Unearth: Carefully dig up your Gladiolus atroviolaceus corms. It’s best to do this when the plant has finished flowering and the foliage has started to yellow and die back. This means the corm has stored enough energy.
- Clean and Inspect: Gently brush off as much soil as you can. You’ll see the main corm and, hopefully, some smaller cormels or offsets attached to its sides. Look for healthy-looking growths.
- Make the Cut: Using your clean pruning shears or knife, carefully separate the offsets from the main corm. Ensure each offset has at least one small eye or sprout on it. If you’re cutting it from a thicker part of the main corm, try to include a tiny piece of that main corm itself – it often helps.
- Let Them Dry (Optional but Recommended): This is a little trick I learned. Let the separated corms sit in a dry, airy place for a day or two. This helps any cut surfaces heal over and reduces the risk of rot when you plant them.
- Prepare Your Pots: Fill your small pots with your well-draining potting mix.
- Planting Time: Plant each offset corm about 2-3 inches deep in the soil. The sprout or eye should be facing upwards.
- Water Gently: Give them a gentle watering.
The “Secret Sauce”: My Insider Tips
Over the years, I’ve found a few things that really make a difference with these often-fussy beauties.
- Don’t Overcrowd: When dividing, be patient and don’t be tempted to force separation if it feels too difficult. You risk damaging the delicate growing points. If an offset is really stubborn, it might be best to leave it for another year.
- Think Warm Feet: While not always necessary, providing a little bottom heat can significantly speed up germination and root development. I’ve used a seedling heat mat for this, and the results are consistently better. Just place your pots on top of it.
- Watch Your Moisture: This is crucial for gladiolus. Avoid waterlogged soil at all costs. It’s the quickest way to invite rot. Water when the top inch of soil feels dry, and ensure your pots have drainage holes.
Aftercare and What to Look For
Once your corms are planted, keep them in a bright spot, but out of direct, scorching sun initially. Water them when the soil starts to dry out.
You’ll know things are going well when you see the first little green shoot emerge from the soil. That’s your new plant! Continue to care for it as you would any young seedling.
Now, what if things don’t go as planned? The most common culprit is rot. If you see wilting that isn’t due to dryness, or if your corm just seems to be mushy and not sprouting, it’s likely rot. This usually stems from overwatering or poorly draining soil. If this happens, isolate the affected pot and learn from it for your next attempt.
A Little Patience Goes a Long Way
Growing anything new is a journey, and propagating Gladiolus atroviolaceus is no different. Be patient with your little corms. Some might take a little longer to show signs of life than others. Enjoy the process, the anticipation, and the satisfaction of nurturing something from a tiny piece of an existing plant. Happy gardening, everyone!
Resource:
https://identify.plantnet.org/k-world-flora/species/Gladiolus%20atroviolaceus%20Boiss./data