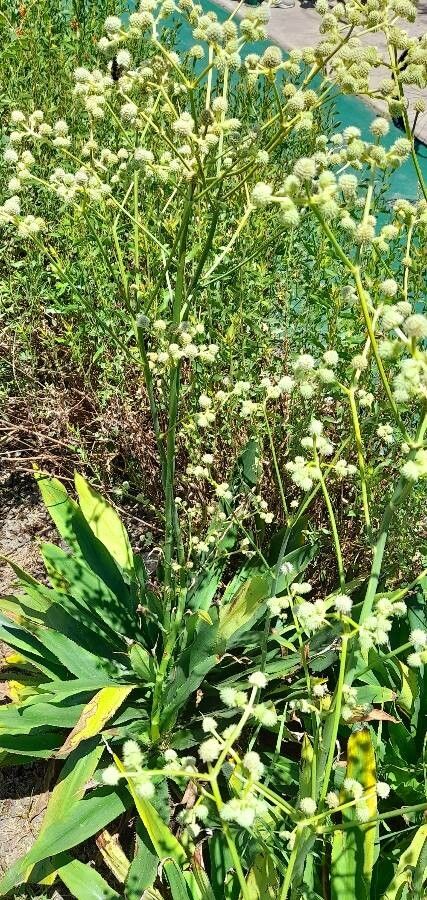
Hello fellow plant lovers! It’s such a joy to connect with you today about one of my absolute favorite garden stars: Eryngium elegans, also known as the elegant sea holly. If you’re drawn to plants with a bit of architectural flair and a certain wild beauty, you’re going to adore this one. Its thistle-like blooms, often a striking steely blue or silver, are not only incredibly unique but also attract tons of beneficial pollinators. Plus, they dry beautifully for winter arrangements!
Now, I know some plants can feel a bit intimidating to propagate, but truthfully, Eryngium elegans is a delightful plant to increase once you know the tricks. It offers a really satisfying reward for your efforts, and I’ve found beginners can absolutely succeed with it. Let’s get those precious new plants started!
The Best Time to Start
My favorite time to get propagating Eryngium elegans is in late spring to early summer. This is when the plant is actively growing and has plenty of energy to put into developing new roots. You’ll want to look for young, vibrant growth that hasn’t yet flowered. If you’re considering root cuttings, early spring, just as new growth is starting, is also a fantastic window.
Supplies You’ll Need
Here’s a little toolkit to get you going. You probably have most of these already!
- Sharp pruning shears or a clean knife: For taking precise cuttings.
- Sterile seed-starting mix or a gritty potting mix: These drain exceptionally well, which is crucial for Eryngium. I often mix equal parts perlite and good quality potting soil.
- Small pots or trays: With drainage holes, of course!
- Rooting hormone (optional but recommended for stem cuttings): This encourages faster and stronger root development.
- Gloves: Some Eryngium varieties can be a bit prickly.
- A watering can with a fine rose: For gentle watering.
- A clear plastic bag or propagation dome: To create a humid environment.
- A trowel (for division): To help gently separate clumps.
Propagation Methods
Eryngium elegans can be propagated in a couple of ways, but I find two methods particularly effective and straightforward.
1. Stem Cuttings
This is my go-to for a good number of new plants.
- Select your stems: Choose healthy, non-flowering stems that are about 4-6 inches long.
- Make the cut: Using your sharp shears or knife, make a clean cut just below a leaf node (where a leaf attaches to the stem).
- Prepare the cutting: Gently remove the lower leaves, leaving just a few at the top. If the leaves are very large, you can even cut them in half to reduce water loss.
- Apply rooting hormone (optional): Dip the cut end into rooting hormone, tapping off any excess.
- Plant your cuttings: Fill your pots or trays with your well-draining mix. Make a small hole with your finger or a pencil and insert the cutting. Gently firm the soil around it.
- Water gently: Water the potting mix thoroughly until you see water drain from the bottom.
- Create humidity: Place a clear plastic bag over the pot or pots, or use a propagation dome. This will keep the cuttings from drying out while they root. Place them in a bright spot out of direct, scorching sun.
2. Root Cuttings (A Bit More Advanced but Very Rewarding!)
This method is surprisingly effective for Eryngium.
- Dig up your plant: In early spring, carefully dig up a mature Eryngium plant. Brush off excess soil to expose the main roots.
- Prepare the root sections: Using your clean knife, cut sections of healthy root that are about 1-3 inches long. Make sure each piece has at least one tiny bud or growing point.
- Plant the root cuttings: Fill your pots with your well-draining mix. Make shallow trenches or holes and lay the root cuttings horizontally or at a slight angle, covering them with about half an inch of soil.
- Water and cover: Water gently and cover the pots with a clear plastic bag or propagation dome to maintain humidity. Place them in a bright location.
The “Secret Sauce” (Pro Tips)
Here are a few things I’ve learned over the years that really boost your success rate.
- Don’t crowd your cuttings: Give them a little bit of space. Overcrowding can lead to fungal issues, and we want healthy roots, not soggy stems!
- Bottom heat is your friend for stem cuttings: If you have a heat mat, placing your pots on it can significantly speed up root formation. It mimics the warmth of spring soil and really encourages those roots to get going.
- Patience is key – check for roots subtly: Resist the urge to yank on your cuttings to see if they’ve rooted! When you think they might be ready (usually after 4-6 weeks for stem cuttings), give them a very gentle tug. If there’s resistance, you likely have roots. For root cuttings, you’ll see new shoots emerge from the soil.
Aftercare & Troubleshooting
Once you see signs of new growth or feel that wonderful resistance when you gently tug a cutting,Congratulations! Your Eryngium is rooting!
- Acclimatize: Slowly start to remove the plastic bag or dome over a few days to allow your new plants to adjust to normal humidity.
- Watering: Continue to water them regularly, keeping the soil consistently moist but not waterlogged.
- Transplanting: Once your new Eryngium plants have developed a good root system and several sets of leaves, you can transplant them into their own small pots.
- Signs of trouble: The most common issue is rot, which usually happens because of overwatering or poor drainage. If you see your cuttings turning mushy and black, it’s a sign that conditions are too wet. If this happens, remove the affected cutting immediately and ensure the remaining soil is draining well. Another sign of failure is if the cutting simply shrivels up – this usually means it dried out too much.
A Encouraging Closing
Propagating Eryngium elegans is a truly rewarding journey. It’s a chance to connect deeper with your plants and expand your garden without spending a fortune. Be patient, enjoy the process of nurturing these new life forms, and before you know it, you’ll have your very own elegant sea holies to admire and share. Happy propagating!
Resource:
https://identify.plantnet.org/k-world-flora/species/Eryngium%20elegans%20Cham.%20&%20Schltdl./data