Well hello there, fellow garden enthusiasts! It’s so nice to have you pull up a chair. Today, we’re going to talk about something truly special: propagating the delightful Erodium cazorlanum, also known as the Sierra de Cazorla stork’s bill.
A Little Bloom to Brighten Your Day
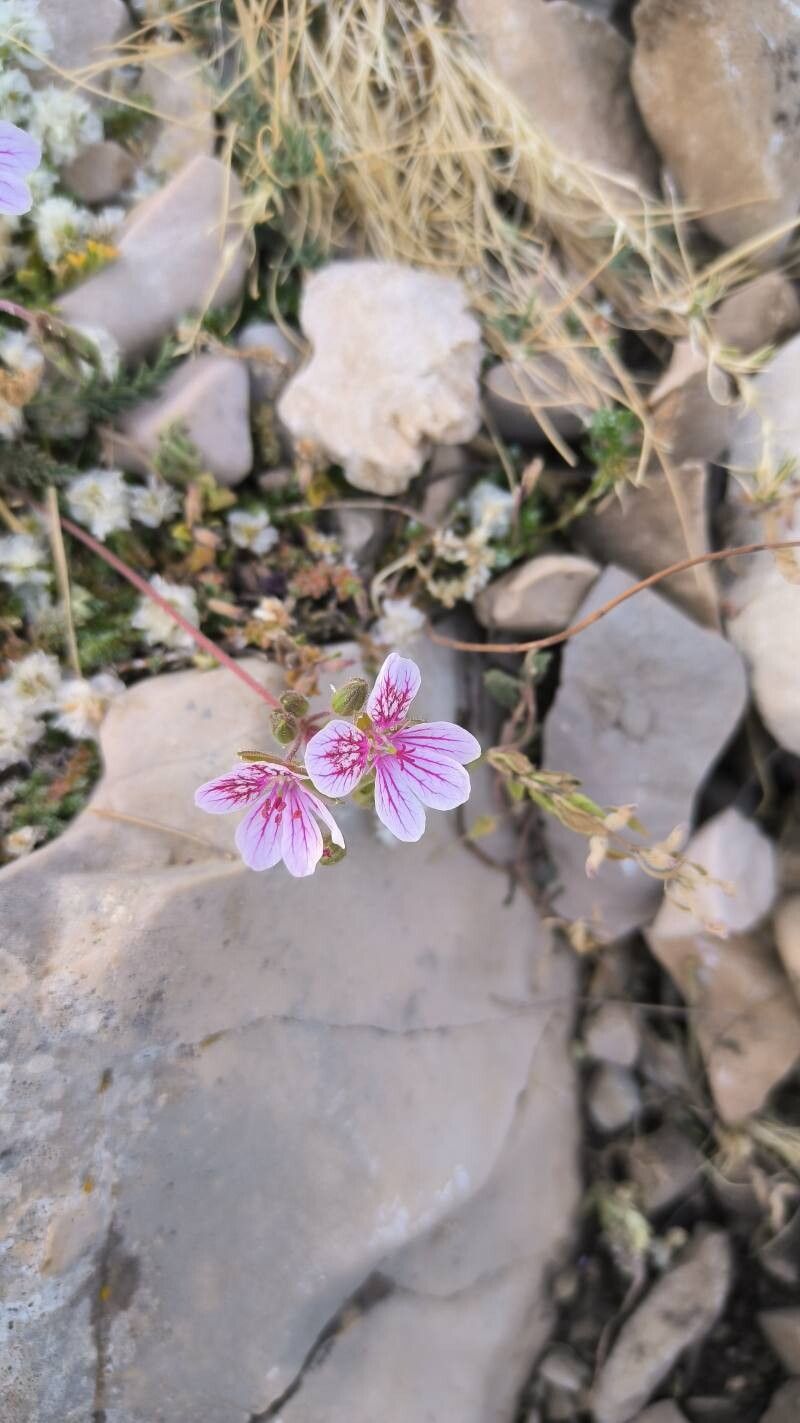
I first fell in love with Erodium cazorlanum years ago. Its delicate, often vibrant pink or purple blooms, sometimes with intricate veining, are like little jewels in the garden. It has a lovely, sprawling habit, perfect for edging beds or spilling over the sides of pots. Best of all, it’s a relatively unfussy plant once it’s settled in, and propagating it yourself? Oh, that’s a joy. It’s a wonderful way to share a bit of this beauty with friends, or simply to fill out your own spaces. As for beginners? I’d say it’s moderately easy; a little patience goes a long way.
Timing is Everything
For the best chance of success with Erodium cazorlanum, I find that late spring to early summer is your sweet spot. This is when the plant is actively growing, and you’ll find plenty of healthy, non-flowering shoots that are perfect for taking cuttings. Think of it as catching your plant at its most vigorous – nature’s perfect time for a little expansion!
Your Propagation Toolkit
Before we get our hands dirty, let’s gather our supplies. Think of this as packing for a delightful gardening adventure!
- Sharp Pruning Shears or a Hobby Knife: Clean cuts are crucial for healthy new plants.
- Seed Starting Mix or a Well-Draining Potting Mix: You want something airy that won’t hold too much moisture. A mix of equal parts peat moss and perlite or coarse sand works beautifully.
- Small Pots or Trays: Four-inch pots are usually a good size for starting out.
- Rooting Hormone (Optional but Recommended): This gives your cuttings a little boost. Look for a powder or gel.
- Watering Can with a Fine Rose: Gentle watering is key.
- Plastic Bags or a Propagator Lid: To create a humid environment.
- Labels and a Permanent Marker: Trust me, you’ll thank yourself later!
Bringing New Life to Erodium: My Go-To Methods
I tend to favor stem cuttings for Erodium cazorlanum. It’s reliable and I can usually get several new plants from a single parent.
Here’s how I do it:
- Select Your Shoots: Look for healthy, non-flowering stems. You want something that feels firm and somewhat woody, but not ancient. About 3-4 inches long is generally ideal.
- Make the Cut: Using your clean pruning shears or knife, make a clean cut just below a leaf node (the point where a leaf attaches to the stem). This is where the magic of root development often happens.
- Prepare the Cutting: Gently remove the lower leaves, leaving just two or three at the top. This helps the cutting focus its energy on rooting rather than trying to support too many leaves. If the remaining leaves are very large, you can even trim them in half to reduce water loss.
- Apply Rooting Hormone (If Using): Dip the cut end of the stem into your rooting hormone, ensuring it’s well-coated. Tap off any excess.
- Planting Time: Make a small hole in your prepared potting mix using a pencil or your finger. Insert the cutting into the hole, making sure the leaf nodes that will be below the soil surface are covered. Gently firm the soil around the base of the cutting.
- Water Gently: Give the pot a gentle watering until the soil is evenly moist but not waterlogged.
- Create a Humid Environment: Cover the pot with a clear plastic bag or a propagator lid. This traps humidity, which is essential for cuttings while they develop roots. If using a bag, secure it loosely around the pot.
The “Secret Sauce” for Success
Over the years, I’ve learned a few tricks that have really upped my propagation game.
- Think About Airflow: While humidity is vital, too much stagnant air can invite fungal diseases. Open the bag or propagator lid for a few minutes each day to allow for some air exchange. This is a small step, but it makes a big difference!
- Warmth Encourages Roots: Erodium cazorlanum loves a bit of warmth to get those roots going. If your potting bench is a bit cool, try placing your pots on a heat mat specifically designed for propagation. It really speeds things up!
- Don’t Drown Your Dreams: It’s SO tempting to water frequently, but overwatering is the quickest way to rot out your precious cuttings. Water only when the top inch of soil feels dry to the touch. You’ll get a feel for it with practice.
Aftercare and Nurturing Your New Sprouts
Once your cuttings have been in their humid haven for a few weeks, you’ll want to check for signs of progress.
- The Gentle Tug Test: After about 3-4 weeks, give a cutting a very gentle tug. If you feel resistance, it’s a good sign that roots have formed.
- Rooted and Ready: Once you see good root development, it’s time to gradually acclimate your new plant to normal conditions. This means slowly removing the plastic cover over a few days, or opening the propagator lid for longer periods.
- Transfer to Individual Pots: When your new Erodium has a decent root system and you can handle it without it falling apart, pot it up into its own small pot with fresh, well-draining potting mix.
- Watch for Rot: The most common sign of failure is rot, which often looks like a slimy, blackening stem base. This is usually due to overwatering and poor air circulation. If you see this, unfortunately, the cutting is likely lost.
Happy Growing!
Propagating plants like Erodium cazorlanum is such a rewarding part of gardening. It’s a chance to slow down, observe, and participate in the beautiful cycle of life. Don’t be discouraged if your first attempt isn’t perfect – every gardener has had their share of cuttings that didn’t make it. Just keep at it, learn from each experience, and most importantly, enjoy the journey of nurturing something new into existence! Happy planting!
Resource:
https://identify.plantnet.org/k-world-flora/species/Erodium%20cazorlanum%20Heywood/data