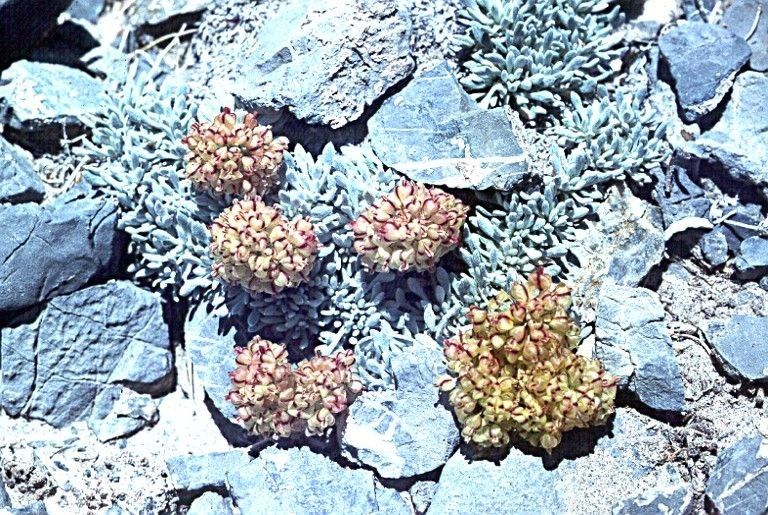
Oh, Eriogonum gilmanii! If you’re looking for a little piece of the desert floor to bring into your own garden, this is a fantastic choice. Also known as Gilman’s buckwheat, it’s a tough little native that offers delicate, often pinkish or white flower clusters and beautiful silvery foliage. Watching these tough plants thrive, and then getting to share that beauty by making more of them, is truly one of gardening’s simple joys. Now, is it a walk in the park for a complete beginner? I’d say it’s more of a gentle hike – not impossible, but definitely best approached with a bit of know-how. But don’t worry, that’s exactly what I’m here for!
The Best Time to Start
Timing is everything, isn’t it? For Eriogonum gilmanii, I find late spring to early summer, just as the plant is putting on new, vigorous growth, is your sweet spot. You want softwood cuttings, which are flexible and have a good amount of stored energy. Trying to take cuttings when the plant is stressed by heat or drought will just be an uphill battle. So, keep an eye on your established plants and get ready to strike when they’re looking their best.
Supplies You’ll Need
To give your little buckwheat babies the best start, have these ready:
- Sharp Pruning Shears or a Craft Knife: Clean cuts are crucial to prevent infection. Sanitize them between plants if you can!
- Potting Mix: A well-draining blend is non-negotiable for Eriogonum. I like a mix of equal parts perlite, coarse sand, and a good quality potting soil, or even a specialized cactus and succulent mix.
- Small Pots or Seed Starting Trays: Clean containers with drainage holes are a must.
- Rooting Hormone (Optional, but Recommended): A powder or gel can significantly boost your success rates.
- Watering Can or Spray Bottle: For gentle watering.
- Labels: Don’t forget to label what you’re growing and when you started it!
Propagation Methods
While Eriogonum gilmanii can be grown from seed, I find that stem cuttings are generally the most rewarding and reliable method for creating new plants.
Stem Cuttings:
- Select Your Cuttings: Look for healthy, non-flowering stems. About 4-6 inches long is a good starting point. Gently bend a stem – if it snaps cleanly, it’s likely a good softwood cutting. If it’s very woody and stiff, wait a bit.
- Make the Cut: Using your clean shears or knife, make a clean cut just below a leaf node (where a leaf attaches to the stem). This is where rooting hormones are most effective.
- Prepare the Cutting: Gently remove the lower leaves. You want to leave at least two sets of leaves at the top. If the remaining leaves are quite large, you can even cut them in half to reduce water loss through transpiration.
- Apply Rooting Hormone: Dip the cut end of the stem into your rooting hormone. Tap off any excess.
- Plant Your Cuttings: Fill your small pots with your well-draining potting mix. Make a small hole with a pencil or your finger, and gently insert the cut end of the stem into the mix. Firm the soil gently around it.
- Water and Cover: Water the soil lightly until it’s moist but not soggy. You can then cover the pot with a clear plastic bag or a propagator lid to create a humid environment. Just make sure the leaves aren’t touching the plastic.
The “Secret Sauce” (Pro Tips)
Here are a few little tricks I’ve learned over the years that can make a big difference:
- Strike Multiple Cuttings: Don’t put all your eggs in one basket! Take more cuttings than you think you’ll need. Not all of them will root, and that’s perfectly normal.
- Bottom Heat is Your Friend: If you have access to a heat mat, placing your pots on it can significantly speed up root development. It mimics the warmth of the soil that plants often seek out to establish themselves.
- Let Them Callus (Slightly): Sometimes, after dipping in rooting hormone and before planting, I’ll let the cut end of the stem sit exposed to the air for a few hours. This allows a tiny callus to form, which can actually help prevent rot and encourage rooting. It’s a subtle step, but I’ve found it helpful with finicky subjects.
Aftercare & Troubleshooting
Once your cuttings are planted, keep them in a bright, indirect light spot. Avoid direct, harsh sun, which can scorch those delicate new cuttings. You’ll want to keep the soil consistently moist but never waterlogged. Mist the leaves occasionally if you’re not using a humidity dome.
Signs of success? In a few weeks, you’ll start to see new growth appearing from the tip or leaf nodes. You can gently tug on a cutting – if there’s resistance, roots have formed! Carefully transplant your rooted cuttings into slightly larger pots with their own well-draining mix.
Troubleshooting: The most common issue is rot, which usually happens from too much moisture and not enough air circulation. If you see stems turning black and mushy, unfortunately, that cutting is likely lost. The best remedy is prevention: ensure excellent drainage, and don’t overwater. If you see wilting that isn’t due to dryness, it could also be a sign of rot or transplant shock.
A Encouraging Closing
Propagating plants is a journey of patience and observation. Don’t get discouraged if your first attempt isn’t perfect! Each cutting teaches you something new. Enjoy the process, celebrate every tiny root you discover, and soon you’ll have a whole collection of your own lovely Eriogonum gilmanii to admire and share. Happy gardening!
Resource:
https://identify.plantnet.org/k-world-flora/species/Eriogonum%20gilmanii%20S.Stokes/data