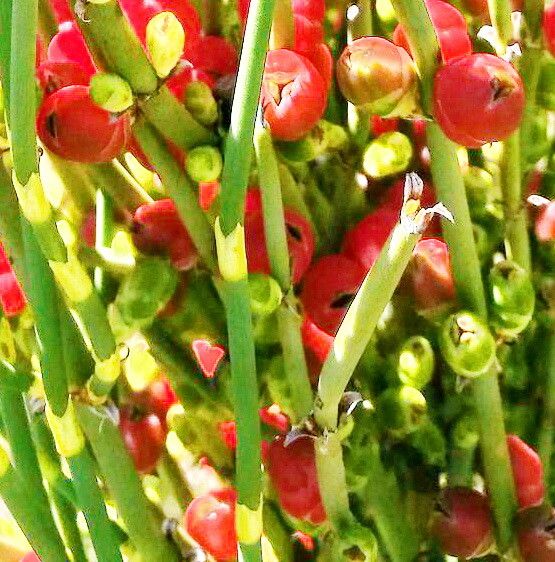
Hello, fellow plant lovers! Today, we’re diving into the fascinating world of Ephedra ochreata. If you’re drawn to plants with a bit of desert charm and an interesting architectural form, you’re in for a treat. Ephedra ochreata, with its delicate, almost architectural stems and subtle, often overlooked beauty, is a plant that rewards a closer look. Propagating it is a wonderfully hands-on way to expand your collection and truly understand its growth cycle. Now, for beginners, I’d say Ephedra ochreata can be a moderately challenging plant to propagate. It requires a little patience and attention to detail, but with these steps, I’m confident you can be successful.
When’s the Best Time to Get Growing?
For Ephedra ochreata, the sweet spot for propagation is during its active growing season. I find the late spring to early summer is ideal. This is when the plant is putting on new growth and has plenty of energy to dedicate to rooting. Waiting until you see fresh, vigorous stems emerging is your cue.
Your Propagation Toolkit
Here’s what you’ll want to have on hand before you begin:
- Sharp, clean pruning shears or a sharp knife: Essential for making clean cuts.
- Small pots or trays: About 3-4 inches in diameter work well. Make sure they have drainage holes!
- Well-draining potting mix: A cactus or succulent mix is perfect. You can also create your own by mixing equal parts perlite and peat moss or coir.
- Rooting hormone (optional but recommended): A powder or gel works wonders.
- A watering can with a fine rose or mister: For gently watering your cuttings.
- Plastic bags or a propagation dome: To create a humid environment.
Let’s Get Rooted: Propagation Methods
The most reliable method for Ephedra ochreata is through stem cuttings. It’s straightforward and often yields great results.
- Select Your Cuttings: Look for healthy, semi-hardwood stems on your mature Ephedra ochreata. These are stems that are no longer floppy and green but haven’t yet become woody and hard. Aim for pieces about 4-6 inches long. Gently twist or cut them from the parent plant.
- Prepare the Cuttings: Once you have your cuttings, it’s time to prepare them. Remove any leaves from the bottom half of the stem. This is crucial because if these leaves are buried in the soil, they can rot, which is a recipe for disaster.
- Apply Rooting Hormone (Optional): Dip the cut end of each stem into your rooting hormone, ensuring it’s evenly coated. Tap off any excess.
- Planting the Cuttings: Fill your small pots with your prepared well-draining mix. Make a small hole in the center of the mix with your finger or a pencil. Gently insert the cut end of the stem into the hole, making sure the nodes where you removed leaves are below the soil surface. Firm the soil gently around the stem.
- Water and Cover: Give your newly planted cuttings a gentle watering. You want the soil to be moist but not soggy. Now, the key to success: create a humid environment. You can do this by placing the pots inside a plastic bag (loosely tied, so air can still circulate) or covering them with a propagation dome.
The “Secret Sauce”: My Insider Tips
- Bottom Heat is Your Friend: If you have a seedling heat mat, placing your pots on it can significantly speed up the rooting process. Ephedra ochreata loves a little warmth from below to encourage those roots to form.
- Don’t Overwater (Seriously!): This is probably the most common mistake. While cuttings need moisture, they absolutely hate sitting in soggy soil. It’s far better to let the soil dry out slightly between waterings than to drown your precious cuttings.
- Patience, My Dear Gardener: I’ve seen too many people give up too soon. Ephedra ochreata can be a slow-rooter. Be patient! It might take several weeks, even a couple of months, before you see new growth, which is a sign that roots have formed.
Nurturing Your New Sprouts
Once you notice new growth appearing on your cuttings, that’s your indicator that roots have developed! At this stage, you can start to gradually acclimate them to less humid conditions. You might start by opening the plastic bag a little each day or lifting the dome for a few hours. Slowly increase the time they’re exposed to the open air over a week or two.
Troubleshooting: Signs of failure usually come in the form of rot. If your cuttings turn mushy, black, or smell off, it’s a sign of overwatering and poor drainage. Unfortunately, at that point, they’re usually beyond saving. If a cutting just seems to dry out and shrivel without any new growth or rot, it might not have had enough humidity or the right conditions to root. Don’t be discouraged; just try again!
So there you have it! Propagating Ephedra ochreata is a rewarding journey that allows you to connect more deeply with this unique plant. Remember to be patient, keep things clean, and provide that little bit of extra TLC. Happy propagating, and enjoy watching your new little desert wonders thrive!
Resource:
https://identify.plantnet.org/k-world-flora/species/Ephedra%20ochreata%20Miers/data