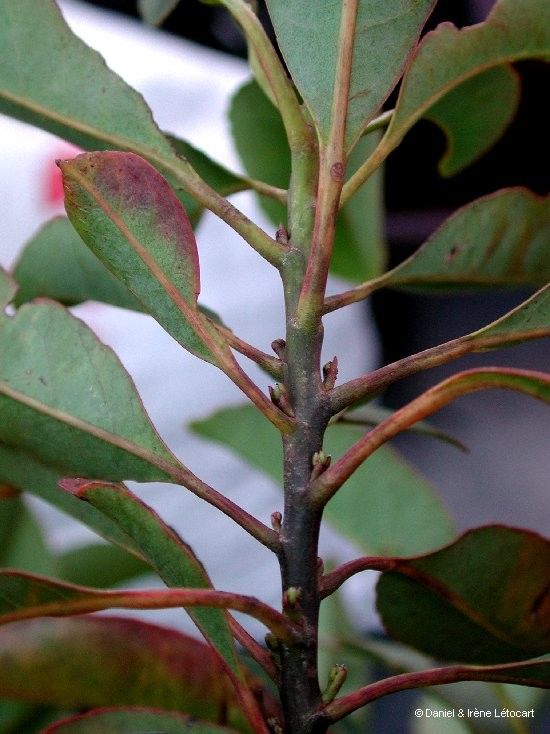
Oh, hello there! Come on in, pull up a chair. I’ve got a pot of Darjeeling steaming, and I’m just itching to chat about one of my favorite plants: Elaeocarpus kaalensis. If you’re looking for a bit of botanical magic in your garden, this is the one. Its beautiful, glossy leaves and delicate flowers are a real treat, and there’s something incredibly satisfying about coaxing a new plant into existence from a small piece of the original. Now, is it a walk in the park for absolute beginners? I’d say it leans towards the moderately easy side. It requires a little attention to detail, but trust me, the reward is well worth the effort.
The Best Time to Start
When it comes to getting your Elaeocarpus kaalensis off to a flying start, timing is everything. I find the late spring to early summer is your sweet spot. This is when the plant is actively growing after its winter rest, and the stems have a good amount of energy to put into developing roots. You want to be taking cuttings from new, but slightly hardened, growth. Think about it – a brand new, super soft shoot might be too tender to survive, and growth that’s been around for ages might be too woody. We’re looking for that perfect middle ground.
Supplies You’ll Need
Before we get our hands dirty, let’s make sure we have all our ducks in a row. Here’s what I usually gather:
- Sharp Pruning Shears or a Clean Knife: Essential for making clean cuts that heal better.
- Rooting Hormone: A little boost can make a big difference. I prefer powdered forms, but gels work too.
- Potting Mix: A well-draining mix is crucial. I often use a blend of peat moss, perlite, and a little bit of compost. You can also buy specific propagation mixes.
- Small Pots or Trays: Clean pots are a must to avoid any nasty diseases.
- Plastic Bag or Humidity Dome: To keep those cuttings nice and moist.
- Watering Can with a Fine Rose: Gentle watering is key.
Propagation Methods
For Elaeocarpus kaalensis, stem cuttings are my go-to method. It’s reliable and gives you the best chance of success.
Stem Cuttings:
- Choose Your Cuttings: Find a healthy stem on your mature Elaeocarpus kaalensis. Look for growth that’s about pencil-thick and has a few sets of leaves. You want to take cuttings that are roughly 4-6 inches long.
- Make the Cut: Using your sharp shears or knife, make a clean cut just below a leaf node. This is where new roots are most likely to emerge. Be decisive; a jagged cut can invite trouble.
- Prepare the Cutting: Gently remove the lower leaves from the cutting, leaving just a couple of leaves at the very top. This prevents them from rotting when buried in the soil. If your leaves are quite large, you can even cut them in half to reduce water loss.
- Apply Rooting Hormone: Dip the cut end of the stem into your rooting hormone, shaking off any excess. This step isn’t always strictly necessary, but it can really speed things up.
- Potting Up: Fill your clean pots with your well-draining potting mix. Make a small hole in the center with your finger or a pencil.
- Insert the Cutting: Gently place the prepared cutting into the hole, making sure the leaf nodes where you removed leaves are buried in the soil. Firm the soil gently around the stem.
- Water and Cover: Water the potting mix thoroughly but gently. Then, cover the pot with a plastic bag or a humidity dome. This creates a mini-greenhouse effect, keeping the humidity high, which is vital for cuttings to develop roots before they can take up water from the soil. Place the pot in a bright spot, but out of direct sunlight.
The “Secret Sauce” (Pro Tips)
You know, after years of tinkering, I’ve learned a few little tricks that can really tip the scales in your favor.
- Bottom Heat is Your Friend: If you can, place your pots on a heat mat designed for propagation. This gentle warmth from below encourages root development much faster than ambient room temperature alone. It’s like giving your cuttings a warm little embrace.
- Don’t Drown Them: While humidity is essential, overwatering the soil is the quickest way to rot your cuttings. Let the surface of the soil dry out slightly between waterings. You can check this by gently poking your finger into the soil. It should feel moist, not soggy.
- Patience, Young Grasshopper: Elaeocarpus kaalensis isn’t the fastest rooter. You might be waiting several weeks, even up to two months, for good root growth. Don’t be tempted to pull them up to check too early! Gently tugging on a cutting – if it offers resistance, roots are forming.
Aftercare & Troubleshooting
Once you see signs of root growth, usually indicated by a gentle tug offering some resistance or new leaf growth at the tip, it’s time for a change of pace.
Gradually remove the plastic cover or dome over a few days to allow the new plant to acclimate to drier air. Continue to water when the top inch of soil feels dry. Once your new Elaeocarpus kaalensis is well-established and showing strong, consistent growth, you can repot it into a slightly larger container or its permanent garden spot.
Now, what if things seem to be going wrong? The most common culprit is rot. This looks like a black, mushy end to your cutting. It’s usually a sign of overwatering and poor drainage. If you see this, unfortunately, that cutting is likely lost. Your best bet is to remove it immediately to prevent the rot from spreading. Ensure your propagation mix is airy and that you’re not watering too frequently. If your cuttings just seem to be wilting and never take off, they might not have rooted, or the environment wasn’t humid enough, leading to excessive water loss.
A Little Encouragement to Finish
Propagating plants is a journey, and it’s one filled with learning. Don’t be discouraged if every cutting doesn’t make it. Each attempt teaches you something new. Celebrate the successes, learn from the setbacks, and most importantly, enjoy the process. There’s a real satisfaction in nurturing a new life from a simple stem. Happy propagating!
Resource:
https://identify.plantnet.org/k-world-flora/species/Elaeocarpus%20kaalensis%20Däniker/data