Oh, hello there, fellow plant enthusiast! Grab a mug of your favorite beverage, because I’ve got something exciting to share with you today. We’re going to dive into the wonderful world of Dracunculus canariensis, affectionately known as the Dragon Arum or Canary Island Arum. Trust me, adding this beauty to your collection is a delightful journey, and propagating it yourself? Pure garden magic!
Why You’ll Love Propagating Dragon Arum
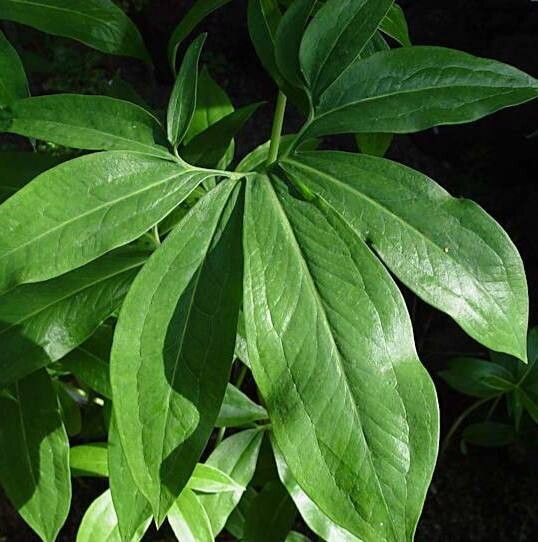
There’s something incredibly satisfying about nurturing a new plant from a tiny piece of its parent. The Dragon Arum, with its striking architectural leaves and intriguing bloom, offers a real “wow” factor. It’s not your everyday houseplant, and seeing your own propagated specimen thrive can bring a special kind of pride. Now, is it a beginner’s plant? I’d say it’s moderately easy. It requires a bit of attention and understanding of its needs, but with these tips, you’ll be well on your way.
When to Get Your Hands Dirty
The absolute best time to propagate Dracunculus canariensis is during its active growing season, which typically falls in the late spring to early summer. This is when the plant is bursting with energy, and the cuttings will have the best chance of rooting quickly. You’ll often see new growth emerging from offsets or the main corm around this time.
Your Propagation Toolkit
Here’s what you’ll want to have on hand before you begin:
- Sharp Pruning Shears or a Clean Knife: For making clean cuts. Sterilize them with rubbing alcohol before and between uses!
- Well-Draining Potting Mix: I love a mix of equal parts perlite and a good quality potting soil. Some gardeners even add a bit of orchid bark for extra aeration.
- Small Pots or Seed Starting Trays: Clean pots are essential to prevent disease.
- Rooting Hormone (Optional, but Recommended): A powder or liquid rooting hormone can give your cuttings a helpful boost.
- Watering Can or Spray Bottle: For gentle watering.
- Gloves: The sap can be a bit irritating to some people, so it’s always a good idea.
My Favorite Ways to Grow More Dragon Arum
The most successful method for me has always been division of the corms. These plants produce small offsets, or baby corms, that naturally grow around the base of the parent plant.
- Gently Unpot the Parent Plant: Wait until the foliage has started to die back naturally after flowering, or carefully dig around it in the active growing season. The goal is to expose the corms without damaging them.
- Identify the Offsets: Look for smaller, bulb-like structures attached to the main corm. They might be quite close, or a little further out.
- Separate Carefully: This is the most crucial step. Using your clean knife or even just your fingers, gently twist or cut the offset away from the mother corm. Try to retain as much of its own tiny root system attached as possible. If there are no roots, don’t worry too much; it can still root.
- Allow to “Cure” (Optional but helpful): If you’ve had to make a clean cut, it’s a good idea to let the offsets sit for a day or two in a dry, airy spot. This allows the cut end to callus over, which helps prevent rot.
- Potting Up: Fill your small pots with the well-draining mix. Plant each offset about 1-2 inches deep, with the pointed end (if you can tell) facing upwards.
- Watering: Give them a light watering to settle the soil. Don’t drench them.
Another method, though slightly less common for this plant, is from stem cuttings if you have new shoots emerging.
- Select a Healthy Shoot: Look for a vigorous new shoot that’s a few inches long and has at least two leaves.
- Make a Clean Cut: Use your sterilized shears to cut the shoot just below a leaf node.
- Prepare the Cutting: Remove the lower leaves, leaving just a couple at the top. If using rooting hormone, dip the cut end into it now.
- Planting: Insert the cut end into your prepared potting mix, about an inch deep.
- Water Lightly: Mist the soil surface to keep it moist.
My “Secret Sauce” for Success
Over the years, a few little tricks have really made a difference for me:
- Think “Tender Loving Care,” Not “Drowning”: Dragon Arums, especially their corms, are prone to rot if kept too wet. When you water your new propagations, be gentle and don’t overdo it. A light sprinkle is often all they need until you see signs of new growth.
- Patience is a Virtue (and a Requirement!): These plants can be slow to show signs of life. Don’t be discouraged if you don’t see leaves emerging within a few weeks. Sometimes, they’re just busy building up their root systems underground. Give them time. I’ve had cuttings sit for months before showing any activity.
What to Do After Roots Appear (and What to Watch For)
Once you start to see new leaf growth emerging, that’s your cue that roots are forming!
- Gradual Acclimation: Continue to water sparingly, but you can start to increase the frequency slightly as the plant grows.
- Light: Place your new plants in bright, indirect light. Avoid direct sun, which can scorch young foliage.
- Fertilizing: Wait until your plant has developed a good amount of foliage before introducing a diluted liquid fertilizer during the growing season.
Common Signs of Trouble: The biggest enemy is moisture. If your corms feel mushy or have a foul smell, that’s rot. This often happens from overwatering or poor drainage. Unfortunately, if the corm itself has rotted significantly, it’s usually too far gone. If you see a cutting shriveling up and turning black, it’s also a sign of rot or it simply being too dry.
Happy Roots, Happy Gardener!
Propagating Dracunculus canariensis is a rewarding endeavor that allows you to multiply the beauty of this unique plant. Remember to be patient, provide the right conditions, and celebrate every tiny sign of progress. Enjoy the process; it’s all part of the wonderful journey of gardening!
Resource:
https://identify.plantnet.org/k-world-flora/species/Dracunculus%20canariensis%20Kunth/data