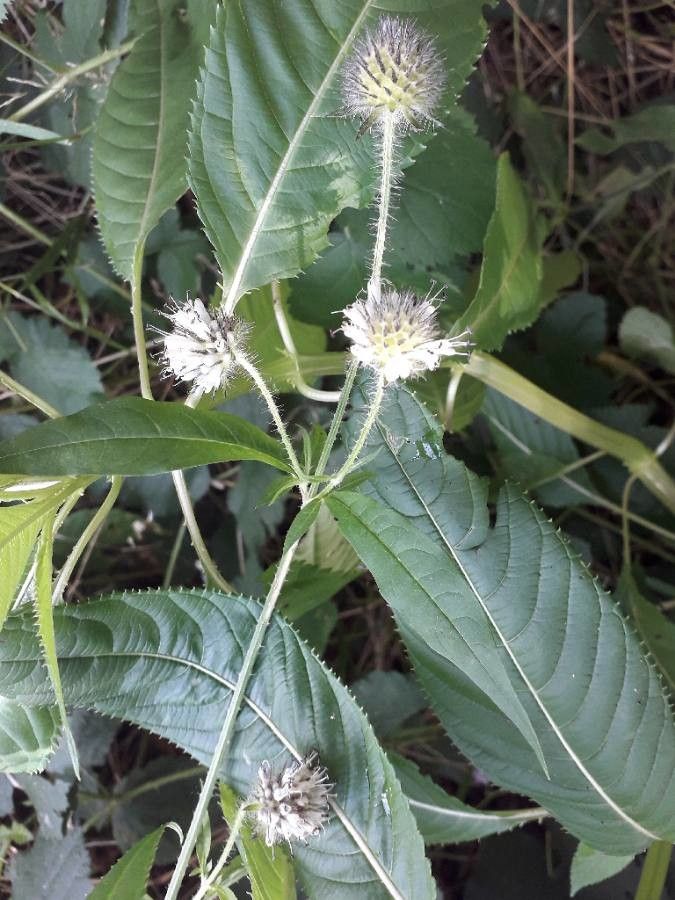
Hello, fellow garden enthusiasts! Today, I want to chat about a plant that’s captured my heart with its unique charm and resilience: Pilosella, or Devil’s Bit Scabious. Its delicate, prickly globe-shaped flowers are an absolute magnet for pollinators, and there’s something incredibly satisfying about creating new plants from an existing one. If you’re looking to expand your flowering meadows or share a bit of natural beauty with friends, propagating Pilosella is a wonderful way to go. And the good news? It’s quite forgiving, making it a lovely project even if you’re just starting to dip your toes into propagation waters.
The Best Time to Start
For the highest success rate with Pilosella, I always aim to propagate in late spring or early summer. This is when the plant is actively growing and has plenty of energy to dedicate to rooting. You’ll want to work with healthy, vigorous stems that haven’t yet flowered or are just beginning to bud. Waiting until after the main flowering flush has passed also works well if you missed the spring window.
Supplies You’ll Need
Here’s what you should gather before you begin:
- Sharp pruning shears or a clean, sharp knife: For taking clean cuts.
- Small pots or seed trays: Cleaned thoroughly, of course!
- A good potting mix: I prefer a well-draining mix, often a blend of equal parts potting soil and perlite or coarse sand. This is crucial to prevent waterlogging.
- Rooting hormone (optional but helpful): A powder or gel formulation can speed up root development.
- Watering can with a fine rose attachment: For gentle watering.
- Plastic bags or propagation cloches: To create a humid environment.
- Labels and a marker: So you don’t forget what you’ve planted where!
Propagation Methods: Let’s Get Our Hands Dirty!
The most successful way I’ve found to propagate Pilosella is through stem cuttings. It’s pretty straightforward and yields great results.
- Select and Cut: Choose a healthy, non-flowering stem from your Pilosella plant. Using your clean snips or knife, make a cut just below a leaf node. A leaf node is where a leaf attaches to the stem – that’s where the magic happens for root formation. Aim for cuttings that are about 4-6 inches long.
- Prepare the Cutting: Gently remove the lower leaves from the cutting, leaving just a few at the very top. This prevents them from rotting in the soil or water. If your cutting is quite long, you can cut the leaves in half to reduce water loss.
- Apply Rooting Hormone (Optional): If you’re using rooting hormone, dip the cut end of the stem into the powder or gel. Tap off any excess.
- Plant Your Cuttings: Fill your pots or trays with your well-draining potting mix. Make a small hole in the center with your finger or a pencil. Insert the cut end of the Pilosella cutting into the hole, ensuring the leaf nodes are below the soil surface. Gently firm the soil around the cutting.
- Create Humidity: Water the soil gently until it’s moist but not soggy. Then, cover the pots with a plastic bag or a propagation cloche. This traps moisture and creates that essential humid environment for the cuttings to root. You can prop the bag up with a few small sticks so it doesn’t touch the leaves.
- Placement: Place your cuttings in a bright location that doesn’t receive direct, harsh sunlight. A shaded spot on a patio or a windowsill that gets bright, indirect light is perfect.
The “Secret Sauce” (Pro Tips)
Over the years, I’ve picked up a few tricks that seem to make all the difference:
- Don’t let the leaves touch the water (if you try water propagation temporarily!): While stem cuttings in soil are my preference for Pilosella, if you experiment with letting them sit in a jar of water for a bit before planting, always ensure the leaves are well above the water line. Any submerged leaf matter is a recipe for rot.
- Bottom heat is your friend: If you happen to have a seedling heat mat, placing your pots on it can significantly speed up root development. It mimics the warmth of spring and really encourages those roots to get going. Just ensure the soil doesn’t dry out more quickly when using heat.
- Be patient with the nodes: The leaf nodes are your powerhouses. Make sure you have at least one or two nodes buried beneath the soil surface for the best chance of root formation.
Aftercare & Troubleshooting
Once your cuttings have rooted – you’ll usually see new leaf growth within 3-6 weeks, and you can gently tug on them to feel for resistance – it’s time for their next stage.
- Gradually Introduce: Slowly acclimate your new Pilosella plants to their new environment by opening the plastic cover a little each day for a few days. This prevents shock.
- Watering: Continue to water them regularly, keeping the soil consistently moist but never waterlogged.
- Potting Up: Once they have a good root system and are showing strong new growth, you can pot them up into slightly larger containers or plant them out in their final garden spot, depending on the weather.
Now, what if things don’t go as planned? Wilting or yellowing leaves on the cutting itself are common early signs and can sometimes be reversed by ensuring consistent moisture and humidity. However, if the stem starts to turn mushy and black, that’s usually a sign of rot, often due to overwatering or poor drainage. Don’t be discouraged! It happens to the best of us. Simply discard the rotten cutting and try again, perhaps with a slightly drier soil mix or less frequent watering.
A Encouraging Closing
Gardening is a journey of observation and patience, and propagation is a beautiful part of that. Don’t be afraid to experiment and learn from each attempt. Watching those tiny new Pilosella plants develop their own roots is incredibly rewarding. So grab your shears, get your hands dirty, and enjoy the process of creating more of these wonderful blooms for your garden! Happy propagating!
Resource:
https://identify.plantnet.org/k-world-flora/species/Dipsacus%20pilosus%20L./data