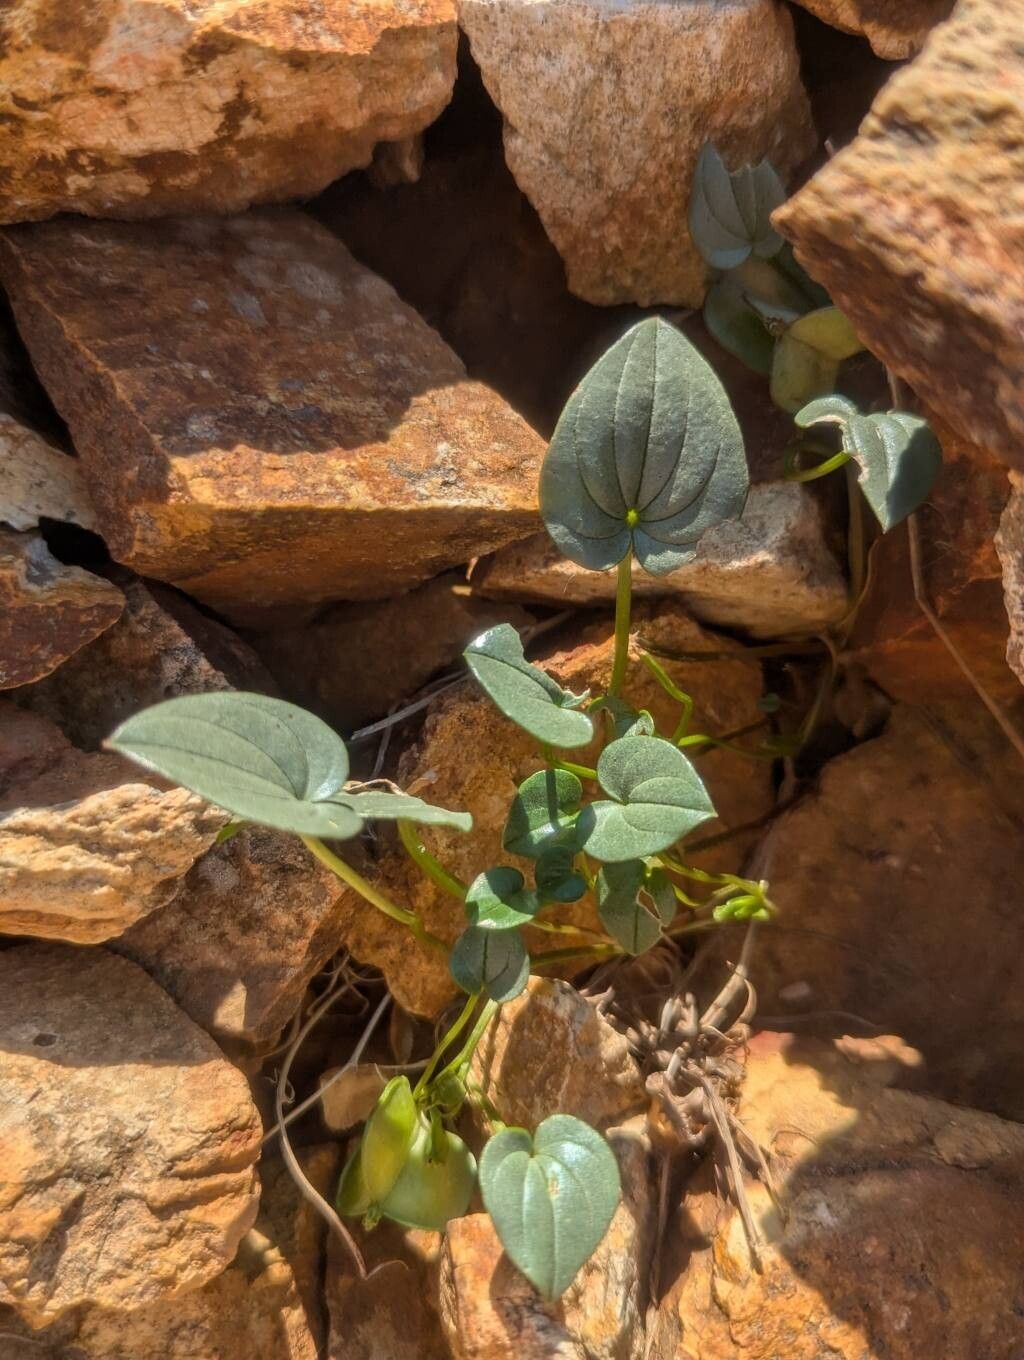
Hello fellow plant enthusiasts! I’m just bubbling with excitement to share a little secret with you today: how to bring forth new life from Dioscorea pyrenaica. This little woodland gem, with its delicate, heart-shaped leaves and subtle beauty, is a true delight to have in any shady corner of your garden or a cool, bright spot indoors. Propagating it is incredibly rewarding, allowing you to multiply its charm without breaking the bank. Now, I’ll be honest, Dioscorea pyrenaica isn’t the most robust plant for a complete beginner to propagate, but with a little care and attention, you’ll find it quite manageable. Think of it as a gentle introduction to propagating more “particular” plants.
The Best Time to Start
For the highest chance of success, I always recommend starting your Dioscorea pyrenaica propagation efforts in the late spring or early summer. This is when the plant is actively growing, putting out fresh, vigorous shoots, and has plenty of energy reserves to dedicate to developing new roots. Trying to propagate when it’s dormant or just starting to wake up can be a bit of a gamble.
Supplies You’ll Need
Before we dive in, let’s gather our tools. Having everything ready makes the process so much smoother.
- Sharp pruning shears or a clean, sharp knife: For making clean cuts.
- Rooting hormone powder (optional but recommended): This little helper can significantly boost root formation. Look for one formulated for stem cuttings.
- Small pots or trays with drainage holes: Tiny pots are perfect for starting out.
- A well-draining potting mix: I like to use a mix of equal parts peat moss, perlite, and a bit of compost. This ensures good aeration and prevents waterlogging.
- Watering can with a fine rose: For gentle watering.
- A clear plastic bag or dome: To create a humid microclimate around your cuttings.
- Optional: A heat mat: This provides gentle warmth from below, encouraging root development.
Propagation Methods: Let’s Get Our Hands Dirty!
Dioscorea pyrenaica is most reliably propagated through stem cuttings. It’s straightforward, and with a bit of patience, you’ll have a lovely little patch of these beauties in no time.
-
Take Your Cuttings: Look for healthy, semi-hardwood stems that are at least 4-6 inches long. These are the stems that are no longer completely soft and green but haven’t yet become woody. Gently cut just below a leaf node (where a leaf attaches to the stem). You’ll want to take multiple cuttings, as not every one will be successful, and that’s perfectly normal!
-
Prepare the Cuttings: Remove the lower leaves from your cuttings, leaving just a couple of pairs at the top. This prevents the lower leaves from rotting once buried in the soil and directs the plant’s energy towards root development. If your cuttings are very long, you can cut the remaining leaves in half to reduce water loss.
-
Apply Rooting Hormone (Optional): Dip the cut end of each stem into a rooting hormone powder. Tap off any excess. This step isn’t strictly necessary, but it can give your cuttings a real boost.
-
Plant Your Cuttings: Fill your small pots or trays with your well-draining potting mix. Gently insert the cut end of each prepared cutting into the soil, about an inch deep. Make sure the nodes where the leaves were removed are submerged.
-
Create a Humid Environment: Water the soil gently until it’s moist but not soggy. Then, cover the pots with a clear plastic bag, ensuring the bag doesn’t touch the leaves or stems, or use a humidity dome. This creates a mini greenhouse effect, keeping the humidity high, which is crucial for cuttings.
-
Provide Light and Warmth: Place the pots in a bright location that receives indirect light. Direct sun will scorch your delicate cuttings. If you have a heat mat, place the pots on it. This gentle warmth from below can significantly speed up the rooting process.
The “Secret Sauce” (Pro Tips)
Here’s where we get into the nitty-gritty, the things that make a real difference:
- Don’t let those leaves touch the water! If you’re doing a water propagation experiment (which I sometimes do just to watch the roots grow!), make sure only the stem is submerged. Any foliage dipped in water is a prime candidate for rot, and that’s the quickest way to lose your precious cutting.
- Bottom heat is your friend. For Dioscorea pyrenaica, providing that little bit of warmth from the soil’s surface, via a heat mat, is often the difference between a successful rooting and a shriveled stem. It mimics the soil temperature in its natural habitat during the growing season.
- Be patient with those aerial roots. Sometimes, before you see much happening in the soil, you might notice tiny white aerial roots forming on the stem above the soil line. Don’t get discouraged! This is a good sign that the plant is trying to establish itself. Keep the humidity high and wait.
Aftercare & Troubleshooting
Once you start to see signs of new growth, like tiny new leaves emerging, or feel a gentle tug when you lightly pull on a cutting, it’s a good indication that roots have formed! You can gently remove the plastic bag or dome for a few hours each day to acclimate them to normal humidity. Gradually increase this time over a week.
The most common issue you’ll encounter is rot. If you see a cutting turning black and mushy, sadly, it’s likely beyond saving. This is usually due to too much moisture and poor drainage. Ensure your soil is well-draining and try not to overwater. A little bit of stem rot can sometimes be salvaged if you can catch it early and remove the affected part, but it’s best to prevent it by getting the watering right from the start.
A Little Encouragement to Finish
Propagating plants is a journey, and Dioscorea pyrenaica can teach us a lot about patience. Don’t be discouraged if not every cutting takes off. Each attempt is a learning experience, and the reward of nuring a new plant from just a stem is truly special. So, get your supplies, pick out a healthy-looking stem, and enjoy the process of bringing more of this lovely plant into your world. Happy gardening!
Resource: