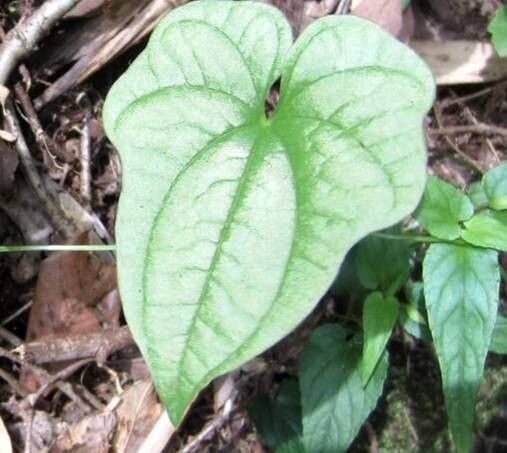
Oh, hello there! Come on in, grab a mug, and let’s chat about one of my absolute favorite plants: Dioscorea polystachya, also known charmingly as the Chinese Yam or Nagaimo. If you’re looking for a rewarding plant to get to know, this is it. It’s a vigorous climber with lovely, heart-shaped leaves and, best of all, it produces these fascinating aerial tubers that are just begging to be propagated. It’s a plant that connects you to something a bit wild and wonderful right there in your own garden. And the best part? It’s surprisingly forgiving and a great plant for those of you just dipping your toes into the propagation pond.
The Best Time to Start
My favorite time to get started with Dioscorea polystachya is in the late spring or early summer. This is when the parent plant is actively growing and has plenty of energy to spare for new beginnings. You’ll see fresh shoots emerging and the aerial tubers will be developing nicely. Trying to propagate too early, before the plant has really woken up, can be a bit of a gamble, and doing it too late in the season might not give your new babies enough time to establish before winter.
Supplies You’ll Need
Before we dive in, let’s get our toolkit ready. Nothing too fancy, just the usual suspects for a happy propagation session:
- Sharp Pruning Shears or a Clean Knife: For making nice, clean cuts.
- Well-Draining Potting Mix: I like a blend of peat moss, perlite, and a bit of compost. You want it to hold some moisture but not get waterlogged.
- Plant Pots or Trays: Small ones are perfect for starting out.
- Rooting Hormone (Optional but helpful): A powder or gel can give your cuttings a little boost.
- Watering Can or Mister: For gentle hydration.
- Small Stakes or Trellis: For your new climbers to grab onto.
- Labels: Trust me, you’ll forget what you planted!
Propagation Methods
Now, let’s get our hands dirty! Dioscorea polystachya is quite generous, and you can multiply it using a couple of easy methods.
1. Propagating from Aerial Tubers
This is the most straightforward and, in my opinion, the most fun way to propagate Chinese Yam.
- Locate the Aerial Tubers: As the plant grows, you’ll notice little potato-like structures forming in the leaf axils along the vine. These are your target! They’ll be around the size of a small grape when they’re ready.
- Carefully Detach: Once they’ve reached a decent size, gently twist or snip them off from the vine. It’s usually best to do this when they feel firm.
- Plant Them Up: Fill your small pots with your prepared potting mix. Make a little hole in the center, about an inch deep.
- Place and Cover: Set your aerial tuber in the hole, cut side down if you can tell, and gently cover it with soil.
- Water Gently: Give them a light watering, so the soil is moist but not soggy.
- Placement: Keep the pots in a warm, bright location, but out of direct, harsh sunlight. They don’t need scorching heat, just gentle warmth.
2. Stem Cuttings (A Little More Patience)
This method takes a bit longer, but it’s another great way to get more plants.
- Take the Cuttings: In late spring or early summer, look for healthy, non-flowering shoots on your parent plant. Using your clean shears, cut a piece of stem about 6-8 inches long. Make sure each cutting has at least two or three nodes (the points where leaves emerge).
- Prepare the Cuttings: Remove any leaves from the bottom node. If the remaining leaves are very large, you can cut them in half to reduce water loss.
- Rooting Hormone (Optional): Dip the cut end of the stem into rooting hormone powder or gel. Tap off any excess.
- Planting: Fill your pots with your well-draining potting mix. Make a hole with your finger or a pencil.
- Insert and Firm: Insert the prepared cutting about 2 inches into the soil, ensuring the nodes without leaves are buried. Gently firm the soil around the stem.
- Water and Cover: Water gently. You can cover the pot with a clear plastic bag to create a humid environment. Make sure the leaves aren’t touching the plastic. If they are, prop it up with sticks.
- Placement: Keep them in a warm spot with bright, indirect light.
The “Secret Sauce” (Pro Tips)
Here are a few little tricks I’ve picked up over the years that really make a difference:
- Don’t Overcrowd Your Tubers: When planting aerial tubers, give each one its own little space. They need room to breathe and start sending out roots without competing with their neighbors. If you cram too many into one pot, you risk rot.
- Bottom Heat is Your Friend for Cuttings: If you’re doing stem cuttings and want to speed things up, a warm propagation mat placed underneath your pots can work wonders. It encourages root development from below, even if the air temperature isn’t scorching.
- Watch for the Soil Level: When watering both methods, water from the bottom if possible (by placing pots in a tray of water) or water gently at the base of the plant. This prevents washing soil away from the developing roots or tubers and reduces the risk of fungal diseases on the leaves and stems.
Aftercare & Troubleshooting
Once you see signs of life – that’s the magical moment! New shoots emerging from the soil for tubers, or tiny leaves unfurling on cuttings – you’re on your way.
- Gradual Acclimation: If you covered your cuttings, start to gradually remove the plastic bag over a few days to let them get used to the lower humidity.
- Watering Routine: Keep the soil consistently moist but never waterlogged. Overwatering is the quickest way to invite trouble like rot. Your new plants will tell you if they’re thirsty – the soil will start to feel dry to the touch.
- First Feeding: Once your cuttings have a good root system and are growing actively, you can give them a diluted liquid fertilizer once every two to three weeks.
- Provide Support: As soon as they start to show that climbing instinct, introduce them to a small stake or trellis. They’re natural climbers!
The most common sign of trouble is rot. If you see your tuber or cutting turn mushy, black, and smell unpleasant, it’s likely rotted. This is usually due to too much moisture and not enough air circulation. Don’t despair, though! Sometimes, if only part of the tuber has rotted, you can carefully trim away the bad bits and replant the healthy section.
A Encouraging Closing
Propagating Dioscorea polystachya is such a rewarding journey. It’s about patience and a little bit of gentle coaxing. Don’t get discouraged if your first attempt isn’t a roaring success. Every gardener has had their share of wilted cuttings and stubbornly dormant tubers! Just keep trying, enjoy the process, and celebrate those little green shoots when they finally appear. Happy propagating!
Resource:
https://identify.plantnet.org/k-world-flora/species/Dioscorea%20polystachya%20Turcz./data