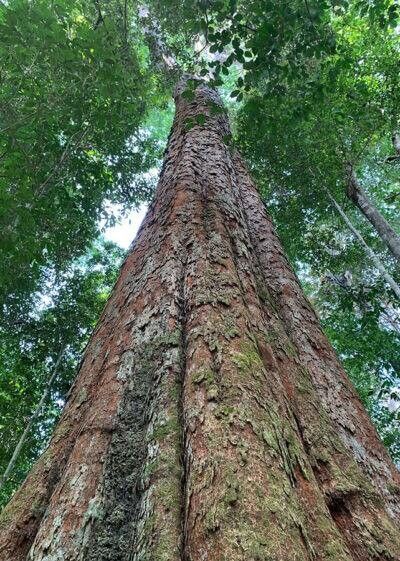
Hello, fellow plant enthusiasts! It’s so lovely to be here with you today. You know, there’s a certain magic in seeing a tiny cutting unfurl into a healthy, thriving plant. And if you’ve ever admired the elegant, architectural beauty of a Dinizia excelsa, you’re in for a treat. These magnificent trees are truly breathtaking, and propagating them is a wonderfully rewarding endeavor for any gardener. Now, I won’t lie to you – Dinizia excelsa can be a bit of a diva, and might not be the absolute easiest plant for a complete beginner. But with a little patience and the right approach, you can absolutely succeed!
The Best Time to Start
The key to successful propagation, for most plants including Dinizia excelsa, lies in timing. You’ll find your best results during the active growing season, which typically means late spring through summer. This is when the plant has the most energy to put into developing new roots. Look for stems that are semi-hardwood – not brand new, floppy growth, but also not old, woody stems. They should have a bit of flexibility to them.
Supplies You’ll Need
Gathering your materials beforehand makes the whole process smoother. Here’s what you’ll want to have on hand:
- Sharp Pruning Shears or a Clean Knife: Essential for making clean cuts. Sterilize them with rubbing alcohol to prevent disease.
- Rooting Hormone: While not strictly mandatory, a good quality rooting hormone powder or gel can significantly boost your success rate.
- Well-Draining Potting Mix: I love a mix of perlite, peat moss, and a little bit of compost. It needs to allow for good airflow and prevent waterlogging.
- Small Pots or Propagation Trays: Terracotta pots are great as they breathe.
- Watering Can or Spray Bottle: For gentle watering.
- Clear Plastic Bags or a Propagation Dome: To create a humid environment.
- Labels and a Pen: To keep track of your cuttings!
Propagation Methods: Taking Stem Cuttings
For Dinizia excelsa, taking stem cuttings is generally the most reliable method. Here’s how I do it:
- Select Your Cuttings: Choose healthy, non-flowering stems that are about 4-6 inches long. Make sure each cutting has at least two sets of leaves.
- Make the Cut: Using your sterilized shears or knife, make a clean cut just below a leaf node (where a leaf meets the stem). This is where the magic of rooting is most likely to happen.
- Prepare the Cutting: Gently remove the lower leaves, leaving just a couple of sets at the top. This reduces moisture loss and prevents leaves from rotting in the soil.
- Apply Rooting Hormone: Dip the cut end of the stem into your rooting hormone, tapping off any excess.
- Plant Your Cuttings: Fill your small pots with the well-draining potting mix. Make a pilot hole with your finger or a pencil, then insert the cutting, ensuring the bottom leaf nodes are buried in the soil. Gently firm the soil around the stem.
- Water Gently: Water thoroughly but carefully, so as not to dislodge the cuttings.
- Create Humidity: Cover the pots with a clear plastic bag or a propagation dome. Make sure the leaves don’t touch the plastic. You can prop up the bag with a skewer if needed.
The “Secret Sauce” (Pro Tips)
Here are a couple of tricks that have really helped me over the years:
- Bottom Heat is Your Friend: If you have a seedling mat or can place your pots in a warm spot, providing gentle bottom heat can significantly accelerate root development. Aim for a consistent temperature around 70-75°F (21-24°C).
- Don’t Be Afraid to Prune Your “Mother Plant”: Taking cuttings is essentially pruning! It encourages your parent Dinizia excelsa to branch out and produce more growth, which means more potential cuttings for you down the line.
Aftercare & Troubleshooting
Once your cuttings are planted and covered, place them in a bright spot that receives indirect sunlight. Avoid direct sun, which can scorch the tender new growth. Keep the soil consistently moist, but never waterlogged.
You’ll know your cuttings are rooting when you see new leaf growth. This can take anywhere from 4-8 weeks, sometimes longer. Patience is key!
The biggest challenge you might face is rot. If you see your cuttings turning black and mushy, it’s usually a sign of too much moisture and not enough airflow. If this happens, remove the affected cutting immediately and check your watering routine. Sometimes, damping off can occur if the soil isn’t sterile.
Embrace the Journey
Propagating Dinizia excelsa is a journey, and like any good journey, it has its ups and downs. Don’t get discouraged if your first few attempts aren’t perfect. Every cutting you take, every plant you nurture, is a learning experience. Enjoy the process of watching new life emerge from a simple stem. Happy propagating!
Resource:
https://identify.plantnet.org/k-world-flora/species/Dinizia%20excelsa%20Ducke/data