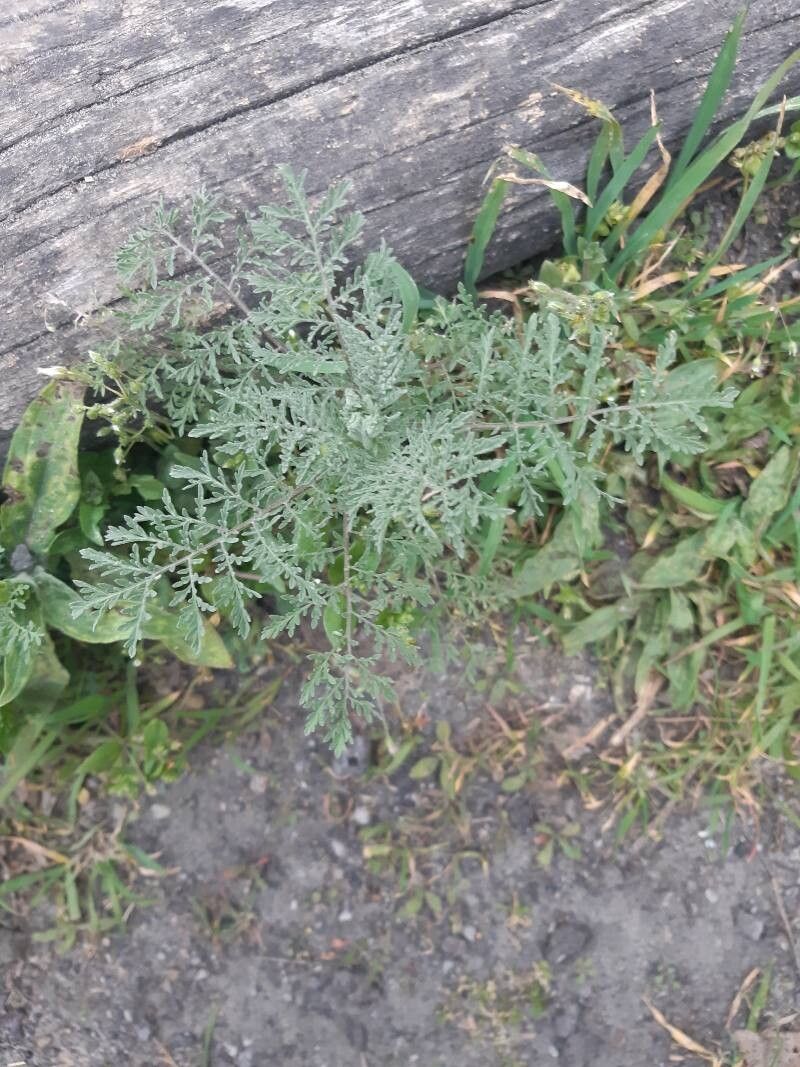
Hello, green thumb friends! I’m so excited to chat with you today about a plant that holds a special place in my heart: Descurainia sophia, also known as Flixweed or Herb-Sophia. Honestly, it’s a bit of an unsung hero in the garden. It’s got these delicate, finely divided leaves and lovely little yellow flowers that bring a touch of wild beauty. Plus, it’s one of those reliable workhorses that doesn’t demand a whole lot of fuss.
Propagating Descurainia sophia is such a rewarding endeavor. You get to witness that magical spark of new life taking hold, and it’s a fantastic way to expand your garden or share these charming plants with friends. For beginners, I’d say it leans towards the easier side of propagation, which is always a win, right?
The Best Time to Start
When it comes to getting the best results, timing is everything. I find that late spring or early summer is your sweet spot for propagating Descurainia sophia from cuttings. This is when the plant is actively growing, so it has plenty of energy to put into developing new roots. You can also often get away with it in early autumn, but the spring/early summer window usually gives you the most vigorous success.
Supplies You’ll Need
Gathering your tools before you begin makes the whole process smoother and less stressful. Here’s what I usually have on hand:
- Sharp Pruning Shears or a Clean Knife: For taking nice, clean cuttings.
- Rooting Hormone (Optional but Recommended): A powder or gel that helps cuttings develop roots faster.
- Well-Draining Potting Mix: A blend of peat moss, perlite, and vermiculite works beautifully. You want something airy that won’t hold too much moisture.
- Small Pots or Seed Trays: With drainage holes, of course!
- Watering Can or Spray Bottle: For gentle watering.
- (Optional) A Clear Plastic Bag or Humidity Dome: To create a mini greenhouse effect.
- (Optional) Bottom Heat Mat: If your propagation area is on the cooler side.
Propagation Methods
Descurainia sophia is quite adaptable, and I’ve found success with a couple of different methods.
Stem Cuttings: My Go-To Method
This is my favorite approach for Descurainia sophia.
- Taking the Cuttings: Look for healthy, non-flowering stems on your established plant. Using your sharp shears, cut a piece about 4-6 inches long. Make the cut just below a leaf node (where a leaf attaches to the stem).
- Prepare the Cuttings: Gently remove the lower leaves from the stem, leaving just a few at the top. This prevents them from rotting in the soil.
- Apply Rooting Hormone: If you’re using rooting hormone, dip the cut end of each stem into the powder or gel. Tap off any excess.
- Planting: Fill your small pots or trays with your prepared potting mix. Make a hole in the center of each with your finger or a pencil. Gently insert the prepared cuttings into the holes, ensuring the bottom leaf nodes are buried in the soil. Firm the soil around the base of the cuttings.
- Watering: Water the soil thoroughly but gently until water drains from the bottom.
Division
If you have a mature Descurainia sophia plant that’s gotten a bit large, division is a simple way to create new plants.
- Excavate the Plant: Carefully dig up the entire plant, keeping as much of the root ball intact as possible.
- Divide: Gently tease apart the root ball into smaller sections. Aim for sections that have both roots and leafy tops. You can use your hands or a clean trowel to help if needed.
- Replant: Plant each division in its own pot or directly into the garden, just as you would a new plant. Water well.
The “Secret Sauce” (Pro Tips)
Here are a couple of little tricks I’ve learned over the years that can really boost your success rate.
- Keep It Moist, Not Soggy: The biggest culprit for failed cuttings is rot. While you want the soil to stay consistently moist, never waterlogged. A good rule of thumb is to water when the top inch of soil feels dry. If you are using a plastic bag or dome, check humidity levels; you don’t want condensation dripping constantly.
- Bottom Heat is Your Friend: Descurainia sophia roots best when the soil is warm. If your propagation area tends to be cool, placing your pots on a gentle heat mat can make a world of difference. It provides that consistent, gentle warmth that encourages root development from below.
Aftercare & Troubleshooting
Once your Descurainia sophia cuttings have successfully rooted (you’ll see new leaf growth and feel resistance when you gently tug on the stem), it’s time to treat them like young plants.
- Gradual Acclimation: If you used a cover, gradually introduce them to less humid conditions over a few days before removing it completely.
- Watering: Continue to water them regularly, allowing the soil to dry slightly between waterings.
- Potting Up: Once they have a decent root system, you can transplant them into slightly larger pots.
- Common Pests: Keep an eye out for aphids, which can sometimes be drawn to young, tender growth. A strong spray of water or organic insecticidal soap can usually handle them.
- Signs of Trouble: The most common sign of failure is rotting. If your cuttings turn black and mushy, they’ve likely succumbed to too much moisture. If they simply wilt and don’t revive after watering, they may not have rooted. Don’t despair, just try again!
A Happy Garden Awaits!
Propagating plants is a journey, and like any good journey, it’s about enjoying the process. Be patient with your little Descurainia sophia starts. Some will take off faster than others, and that’s perfectly natural. Soon enough, you’ll have a lovely collection of these charming plants to enjoy. Happy propagating!
Resource: