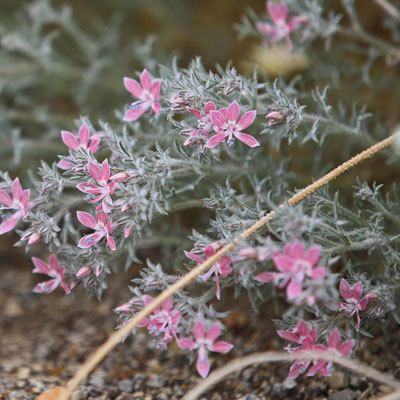
Hello, fellow plant lovers! I’m so glad you’re here. Today, we’re diving into something truly special: propagating Dayia havardii. If you’ve ever admired this plant’s unique charm, its adaptability, or its delightful blooms, you know how wonderful it is to have more of it gracing your home or garden. And trust me, bringing a new life into being from a piece of an existing one? There’s almost nothing more rewarding in this green-thumb journey.
Now, about Dayia havardii. It’s a plant that holds a special place in my heart. Its resilience is captivating, and honestly, while it can be just a tad particular, I find it surprisingly forgiving. Beginners, don’t be shy! With a little guidance, you’ll be propagating this beauty like a pro in no time.
The Best Time to Start
My golden rule for most propagation is to work with the plant’s natural energy. For Dayia havardii, the spring or early summer is your sweet spot. This is when the plant is actively growing and has plenty of vigor. You’re essentially borrowing a bit of that youthful energy to give your new cuttings the best possible start. Avoid trying this during the plant’s dormant period; it’s like asking someone to run a marathon when they’re fast asleep.
Supplies You’ll Need
Before we get our hands dirty, let’s gather our trusty tools. Think of this as preparing your gardening toolkit!
- Sharp Pruning Shears or a Clean Knife: For making clean cuts that heal well.
- A Well-Draining Potting Mix: I like a blend of perlite, vermiculite, and peat moss. For Dayia havardii, something that doesn’t hold too much moisture is key.
- Rooting Hormone (Optional but Recommended): A little powder can give your cuttings a helpful boost.
- Small Pots or Trays: Whatever you plan to start your cuttings in. Make sure they have drainage holes!
- A Spray Bottle: For misting.
- Clear Plastic Bag or Dome: To create a humid environment.
- Patience! This is the most important ingredient.
Propagation Methods
Let’s get down to the good stuff – actually making more Dayia havardii. For this plant, stem cuttings are my go-to method, and it’s incredibly successful.
Stem Cuttings:
- Select a Healthy Mother Plant: Choose a robust, well-established Dayia havardii. Look for stems that are firm and have a good amount of foliage.
- Take Your Cuttings: Using your clean shears or knife, make a cut just below a leaf node. A leaf node is that little bump on the stem where a leaf grows. Aim for cuttings that are about 4-6 inches long. Remove the lower leaves, leaving just the top few.
- Apply Rooting Hormone (If Using): Dip the cut end of the stem into your rooting hormone. Give it a gentle tap to remove any excess.
- Plant Your Cuttings: Fill your small pots with your prepared, moistened potting mix. Make a small hole with your finger or a pencil and carefully insert the cutting. Gently firm the soil around it to ensure good contact.
- Water Gently: Give the pot a light watering. You want the soil to be moist, but not waterlogged.
The “Secret Sauce” (Pro Tips)
Now, here are a few little tricks up my sleeve that often make all the difference:
- The “No Drip” Rule for Water Propagation (if you choose this route): While stem cuttings in soil are my preference for Dayia havardii, if you do try water propagation, a crucial tip is to ensure no leaves are submerged. Leaves sitting in water will rot, which is a sure way to doom your cutting before roots can even think about forming.
- Embrace the Humid Hug: Once your cuttings are planted, cover them with a clear plastic bag or a propagation dome. This traps humidity, mimicking the perfect tropical environment they crave. Make sure to remove the cover for an hour or so every few days to allow for air circulation and prevent fungal issues.
- Bottom Heat is Your Friend: If you have access to a heat mat used for seedlings, placing your pots on it can significantly speed up root development. It encourages those roots to grow downwards and seek out that gentle warmth.
Aftercare & Troubleshooting
Once you’ve spotted those magical little roots emerging from the drainage holes, it’s time to shift gears from propagation mode to nurturing mode.
- Gradual Acclimatization: As your cuttings become more established, slowly introduce them to drier air. Gradually increase the time you leave the plastic cover off. This prepares them for life outside their humid little bubble.
- Gentle Feed: Once the cuttings are showing good growth, you can start them on a very diluted liquid fertilizer – think half-strength or even quarter-strength.
- Watch for Rot: The most common pitfall is overwatering, which leads to rot. If your cutting turns mushy and dark at the base, or if leaves yellow and drop rapidly, it’s often a sign of too much moisture or poor drainage. Sometimes, you can salvage a cutting by trimming away the rotted parts and repotting in fresh, drier soil, but often, it’s best to start again.
A Little Encouragement to Finish
Propagating Dayia havardii is a journey, and like any good gardening adventure, it requires a bit of patience. There will be times when things don’t go exactly as planned, and that’s okay! Every gardener has had cuttings that didn’t make it. The beauty of propagation is that you can always try again, armed with newfound knowledge. So, celebrate your successes, learn from your challenges, and most importantly, enjoy the incredible satisfaction of creating new life from your beloved plants. Happy propagating!
Resource:
https://identify.plantnet.org/k-world-flora/species/Dayia%20havardii%20(A.Gray)%20J.M.Porter/data