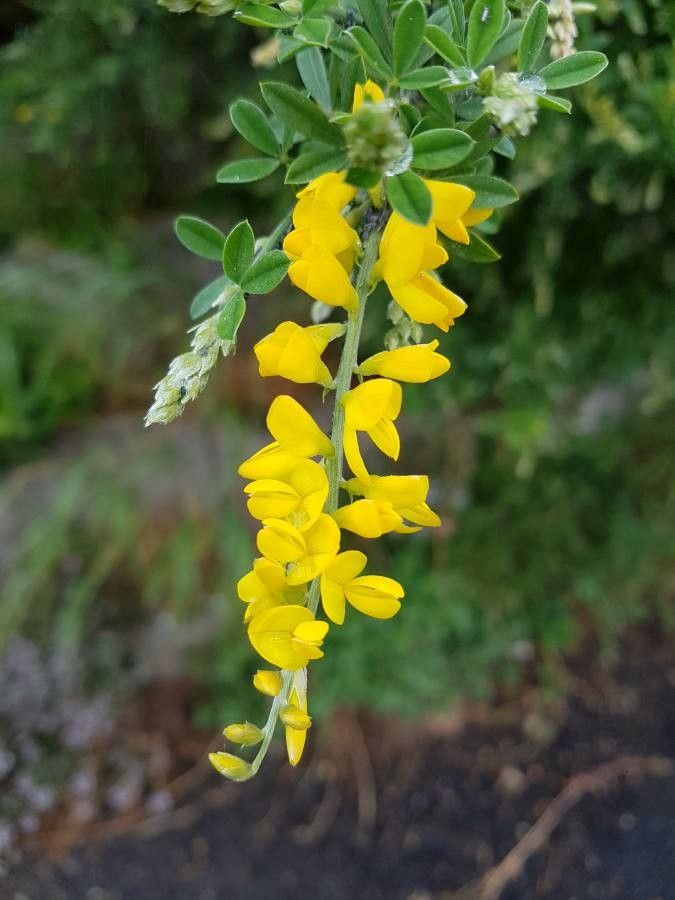
Hello, fellow garden enthusiasts! Today, we’re diving into the wonderful world of Cytisus villosus, also known as Mount Etna Broom. If you’re a fan of those vibrant, pea-like yellow blooms that cascade over your garden in spring and early summer, you’re in for a treat. Propagating this beauty isn’t just about getting more plants; it’s about prolonging that joy, sharing it with friends, and feeling that incredible satisfaction of coaxing new life from a parent plant.
Now, for the big question: is Cytisus villosus a beginner-friendly plant to propagate? I’d say it’s moderately easy. It’s not as foolproof as a hydrangean cutting, perhaps, but with a little attention to detail, you’ll find yourself with a lovely collection of new brooms in no time.
The Best Time to Start
The sweet spot for propagating Cytisus villosus is late spring to early summer. This is when the plant is actively growing, and you can find healthy, semi-hardwood cuttings. You want stems that are firm but still a bit flexible – not brand new, floppy growth, nor old, woody stems. Think of a pencil thickness; that’s often a good indicator.
Supplies You’ll Need
Gathering your supplies beforehand makes the process so much smoother. Here’s what you’ll want to have on hand:
- Sharp Pruning Shears or a Sharp Knife: For clean cuts that heal well.
- Rooting Hormone: A good quality powder or gel specifically for herbaceous or woody cuttings.
- Small Pots or Seedling Trays: Clean ones, please!
- Propagation Mix: A well-draining blend. I like to use a 50/50 mix of perlite and coco coir or a commercial seed-starting mix. Avoid heavy garden soil.
- Plastic Bags or a Propagation Dome: To create a humid environment.
- Watering Can or Spray Bottle: For gentle watering.
- Labels and a Pen: To keep track of what you planted and when!
Propagation Methods: Stem Cuttings
This is my go-to method for Cytisus villosus. It’s reliable and gives you plenty of opportunities.
- Taking the Cuttings: Using your sharp pruning shears or knife, take cuttings from healthy, non-flowering stems. Aim for pieces about 4 to 6 inches long. Make your cut just below a leaf node (where a leaf attaches to the stem).
- Preparing the Cuttings: Gently remove the lower leaves from the cutting, leaving just a few at the top. This prevents them from rotting when they’re in the soil.
- Applying Rooting Hormone: Dip the cut end of each stem into your rooting hormone, tapping off any excess.
- Potting Up: Fill your clean pots with the propagation mix. Make a small hole in the center with your finger or a pencil.
- Inserting the Cuttings: Insert the hormone-coated end of each cutting into the hole, gently firming the soil around it. You can fit several cuttings into one pot, spaced a few inches apart.
- Watering and Humidifying: Water gently until the soil is moist but not waterlogged. Then, cover the pot with a plastic bag or place it inside a propagation dome. This creates a mini greenhouse.
The “Secret Sauce” (Pro Tips)
Here are a couple of things I’ve learned over the years that can really boost your success:
- Think “Air Flow”: While you want humidity, don’t let the leaves of your cuttings touch the plastic bag. If they do, condensation can lead to fungal issues. If the bag sags, prop it up with a few small stakes. I often lift the bag for a few minutes each day to give them a breath of fresh air.
- Bottom Heat is Your Friend: Cytisus villosus loves a little warmth from below to encourage root development. Placing your pots on a heated propagation mat can significantly speed up the rooting process. It mimics that lovely spring soil warmth.
Aftercare & Troubleshooting
Once your cuttings are potted, find them a spot with bright, indirect light. They don’t need direct sun at this stage. Keep the soil consistently moist but never soggy.
You’ll know your cuttings are taking root when you see new leaf growth and they resist a gentle tug when you try to pull them out of the soil. This can take anywhere from 4 to 8 weeks, sometimes longer.
The most common issue you’ll face is rot. If a cutting turns black and mushy, it’s usually a sign of too much moisture and not enough air circulation. Unfortunately, you’ll likely need to discard it and try again, perhaps with a drier mix or by ensuring better airflow.
A Encouraging Closing
Propagating plants is an act of faith, a patient conversation with nature. Don’t get discouraged if some don’t make it – every gardener has their losses. Celebrate each success, however small. Watching those tiny roots form and new growth emerge is one of the most rewarding experiences in gardening. So, grab your pruners, get your hands dirty, and enjoy the journey of growing your own Cytisus villosus! Happy gardening!
Resource:
https://identify.plantnet.org/k-world-flora/species/Cytisus%20villosus%20Pourr./data