Hello there, fellow plant lovers! Gather ‘round, let’s chat about a little green gem that’s captured my heart over the years: Cyperus difformis, or as some of us affectionately call it, False Umbrella Sedge.
A Touch of Grace for Your Water Garden
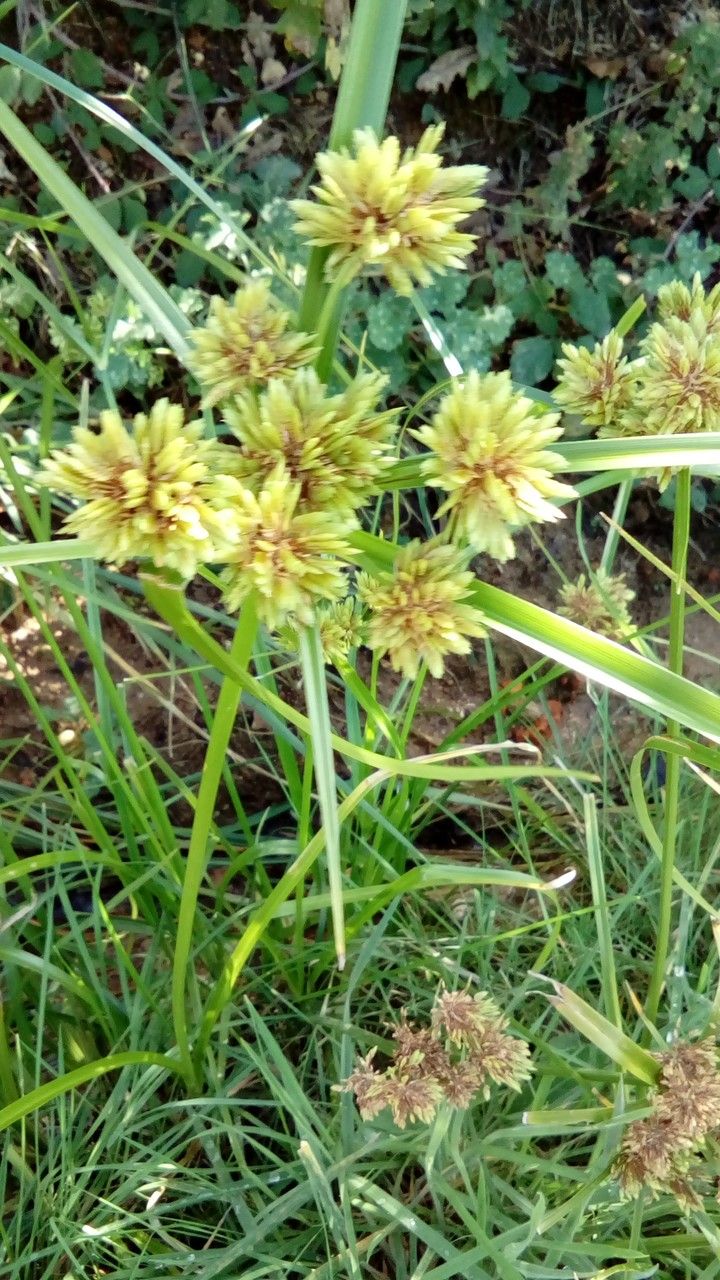
Isn’t there something so peaceful about plants that thrive in water? Cyperus difformis brings a delicate, airy elegance to any aquatic or bog garden. Its fine, grass-like foliage often forms neat, umbrella-shaped clusters, adding a lovely texture. And the best part? Propagating it is a truly rewarding experience. It’s a relatively straightforward plant to propagate, even for those just starting their gardening journey. Watching a tiny piece of your favorite plant sprout new life is incredibly satisfying!
When is it “Go Time”?
For the best luck in coaxing new life from Cyperus difformis, spring and early summer are your prime windows. This is when the plant is actively growing and has the stored energy it needs to put out roots. You can also propagate it during warmer months, but starting in spring gives your new babies a longer, more robust growing season. Look for healthy, vigorous stems on your established plant.
Your Propagation Toolkit
Don’t worry, you won’t need a whole shed full of fancy gadgets. Here’s what I always have on hand:
- Sharp Pruning Shears or Scissors: Clean cuts are crucial.
- Well-draining Potting Mix: A blend of peat moss, perlite, and a bit of sand works wonders. For bogier plants, you can use a mix with more water retention, but ensure it’s not waterlogged.
- Small Pots or Trays: Clean containers are a must to prevent disease.
- Rooting Hormone (Optional but helpful): A powdered or liquid hormone can speed things up.
- Water: Fresh, clean water for watering and, in some cases, propagation.
- A Spray Bottle: For misting your cuttings.
- Labels: Trust me, you’ll thank yourself later!
Bringing New Sedges to Life
Cyperus difformis is pretty obliging when it comes to propagation. Here are a couple of my favorite, easiest methods:
1. Division: The “Separate but Equal” Approach
This is probably the most common and successful method, especially for larger, established clumps.
- Gently Excavate: Carefully dig up your Cyperus difformis plant. You don’t need to yank it out of the ground – a gentle loosening is best.
- Inspect the Roots: Gently shake off some of the excess soil so you can clearly see the root structure.
- Divide and Conquer: Look for natural sections of the plant where roots and shoots are clearly separated. Using your clean hands or a serrated knife, carefully pull or cut the clump into smaller divisions. Each division should have at least a few healthy roots and some shoots.
- Repot: Plant each division into its own pot filled with your chosen potting mix. Make sure the roots are well-covered.
- Water Well: Water thoroughly to settle the soil around the roots.
2. Stem Cuttings: A Bit More Patience, Big Rewards
This method is fantastic for creating lots of new plants from a single mother.
- Select Your Stems: Choose healthy, non-flowering stems from your mature plant. Look for stems that are about 4-6 inches long.
- Make the Cut: Using your sharp shears, make a clean cut just below a leaf node (where a leaf attaches to the stem).
- Prepare the Cutting: Strip off the lower leaves, leaving only a few at the top. If the leaves are very large, you can even cut them in half to reduce water loss.
- Dip in Rooting Hormone (Optional): If you’re using rooting hormone, lightly dip the cut end of the stem into the powder or liquid.
- Plant Your Cuttings: Insert the cut end of each stem into your prepared potting mix, about an inch or so deep. You can fit several cuttings into one pot, but give them a little space.
- Water and Cover: Water gently and then cover the pot with a clear plastic bag or dome. This creates a mini-greenhouse to keep humidity high.
3. Water Propagation: The Transparent Method
This works well for Cyperus difformis, particularly if you’re only taking a few cuttings for immediate potting.
- Prepare Your Cuttings: Follow steps 1-3 from the stem cuttings method.
- Place in Water: Put your prepared cuttings into a clean jar or vase filled with fresh water. Ensure none of the remaining leaves are submerged.
- Location, Location, Location: Place the jar in a bright spot, but out of direct, intense sunlight.
- Change Water Regularly: Change the water every few days to keep it fresh and prevent bacterial growth. You’ll start to see little white roots emerge from the nodes along the stem within a few weeks.
- Pot Up: Once the roots are about an inch long, you can carefully transplant them into pots with potting mix.
The “Secret Sauce” from My Garden Bench
After years of trial and error (and plenty of successes!), here are a few little secrets I’ve learned that can really make a difference:
- Don’t Overcrowd: Whether you’re dividing or planting cuttings, give your new plants a bit of breathing room. Overcrowding leads to poor air circulation, which can invite fungal diseases.
- Consider Bottom Heat: For stem cuttings, especially if your house is a bit on the cooler side, placing your pots on a heated propagator mat can significantly speed up root development. It’s like giving them a warm embrace!
- The “Shake Test” for Divisions: When dividing, I always give each division a gentle shake. If the roots readily fall away from the main clump, it’s a good sign they’re ready to establish independently. If they’re stubborn, be extra gentle with your knife or hands to avoid damaging them.
Nurturing New Growth and What to Watch For
Once your Cyperus difformis has developed a healthy root system (you’ll see new shoots emerging!), it’s time for a little extra TLC.
- Gradually Acclimate: If your cuttings were covered, gradually remove the plastic cover over a few days. Let them get used to the ambient humidity.
- Water Wisely: Keep the potting mix consistently moist, but not waterlogged. For divided plants, ensure the soil is kept damp. New roots are delicate, so avoid letting them dry out completely.
- Light and Love: Place your new plants in bright, indirect light. As they grow stronger, you can slowly introduce them to more sunlight.
Troubleshooting: The most common issue you’ll face is rot. If you see stems turning mushy and black, it’s usually a sign of too much moisture and poor air circulation. In this case, try to increase ventilation and ease up on the watering. If you see cuttings wilting and drying out, they need more humidity – pop that plastic cover back on temporarily!
Go Forth and Propagate!
There you have it! Propagating Cyperus difformis is a wonderfully accessible way to expand your collection or share these graceful plants with friends. Be patient with your new charges; gardening is always a journey. Enjoy the process, celebrate every tiny root, and soon you’ll have a whole water garden full of these lovely sedges. Happy planting!
Resource:
https://identify.plantnet.org/k-world-flora/species/Cyperus%20difformis%20L./data