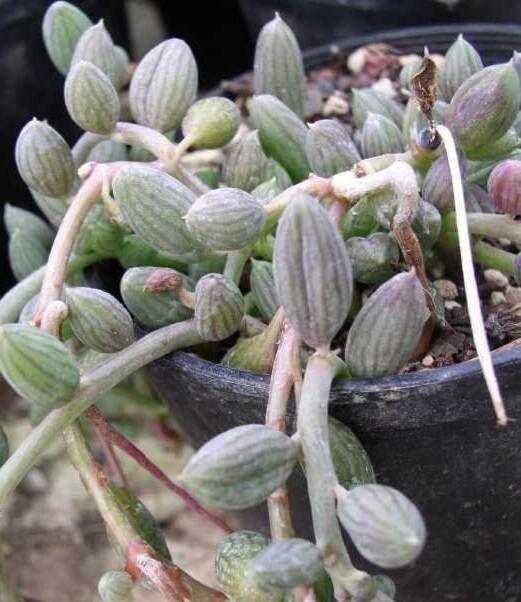
Oh, hello there! Grab a mug of your favorite warm beverage, and let’s chat about one of my absolute favorite plants: Curio herreanus. You know, those gorgeous string of pearls plants, but with a delightful little twist? Their leaves are more like tiny, little upright bananas or raindrops, hence their common name, “String of Bananas” or sometimes “String of Watermelons” depending on how plump they get!
There’s something so captivating about their cascading vines, isn’t there? They look like living jewelry, perfect for adding a touch of whimsy and elegance to any windowsill or shelf. And the best part? Propagating them is incredibly rewarding. You get to watch new life emerge from a tiny piece of a plant you already love. Now, for beginners wondering if it’s tricky, I’d say it’s moderately easy. A little patience and a few key pointers, and you’ll be a pro in no time.
The Best Time to Start
Generally, the spring and early summer are your best bets for propagating Curio herreanus. This is when the plant is actively growing and has the most energy to put into developing new roots. You’re looking for healthy, non-flowering stems that feel firm, not soft or mushy. Think of it as harvesting at the peak of ripeness!
Supplies You’ll Need
Here’s what you’ll want to have on hand before you dive in:
- Sharp, clean pruning shears or a sharp knife: Sanitation is key to prevent disease.
- A well-draining potting mix: I love a good cactus and succulent mix. You can also make your own by combining potting soil with perlite or pumice at a 1:1 ratio.
- Small pots or seed trays: Anything that allows for good drainage.
- Rooting hormone (optional but recommended): This can give your cuttings a little boost.
- A spray bottle: For gentle watering.
- A chunky material for water propagation (if going that route): Like small pebbles or leca balls.
Propagation Methods
There are a couple of really effective ways to get more Curio herreanus, and they’re both quite straightforward.
1. Stem Cuttings (My Go-To!)
This is my favorite method because it’s so efficient.
- First, select a healthy, mature vine. You want a piece that’s at least 3-4 inches long and has a few sets of “bananas” on it.
- Using your clean shears, carefully cut the stem just below a leaf node (where a leaf attaches to the stem).
- Now, gently remove the bottom 1-2 sets of leaves from your cutting. This exposes the stem, which is where the roots will eventually emerge from.
- If you’re using rooting hormone, now’s the time to dip the cut end into it. Just a light coating is fine.
- Let the cutting “callus over” for a day or two. This means letting the cut end dry out a bit. It might sound odd, but this helps prevent rot when you plant it.
- Once callused, gently insert the cut end into your prepared potting mix. Just nestle it in there so the stem base is covered.
- Lightly mist the soil with your spray bottle. You don’t want it soggy, just slightly damp.
- Place the pot in a bright spot with indirect sunlight.
2. Water Propagation
This method lets you see the magic happen!
- Take a stem cutting as described above, and remove the bottom leaves.
- Fill a small jar or glass with water.
- You can add a few pebbles or leca balls to the bottom of the jar to help support the stem and keep the leaves from submerged.
- Place the cutting in the water, ensuring the leaf nodes (where you removed the leaves) are submerged, but the leaves themselves are above the water line.
- Place the jar in bright, indirect light.
- Change the water every few days to keep it fresh and prevent algae growth.
The “Secret Sauce” (Pro Tips)
I’ve learned a few tricks over the years that can really make a difference.
- Don’t let the leaves touch the water: Seriously, this is a big one for water propagation. If the leaves sit in stagnant water, they’re much more prone to rotting, which will take your whole cutting down. Support is your friend!
- Bottom heat can be a game-changer: If you have a seedling heat mat, placing your pots on it can significantly speed up root development. It mimics the warmth of spring and gives those little root buds an extra nudge.
- Be patient with dryness: When using stem cuttings, it’s tempting to water constantly. Resist the urge! Let the soil dry out a bit between waterings. Overwatering is the quickest way to invite rot. You’re aiming for “barely damp,” not “soggy.”
Aftercare & Troubleshooting
Once you see signs of new growth or tiny roots poking out of the bottom of the pot (for stem cuttings) or developing in the water, you’re on your way!
- For stem cuttings, once they have a good root system (you can gently tug and feel resistance), you can start treating them like a mature Curio herreanus. Water when the soil is completely dry.
- For water-propagated plants, carefully transfer them to a pot with well-draining soil once the roots are an inch or two long. Again, water sparingly at first.
The most common sign of failure is rot. If your cutting turns black and mushy, it has likely rotted. This is usually due to too much moisture. If you catch it early, you might be able to salvage a healthy portion of the stem to try again. Another sign is if the leaves start to shrivel and dry up – this could mean it’s too dry, or if it’s happened after rotting, it’s just a consequence.
A Encouraging Closing
See? It’s not as daunting as it might seem. Propagating these beauties is a wonderful way to share the joy of gardening. Be patient with yourself and with your new little plants. Some might take off right away, while others might be a bit slower to show their enthusiasm. Just enjoy the process of nurturing something new. Happy propagating!
Resource:
https://identify.plantnet.org/k-world-flora/species/Curio%20herreanus%20(Dinter)%20P.V.Heath/data