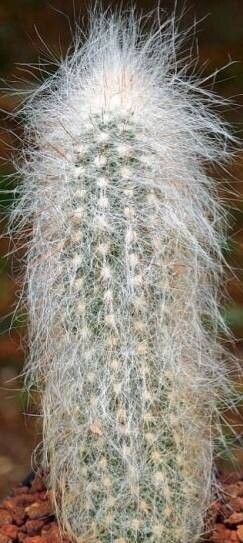
Oh, Cremnocereus albipilosus! If you’ve ever seen one of these beauties, with its striking white, woolly covering and intricate structure, you know exactly why I’m so smitten. They really do have a presence, don’t they? Propagating them yourself is incredibly rewarding. You get to watch a tiny piece of that magic grow into a whole new plant. Now, I’ll be honest, while not impossibly difficult, Cremnocereus albipilosus can be a bit more of a patient endeavor than, say, a common succulent. But don’t let that deter you! With a few key pointers, you’ll be well on your way.
The Best Time to Start
For the most robust growth and quickest root development, spring is your golden ticket. This is when the plant is naturally heading into its active growing season. You want to take cuttings or divisions when the plant is already showing signs of vigor, not when it’s dormant or stressed. Think of it like giving your new little ones the best possible start for a long, healthy life.
Supplies You’ll Need
Gathering your tools beforehand makes the whole process so much smoother. Here’s what I always have on hand:
- Sharp, sterile pruning shears or a clean knife: For taking clean cuts which heal better.
- Well-draining cactus or succulent potting mix: This is crucial! You can buy a commercial mix or make your own with roughly 2 parts potting soil, 1 part perlite, and 1 part coarse sand.
- Rooting hormone (optional but helpful): Especially for stem cuttings, this can give them a little boost.
- Small pots or trays: With drainage holes, of course!
- Newspaper or paper towels: To lay out your cuttings on.
- Mister bottle: For gentle watering.
Propagation Methods
Cremnocereus albipilosus is best propagated from stem cuttings. They don’t typically produce offsets readily, and division is less common for this particular cactus.
Stem Cuttings:
- Select a healthy stem: Look for a mature, healthy stem that isn’t too crowded.
- Make a clean cut: Using your sterile shears or knife, make a clean cut at the base of the stem you wish to take.
- Let it callous: This is SUPER important for cacti. Gently place the cutting on a piece of newspaper or paper towel in a bright, dry spot, out of direct sun, for 3-7 days, or even up to two weeks. You want the cut end to form a dry, hardened skin, or “callous.” This prevents rot when you plant it.
- Apply rooting hormone (optional): If you’re using rooting hormone, dust the calloused end lightly.
- Plant your cutting: Fill your small pot with your well-draining mix. Make a small hole in the center and gently insert the calloused end of the cutting. Firm the soil around it so it stands upright. Don’t bury it too deep!
- Wait for roots: Resist the urge to water immediately! Wait about a week after planting before giving it its first light watering. Keep the soil barely moist, not wet.
The “Secret Sauce” (Pro Tips)
Having gardened for a while, I’ve learned a few tricks that make a difference.
- Don’t rush the callous: Seriously, this is where many people go wrong with cacti. A good, dry callous is your best defense against rot. If you try to plant a wet-cut stem, it’s almost guaranteed to get mushy.
- Bottom heat is your friend: If you can, place your potted cuttings on a propagation mat set to a low temperature (around 70-75°F or 21-24°C). This gentle warmth encourages root formation from below.
- Airflow is king: Good air circulation around your cuttings helps prevent fungal issues. Don’t crowd them, and if you’re in a humid environment, consider a small fan on a low setting.
Aftercare & Troubleshooting
Once you see signs of new growth, or if you gently tug on the cutting and feel resistance (indicating roots!), you’re on your way!
- Gradual watering: Continue to water sparingly. Let the soil dry out between waterings. It’s far better to underwater a cactus cutting than to overwater it.
- Bright, indirect light: Gradually introduce your new plant to brighter light, but avoid harsh, direct sun initially. A brightly lit windowsill is perfect.
- Watch for rot: The most common issue is rot. Signs include a mushy, discolored base, or a cutting that simply collapses. If you see this, unfortunately, it’s usually a lost cause. The best prevention is a well-draining mix and not overwatering.
A Little Patience Goes a Long Way
Propagating Cremnocereus albipilosus takes time, but the satisfaction of nurturing a new life from a piece of your existing plant is well worth the wait. Enjoy the process, connect with nature, and don’t be discouraged if your first attempt isn’t perfect. Happy growing!
Resource: