Oh, hello there! Come on in, grab a cuppa. Today, we’re diving into something wonderfully rewarding: propagating Chlorophytum capense, often known as the Cape Spider Plant or just plain old Spider Plant.
Your Spider Plant’s Appeal and Why Propagating is Terrific
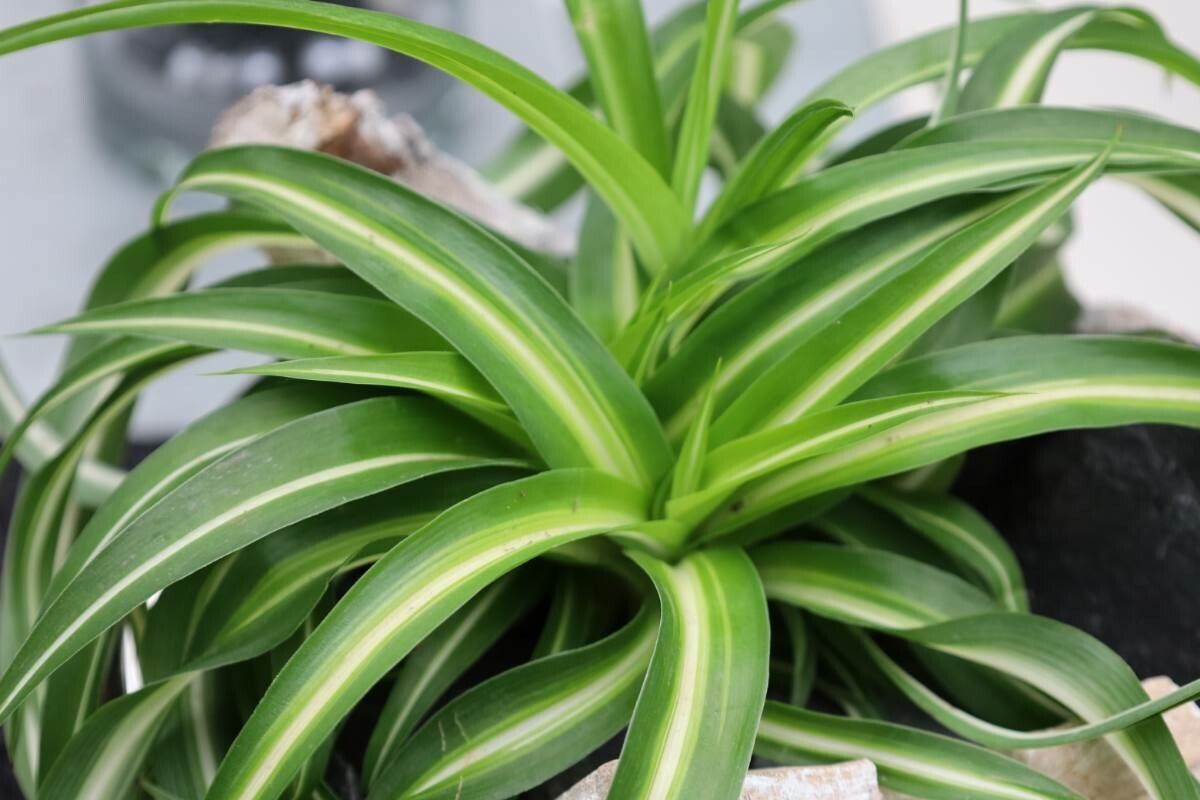
These leafy beauties are just so cheerful and adaptable, aren’t they? They hang out in their spider-like fashion, unfurling those lovely green (or variegated!) leaves, and then, boom, they send out these delightful little plantlets, like tiny babies dangling on long stems. It’s such a treat to watch them appear! And the best part? Propagating them is surprisingly easy, making it the perfect project for anyone just dipping their toes into the wonderful world of plant propagation. You’ll have a whole jungle of new spider plants in no time, ready to share with friends or fill every sunny windowsill you own.
When to Get Started with Your Propagating Adventures
The absolute best time to start is during the active growing season. Think spring and summer. This is when your mother plant is buzzing with energy and more likely to produce those desirable plantlets. You can also have success in early fall, as long as your indoor conditions are warm and bright enough. Honestly, if you see those cheerful little babies forming, don’t hesitate to get started!
What You’ll Need to Get Going
Gathering your supplies is part of the fun. Here’s what I usually have on hand:
- Sharp, clean pruning shears or scissors. A clean cut matters!
- Small pots or containers. Yogurt cups or seed trays work wonderfully. Make sure they have drainage holes.
- A good potting mix. I like a blend of standard potting soil mixed with some perlite or coarse sand to ensure good drainage. Spider plants hate soggy feet.
- A spray bottle filled with water. For keeping things a bit humid.
- Optional (but helpful): Rooting hormone. This can give your cuttings a little boost, though spider plants are often quite eager to root without it.
- A shallow tray or saucer. To catch any excess water.
Let’s Get Propagating! Your Step-by-Step Guide
Spider plants are incredibly versatile, and here are my favorite ways to multiply them:
Method 1: The Easiest Way – Using the Spiderettes (Plantlets)
This is where the magic happens with spider plants!
- Spot the Babies: Look for the long stems (stolons) that your mature spider plant sends out. At the end of these stems, you’ll see tiny plantlets already forming roots. They look like miniature versions of the big plant.
- Detach the Plantlets: Once the plantlets are a decent size, say a couple of inches long and have some visible roots, you can carefully snip them off the mother stem. You can do this with your clean shears. It’s best to cut close to the plantlet itself.
- Pot Them Up: Gently press the base of each plantlet into your prepared potting mix. You can plant one per small pot, or a few together in a slightly larger container if you want them to grow into a fuller clump. Make sure the tiny roots are nestled into the soil.
- Give Them a Drink: Water gently until the soil is evenly moist. Avoid waterlogging.
- Find a Cozy Spot: Place the pots in a spot with bright, indirect light. Too much direct sun can scorch their tender leaves.
Method 2: Water Wonderfulness
This method lets you watch the roots develop, which is so satisfying!
- Harvest Your Plantlets: Just as described above, snip off your spiderettes from the mother plant.
- Into the Water: Fill a clean jar or glass with room-temperature water. Submerge the very base of the plantlets, making sure no leaves are touching the water. This is crucial to prevent rot.
- Select a Sunny Perch: Place the jar in a spot with bright, indirect light.
- Change the Water: Change the water every few days to keep it fresh and prevent stagnation. You’ll start seeing roots emerge within a week or two!
- When to Pot: Once the roots are a good inch or two long and you see a few new leaf tips emerging, it’s time to transplant them into soil just like in Method 1.
Method 3: Division (For Really Mature Plants)
If your spider plant has become a bit of a monster and is producing babies right from its base, you can divide it.
- Gently Remove: Carefully take the entire plant out of its pot.
- Examine the Roots: You’ll see a dense root ball. Look for natural divisions where you can see distinct rosettes of leaves and their own root systems.
- Separate Gently: Using your hands or a clean, sharp knife, gently pull or cut apart the plant into smaller sections. Try to ensure each section has plenty of roots.
- Pot Them Up: Pot each of your new divisions into their own container with fresh potting mix. Water gently and place in bright, indirect light.
The “Secret Sauce” – My Expert Insider Tips
Over the years, I’ve learned a few little tricks that can make a big difference:
- Don’t Overcrowd Your Pots: When planting plantlets straight into soil, resist the urge to cram too many into one pot. Give them a little breathing room to develop their own root systems. They’ll grow together beautifully over time.
- Bottom Heat is Your Friend (Sometimes): While spider plants are pretty forgiving, if you’re propagating in a cooler environment or in the dead of winter, placing your pots on a gentle seedling heat mat can really encourage root development. Just a low, consistent warmth.
- Mist, Don’t Drench: When you first pot up your spiderettes, they don’t have a huge root system to draw moisture. Lightly misting the soil surface daily (or every other day) can help keep things humid and encourage root growth without waterlogging.
Keeping Your New Sprouts Happy and What to Watch For
Once those roots have taken hold and your little spider plant is upright and looking perky, treat it like a miniature version of the mature plant. Give it bright, indirect light and water when the top inch of soil feels dry. Don’t fertilize them right away; wait until they’ve settled in for a few weeks.
Now, what if things go wrong? The most common issue is rot. This usually happens from overwatering or, if using the water method, from leaves sitting in the water. If you see yellowing leaves that quickly turn mushy and brown, or if the base of your plantlet is soft and stinky, it’s a sign of rot. Sadly, there’s not much you can do once rot sets in. Your best bet is to discard the affected plant and start again, ensuring your watering and environmental conditions are correct. Sometimes, a plantlet might just decide it’s not its time, and that’s okay too! Don’t be discouraged.
Happy Propagating!
See? It’s really quite straightforward. Propagation is a wonderful way to connect with your plants and understand their life cycles. Be patient, enjoy the process, and before you know it, you’ll have a happy collection of these wonderful spider plants. Happy gardening!
Resource:
https://identify.plantnet.org/k-world-flora/species/Chlorophytum%20capense%20(L.)%20Voss/data