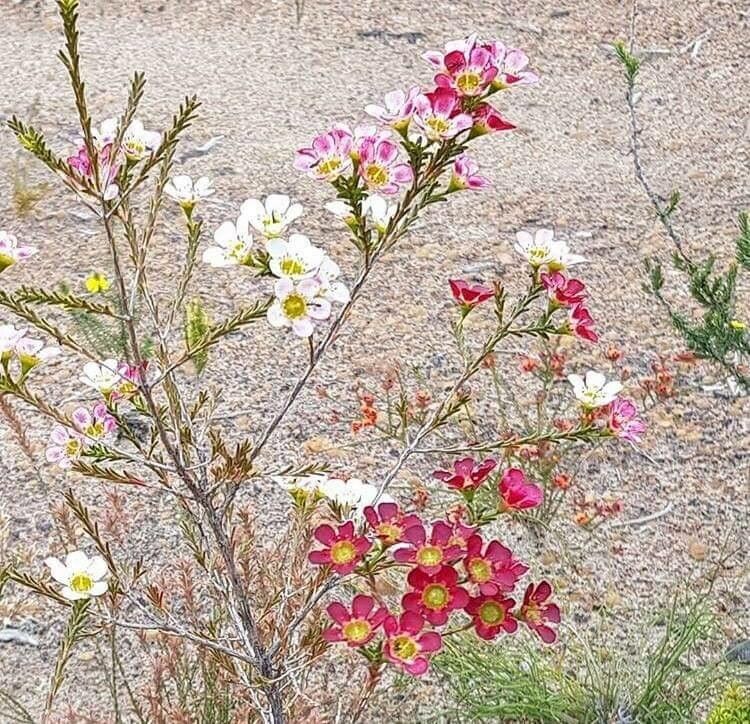
Oh, hello there, fellow plant enthusiast! Grab a mug of your favorite brew, and let’s chat about a truly special plant: the Chamelaucium, or as many of us know it, Geraldton Wax. If you’ve ever admired those delicate, waxy flowers on their wiry stems, you know their charm. They bring such a burst of color and a lovely scent to the garden, not to mention they’re fantastic in bouquets. Propagating them is such a rewarding feeling, like coaxing a little bit of your favorite plant to live on. Now, are they a walk in the park for absolute beginners? Honestly, they can be a tad finicky, but with a little care and attention, you’ll be well on your way to success.
The Best Time to Start
For Geraldton Wax, the sweet spot for taking cuttings is generally late spring to early summer. This is when the plant is actively growing but has produced some semi-hardwood stems. Think of it as the plant having plenty of energy to put into rooting. Trying to root very soft, new growth can be prone to rot, and trying it on old, woody material might also be a bit more challenging.
Supplies You’ll Need
Gathering your tools beforehand makes the whole process smoother. Here’s what I find essential:
- Sharp, clean pruning shears or a sharp knife: For making those clean cuts.
- Rooting hormone powder or gel: This is your friend to encourage root development.
- Well-draining potting mix: I usually go for a mix of perlite, coarse sand, and a little peat moss or coco coir. A succulent or cactus mix works well too.
- Small pots or trays: About 3-4 inches is usually plenty for cuttings. Make sure they have drainage holes!
- Plastic bag or humidity dome: To create a humid microclimate.
- Labeled sticks or tags: So you don’t forget what you planted where!
- A warm spot or heat mat (optional but helpful): Bottom heat can really speed things up.
Propagation Methods: Stem Cuttings
This is, by far, the most common and effective way to propagate Geraldton Wax.
- Select Your Stems: Look for healthy, vibrant branches on your mature plant. You want stems that are slightly firm but not completely woody. Pinching one back might feel a little sad, but think of the new plants you’ll get!
- Take the Cuttings: Using your clean shears or knife, take cuttings that are about 4-6 inches long. Make your cut just below a leaf node, which is where roots are most likely to form.
- Prepare the Cuttings: Gently strip off the lower leaves. You want to remove any leaves that would be below the soil line. You can leave a few leaves at the top to help the cutting photosynthesize.
- Apply Rooting Hormone: Dip the cut end of the stem into your rooting hormone, tapping off any excess.
- Pot Them Up: Fill your small pots with your well-draining mix. Make a small hole in the center with your finger or a pencil. Gently insert the cutting into the hole, making sure the base is firm. Firm the soil around the cutting, but don’t pack it down too hard.
- Water Gently: Water the soil lightly. You want it moist, but not waterlogged.
- Provide Humidity: Cover the pot with a plastic bag or a humidity dome. You can prop up the bag with a stick or two so it doesn’t touch the leaves directly. Place the pot in bright, indirect light.
The “Secret Sauce” (Pro Tips)
Here are a couple of little tricks I’ve picked up over the years that can really make a difference:
- Air Circulation is Key: While you want humidity, don’t keep those bags sealed shut all the time. Open them up for an hour or so each day to allow for fresh air exchange. This helps prevent fungal diseases, which is Geraldton Wax’s nemesis!
- Bottom Heat is Your Best Friend: If you have a heat mat, placing your pots on it can work wonders. It mimics the warmth from the soil that stimulates root growth. I find it really helps speed up the rooting process significantly for these guys.
- Don’t Be Afraid to Be Bold: When taking cuttings, don’t be shy about taking a good number. Not all of them might take, and that’s perfectly normal. The more you try, the higher your chances of success. Plus, you can always give away your extras!
Aftercare & Troubleshooting
Once you’ve potted up your cuttings, the waiting game begins. Keep them in that bright, indirect light and continue to mist them gently or water lightly when the surface of the soil starts to feel dry.
The exciting moment is when you see new leaf growth appearing at the top of your cutting. That’s a sure sign that roots are forming! You can also give a very gentle tug on the cutting; if you feel resistance, it’s likely rooted.
Now, what if things go wrong? The most common issue is rot, which usually happens when the soil is too wet and there’s poor air circulation. Your cutting might turn dark and mushy at the base. If you see this, sadly, it’s usually best to discard it and start again, making sure to improve drainage and air circulation next time.
A Encouraging Closing
Propagating Geraldton Wax might require a little patience and a watchful eye, but the thrill of seeing those tiny roots emerge and a new plant unfurl is absolutely unparalleled. Don’t get discouraged if your first attempt isn’t perfect. Every gardener has learned through trial and error – I certainly have! Enjoy the process, learn from each cutting, and soon you’ll have a whole nursery of your own beautiful Geraldton Wax. Happy growing!
Resource: