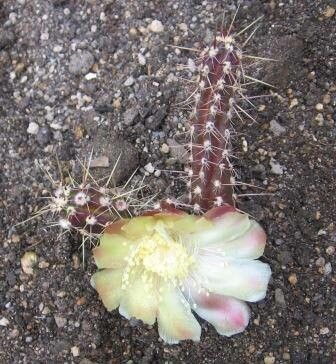
Oh, hello there! I’m so glad you’re curious about Austrocactus spiniflorus. This little beauty, with its fuzzy stems and those gorgeous, spiky flowers – isn’t it just a delight? I’ve been coaxing new life from these cacti for years, and trust me, multiplying them is one of the most rewarding parts of the gardening journey. While not everyone’s absolute first foray into propagation, it’s definitely within reach for a keen beginner with a bit of patience.
The Best Time to Start
For Austrocactus spiniflorus, like many succulents and cacti, spring or early summer is your golden window. This is when the plant is actively growing and has the most energy to dedicate to rooting. We want to see some vigorous new growth before we start snipping!
Supplies You’ll Need
Here’s what I always have on hand when I’m ready to get propagating:
- Well-draining potting mix: I usually mix my own with equal parts perlite and cactus/succulent soil. You can also buy pre-made cactus mix.
- Sharp, clean pruning shears or a sharp knife: A clean cut prevents disease.
- Rooting hormone (optional but recommended): This really gives cuttings a boost.
- Small pots or trays: Terracotta pots are great as they breathe.
- Gravel or small stones: For drainage in the pots.
- Watering can or spray bottle: For gentle watering.
- Gloves: Those spines can be sneaky!
Propagation Methods
There are a couple of ways to go about this, and I find both work well for Austrocactus spiniflorus.
Stem Cuttings
This is my go-to method, and it’s quite straightforward.
- Select a healthy stem: Look for a mature, but not woody, stem. About 3-6 inches long is perfect.
- Make a clean cut: Using your sharp shears or knife, sever the stem close to the main body of the parent plant. Try to make it as neat as possible.
- Let it callus: This is crucial! Lay the cutting on its side in a dry, airy spot for a few days to a week. You’ll notice a dry callus forming over the cut end. This prevents rot when you plant it.
- Dip in rooting hormone (optional): Once callused, dip the cut end into your rooting hormone powder. Tap off any excess.
- Plant it up: Fill your small pot with your well-draining mix and a layer of gravel at the bottom. Gently insert the callused end of the cutting into the soil, about an inch deep. You might need a small stake or a few pebbles to keep it upright.
- Wait for roots: Do NOT water immediately. Let the cutting settle in for about a week. Then, water very sparingly, just enough to moisten the soil. You’re looking for signs of new growth, which indicates roots have formed. This can take several weeks.
Division
If your Austrocactus spiniflorus has started to produce offsets (little baby plants growing from the base), you can divide them.
- Gently remove the main plant from its pot: Do this carefully to avoid damaging the roots of the offsets.
- Identify the offsets: Look for small, often fuzzy, arms or clumps emerging from the main body.
- Separate gently: Using your hands or a sharp knife, carefully detach the offset from the parent plant, making sure to get some roots attached if possible.
- Let calluses form: Just like with cuttings, allow any cut surfaces on the offset or parent plant to callus over for a few days.
- Pot them up: Plant the offset in its own small pot with appropriate cactus mix. Water very sparingly as described above.
The “Secret Sauce” (Pro Tips)
Now, for a couple of things that have made all the difference for me:
- Bottom Heat is Your Friend: If you can, place your pots with cuttings on a heat mat designed for seedlings. This warmth from below encourages root development much faster. Just don’t let it get too hot!
- Don’t Overwater – Ever! This is the cardinal sin of cactus propagation. Rot is the enemy. I’d rather underwater a cutting than water it too much. Wait until the soil is bone dry before giving it a tiny drink. And with cuttings, you’re mostly encouraging the existing moisture in the cutting to work its magic.
Aftercare & Troubleshooting
Once you see signs of life – a tiny bit of new growth, or if you gently tug and feel resistance from roots – it’s time to start treating your new plant like a small but established cactus. Water a bit more regularly, but still err on the side of caution. Keep it in bright, indirect light.
The most common problem you’ll encounter is rot. If your cutting or offset turns mushy, black, or just looks generally sad and unresponsive, it’s likely rotted. This is usually a sign of too much moisture in the soil. If you catch it early, you might be able to cut away the rotted part and let the healthy bit callus again, but it’s often a lost cause. Another issue can be lack of rooting – if it looks good but just never does anything for months, it may not have rooted. Be patient!
A Little Encouragement
Propagating these plants is a beautiful exercise in patience. Some will take off immediately, while others will test your resolve. Don’t get discouraged if one doesn’t make it; it’s all part of the learning process for us green-thumbed folks. Enjoy watching those little roots emerge; it’s a tiny miracle happening right in your home. Happy propagating!
Resource: