Hey there, fellow plant enthusiasts! It’s so wonderful to have you visit my little corner of the internet. Today, we’re diving into the magical world of propagation with a plant that truly sparks joy: Chamaedendron nervosa.
Why Propagate Chamaedendron nervosa?
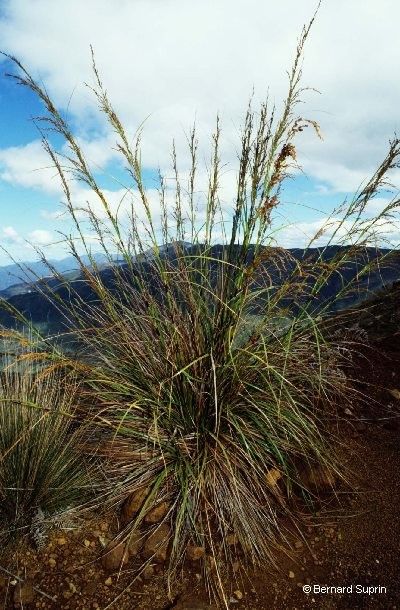
If you’ve ever admired the striking, architectural form of Chamaedendron nervosa – those beautiful, deeply veined leaves that add such a touch of drama to any space – you’re not alone! This plant is a real showstopper. And the best part? You can often create more of its stunning beauty right from your own home. Propagating it is incredibly rewarding, allowing you to share these beauties with friends or simply expand your own collection without breaking the bank. Now, for beginners, I’d say Chamaedendron nervosa falls into the “manageable to moderately challenging” category. It’s not as fiddly as some orchids, but it does appreciate a bit of care and attention.
The Best Time to Start
For the highest success rate, I always recommend starting your Chamaedendron nervosa propagation in the late spring or early summer. This is when the plant is actively growing, meaning it has plenty of energy to put into developing new roots. You’ll often see new shoots emerging around this time, which are perfect candidates for taking cuttings.
Supplies You’ll Need
Gathering your tools before you begin makes the whole process so much smoother. Here’s what you’ll want to have on hand:
- Sharp, clean pruning shears or a sharp knife: Cleanliness is key to preventing disease.
- Well-draining potting mix: A good blend for aroids works well. I often use a mix of perlite, orchid bark, and peat moss (about 1:1:1 ratio) or a high-quality commercial aroid mix.
- Small pots or propagation trays: Make sure they have drainage holes!
- Rooting hormone (optional but recommended): This boosts your chances of successful root development. Look for one that contains IBA.
- Watering can or spray bottle: For gentle watering.
- Clear plastic bag or propagation dome: To maintain humidity.
- A small label and pen: To keep track of what you’ve propagated and when.
Propagation Methods for Chamaedendron nervosa
While Chamaedendron nervosa can be a bit particular, the stem cutting method is generally the most successful and straightforward.
PVC Stem Cuttings:
- Identify a healthy stem: Look for a mature stem that has at least two to three nodes (the little bumps where leaves emerge). Avoid very thin, new growth or old, woody stems.
- Make the cut: Using your sterilized pruners or knife, make a clean cut about an inch below a node. You’re aiming for a cutting that is at least 4-6 inches long. You can take multiple cuttings from a healthy plant.
- Prepare the cutting: Gently remove any lower leaves, making sure to leave at least one node submerged if you plan on water propagation later, or if the node is close to the soil surface. This node is where roots will emerge. If your cutting is long, you can even cut it into smaller sections, ensuring each section has at least one node.
- Apply rooting hormone (optional): Dip the cut end of the stem into your rooting hormone, tapping off any excess. This step really gives your cutting a heads-up in the root-forming department.
- Potting Up: Fill your small pots with your prepared, well-draining potting mix. Make a small hole in the center with your finger or a pencil.
- Plant the cutting: Insert the cut end of the Chamaedendron nervosa cutting into the hole, ensuring the lowest node is just covered by soil. Gently firm the soil around the stem.
- Water gently: Water thoroughly until water drains from the bottom of the pot. Allow excess water to drain away completely.
- Create a humid environment: Place a clear plastic bag over the pot, or put the pot inside a propagation dome. Prop open the bag slightly or the dome lid to allow for some air circulation. This humidity is crucial for preventing the cutting from drying out before it can grow roots.
- Place in bright, indirect light: Find a warm spot with plenty of bright, indirect light. Avoid direct sunlight, which can scorch the leaves and overheat the propagatiion setup.
The “Secret Sauce”
Here are a couple of my personal tricks that have made a world of difference for me:
- The “No Leaf in Water” Rule (if water propagating): If you’re tempted to try water propagation for your Chamaedendron nervosa cuttings, and I know some of you will be, here’s a big one: Absolutely do not let any leaves sit in the water. They will rot, and they can take your entire cutting down with them. Only the stem node should be submerged. I’ve found that when rooting in soil, this is less of a concern as the soil helps wick away excess moisture.
- Bottom Heat is Your Friend: While not strictly essential, placing your pots on a gentle heat mat designed for plant propagation can significantly speed up root development for Chamaedendron nervosa. It mimics the warmth of spring soil and gives your cuttings that extra boost they crave. Just ensure the heat isn’t too intense.
Aftercare & Troubleshooting
Once your Chamaedendron nervosa cuttings have been potted up and are in their humid environment, patience is your best virtue.
- Check for roots: After about 4-8 weeks, you can gently tug on the cutting. If you feel resistance, it’s a good sign that roots have formed. You can also look for new leaf growth, as this usually indicates successful rooting.
- Gradually acclimate: Once roots have appeared, slowly begin to acclimate your new plant to normal room humidity. Gradually unfurl the plastic bag or open the dome a bit more each day over a week.
- Watering: Continue to water when the top inch of soil feels dry. Avoid overwatering, as this is the most common cause of rot.
- Troubleshooting Rot: If you see your cutting turning mushy, yellowing, or developing black spots, it’s likely rot. Unfortunately, rot is usually fatal. If you catch it early, you might be able to save a portion by cutting away the diseased parts and repotting in fresh, dry soil, but often it’s best to start again with new cuttings. Ensure good airflow and avoid soggy soil to prevent this.
Keep Growing!
Propagating plants is an incredibly rewarding journey, and Chamaedendron nervosa is a wonderful specimen to practice on. Don’t be discouraged if your first attempt isn’t perfect. Gardening is all about learning, observing, and trying again. Be patient, enjoy the process of nurturing a new life from a tiny cutting, and soon you’ll have a whole new family of these gorgeous plants! Happy propagating!
Resource: