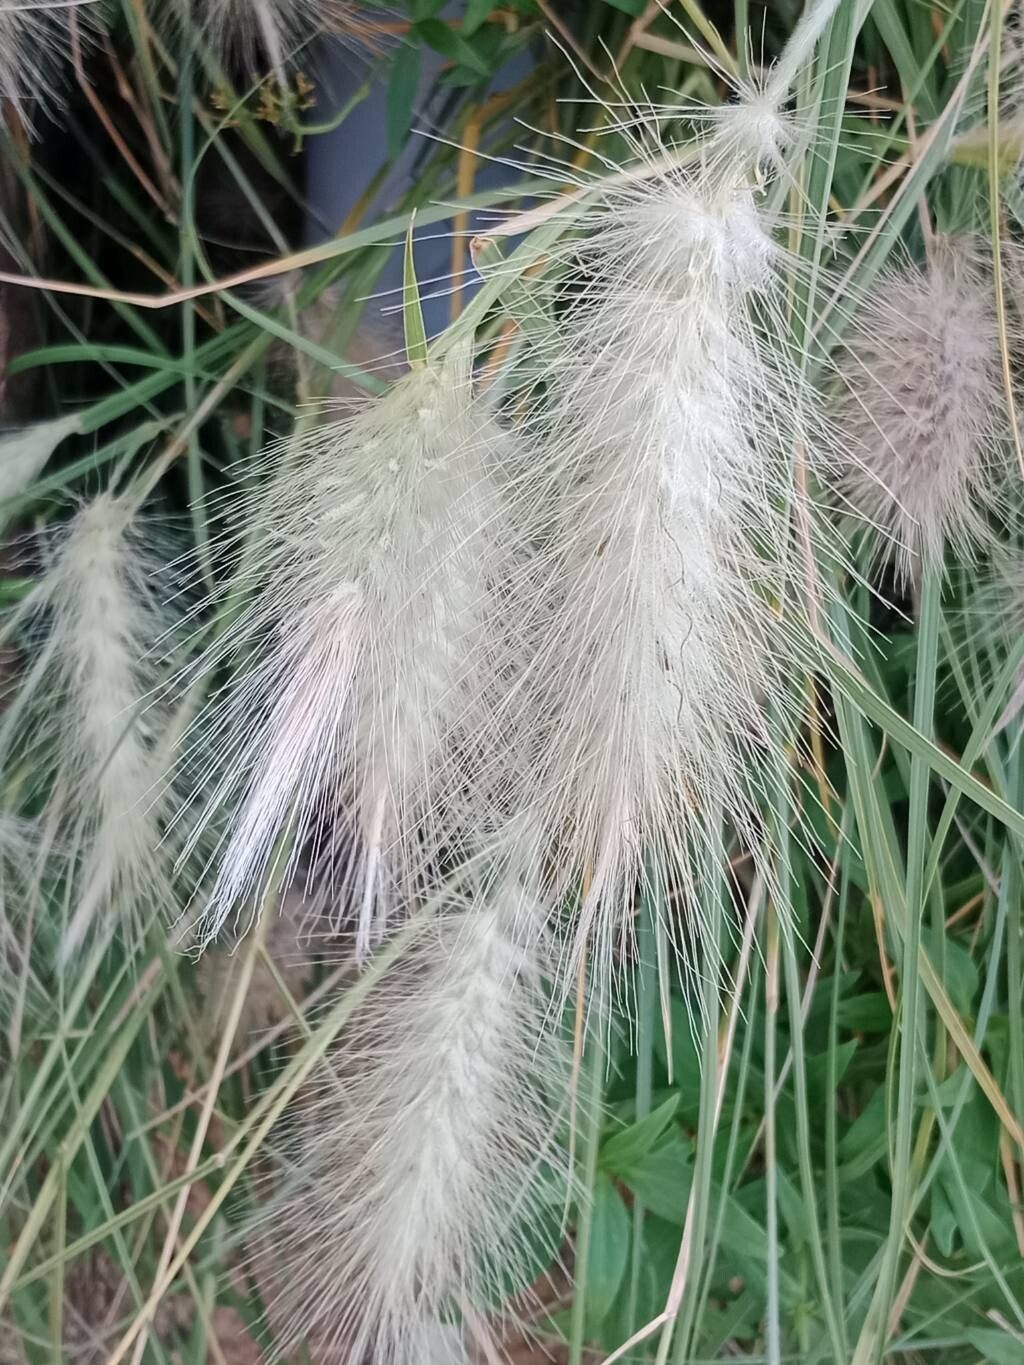
Hello there, fellow plant lovers! Today, I want to chat about a grass that’s truly captured my heart over the years: Cenchrus longisetus, often called African Feather Grass. Its delicate, wispy plumes catching the sunlight are just pure magic in the garden. And you know what’s even better? The sheer satisfaction of watching a tiny cutting or a divided clump transform into a whole new plant. It’s a deeply rewarding process, and I’m happy to say, propagating this beauty is quite manageable, even for those of you just starting your green journey.
The Best Time to Start
When it comes to getting your Cenchrus longisetus off to a great start, spring is absolutely your best bet. Aim for when the plant is actively growing, usually after the last frost has passed. You want that vibrant energy to help your new propagations take hold. If you miss spring, don’t fret too much; early summer can also work well, as long as you can keep them consistently watered.
Supplies You’ll Need
To make this propagation project a success, let’s gather our tools:
- Sharp pruning shears or a clean knife: For making those crucial cuts.
- Well-draining potting mix: I usually go for a seed starting mix blended with a bit of perlite or coarse sand. This is key for preventing rot.
- Small pots or trays: Clean containers are a must!
- Rooting hormone (optional but helpful): A little boost can speed things up.
- Plastic bags or a clear plastic dome: To create a mini-greenhouse effect.
- A watering can with a fine rose attachment: For gentle watering.
- Bottom heat source (optional): A seedling heat mat can work wonders.
Propagation Methods
Cenchrus longisetus is quite cooperative when it comes to propagation. I find two main methods work best:
Stem Cuttings
This is my go-to. It’s wonderfully efficient.
- Select healthy shoots: Look for stems that are not flowering but have good vigor. You want a piece about 4-6 inches long.
- Make a clean cut: Just below a leaf node (where a leaf attaches to the stem) is ideal. This is where roots love to form.
- Prepare the cutting: Gently remove any lower leaves. If you’re using rooting hormone, dip the cut end into it, tapping off any excess.
- Plant them up: Insert the cuttings into your prepared, moist potting mix. Make sure at least one leaf node is buried.
- Create humidity: Cover the pot with a plastic bag or dome. This traps moisture and prevents the cuttings from drying out.
- Provide warmth: Place the pot in a warm spot, out of direct, harsh sunlight. If you have a heat mat, this is when you’d use it.
Division
If you have an established clump, division is a fantastic way to get more plants and give your mature one a little refresh.
- Gently excavate: Carefully dig up the entire clump. It’s easier if the soil is slightly moist.
- Loosen the root ball: Gently tease apart the soil from the roots.
- Separate the divisions: Using your hands or a clean knife, separate the clump into smaller sections. Each section should have a good amount of roots and at least a few shoots.
- Pot them up: Plant each division in its own pot filled with your well-draining mix.
- Water thoroughly: Give them a good drink to settle the soil.
The “Secret Sauce” (Pro Tips)
Here are a couple of tricks I’ve learned over the years that really make a difference:
- Don’t let the leaves touch the water: If you’re attempting water propagation (which I find less reliable for this grass but some try), make sure only the cut stem is submerged. Any leaves in the water will just rot and harbor disease. I find the potting mix method much more successful for Cenchrus.
- Patience with the cuttings: It can take several weeks, sometimes longer, for those cuttings to really get going. Resist the urge to pull them up to check for roots too soon! You’ll know they’re ready when you see new growth emerging or feel a slight resistance when you gently tug.
Aftercare & Troubleshooting
Once your cuttings show signs of life or your divisions are planted, keep them consistently moist but not waterlogged. Think of a wrung-out sponge. As they establish, you can gradually reduce the humidity.
The most common enemy here is rot. If your cuttings turn mushy and black, it’s usually a sign of too much moisture and not enough air circulation. Make sure your potting mix is super well-draining. If you see signs of wilting or yellowing that isn’t related to drought, it could also be stress from too much direct sun too soon. Gradually introduce them to more light as they grow stronger.
A Little Encouragement
Growing Cenchrus longisetus from cuttings or divisions is such a beautiful way to fill your garden with these airy wonders. Be patient with the process, celebrate every tiny bit of new growth, and enjoy the journey of nurturing these plants. You’ve got this!
Resource:
https://identify.plantnet.org/k-world-flora/species/Cenchrus%20longisetus%20M.C.Johnst./data