Hello there, fellow plant lovers!
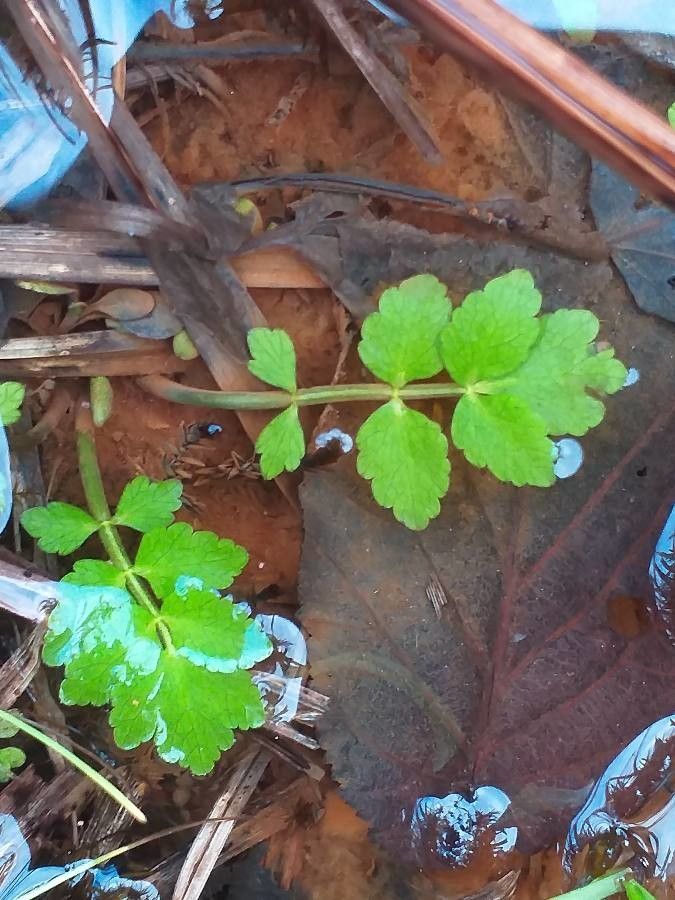
It’s so lovely to connect with you today to talk about a really special plant: Berula erecta, also known as Lesser Water Parsnip. If you’re looking for a plant that brings a touch of wild elegance to your garden, especially if you have a pond or water feature, this is it. Its delicate, umbrella-shaped clusters of white flowers are simply charming, and the feathery foliage adds a lovely texture. Propagating it is a wonderfully rewarding endeavor, and I’m thrilled to guide you through it. For those just starting out, I’d say Berula erecta is a pretty beginner-friendly plant to tackle.
The Best Time to Start
Timing is everything in gardening, isn’t it? For Berula erecta, the sweet spot for propagation is generally late spring to early summer. This is when the plant is actively growing and has plenty of energy to produce new roots. You can also have success with stem cuttings in the early fall, but spring and early summer usually give you the best bang for your buck in terms of quick establishment.
Supplies You’ll Need
Gathering your tools makes the process so much smoother. Here’s what I always have on hand for propagating Berula erecta:
- Sharp Pruning Shears or Scissors: Clean cuts are essential for healthy new growth.
- Rooting Hormone (Optional but Recommended): This can give your cuttings a helpful boost.
- Well-Draining Potting Mix: A good blend of peat moss, perlite, and coarse sand works wonderfully. For water propagation, just a clean jar of water will do.
- Small Pots or Trays: For starting your cuttings.
- Clear Plastic Bags or Domes: To create a humid environment for cuttings.
- Watering Can or Spray Bottle: For gentle watering.
- Labels: To keep track of what you’ve propagated!
Propagation Methods
There are a couple of fantastic ways to get more Berula erecta plants. Let’s dive in!
Stem Cuttings
This is my go-to method, and it’s incredibly effective.
- Take Cuttings: In late spring or early summer, select healthy, non-flowering stems. Look for stems that are about 4-6 inches long. Using your sharp shears, make a clean cut just below a leaf node (where a leaf attaches to the stem).
- Prepare the Cuttings: Gently remove the lower leaves, leaving just a few at the top. If any flower buds have formed, pinch them off—we want the plant’s energy to go into rooting, not flowering.
- Apply Rooting Hormone (If Using): Dip the cut end of each stem into rooting hormone powder or gel. Tap off any excess.
- Plant the Cuttings: Fill your small pots with your prepared, moistened potting mix. Make a small hole in the soil with a pencil or your finger, and insert the cut end of the stem. Gently firm the soil around it.
- Create Humidity: Water the soil gently. To keep the humidity high, which cuttings absolutely adore, you can either cover the pots with a clear plastic bag (making sure the bag doesn’t touch the leaves) or place them under a propagator lid.
- Location, Location, Location: Place your pots in a bright location, but out of direct sunlight. A warm spot is best.
Water Propagation
This is a super simple and satisfying method to watch.
- Take Cuttings: Follow the same steps as above for taking and preparing stem cuttings.
- Place in Water: Fill a clean jar or glass with room-temperature water. Place your prepared cuttings in the water, ensuring that no leaves are submerged. Leaves sitting in water tend to rot, and we want to avoid that!
- Change Water Regularly: Change the water every few days to keep it fresh. This helps prevent bacterial growth.
- Monitor for Roots: Keep the jar in a bright spot, away from direct sun. You’ll start to see little white roots emerge from the leaf nodes.
Division
If you have a mature clump of Berula erecta, dividing it is a straightforward way to multiply your plants.
- Dig Up the Clump: In early spring, gently dig up the entire plant.
- Separate the Roots: You can often gently pull the root ball apart with your hands. If it’s a bit stubborn, use a clean trowel or knife to carefully slice through the roots, ensuring each section has plenty of healthy roots and some shoots.
- Replant: Replant the divisions immediately into their new locations, whether that’s back into the ground or into pots. Water them well.
The “Secret Sauce” (Pro Tips)
Here are a few little tricks I’ve picked up over the years that can really help your cuttings thrive:
- Use Bottom Heat: For stem cuttings, placing your pots on a heat mat designed for propagation can significantly speed up root development. It mimics the warmth of the soil that’s naturally warmed by the sun.
- Don’t Overwater: It’s a fine line with cuttings. You want the soil to be consistently moist, but not waterlogged. Waterlogging is the quickest way to invite rot. If you’re using the plastic bag method, you’ll see condensation – a good sign!
- Air Circulation is Key: If you’re using plastic bags or domes, lift them daily for a few minutes to allow for some air exchange. This helps prevent fungal diseases.
Aftercare & Troubleshooting
Once you see signs of roots—either peeking out of the pot bottom or visible in the water—your new Berula erecta is ready for a bit more independence!
- Transitioning to Soil (from water propagation): Once your water-propagated cuttings have roots about an inch long, you can carefully plant them into pots filled with your well-draining potting mix. Keep them consistently moist and in bright, indirect light.
- Watering (for soil cuttings): Continue to keep the potting mix consistently moist but not soggy. As the plant grows and roots establish, you can gradually reduce the frequency of watering, allowing the top inch of soil to dry out slightly between waterings.
- Troubleshooting: The most common issue you might encounter is rot. If your stem cuttings turn black and mushy, or develop soft, discolored bases, it’s a sign of too much moisture and not enough air circulation. Sadly, these are usually lost. Yellowing leaves on a cutting might indicate it hasn’t rooted yet and is using up its stored energy, or it might be getting too much direct sun. Be patient; some cuttings take longer than others.
A Grateful Goodbye
Propagating Berula erecta is a beautiful way to connect with nature and expand your garden. Remember, gardening is a journey, and not every cutting will take. Don’t be discouraged! Each attempt is a learning experience. Enjoy the process, savor the small victories, and soon you’ll have more of these lovely plants to share.
Happy gardening!
Resource:
https://identify.plantnet.org/k-world-flora/species/Berula%20erecta%20(Huds.)%20Coville/data