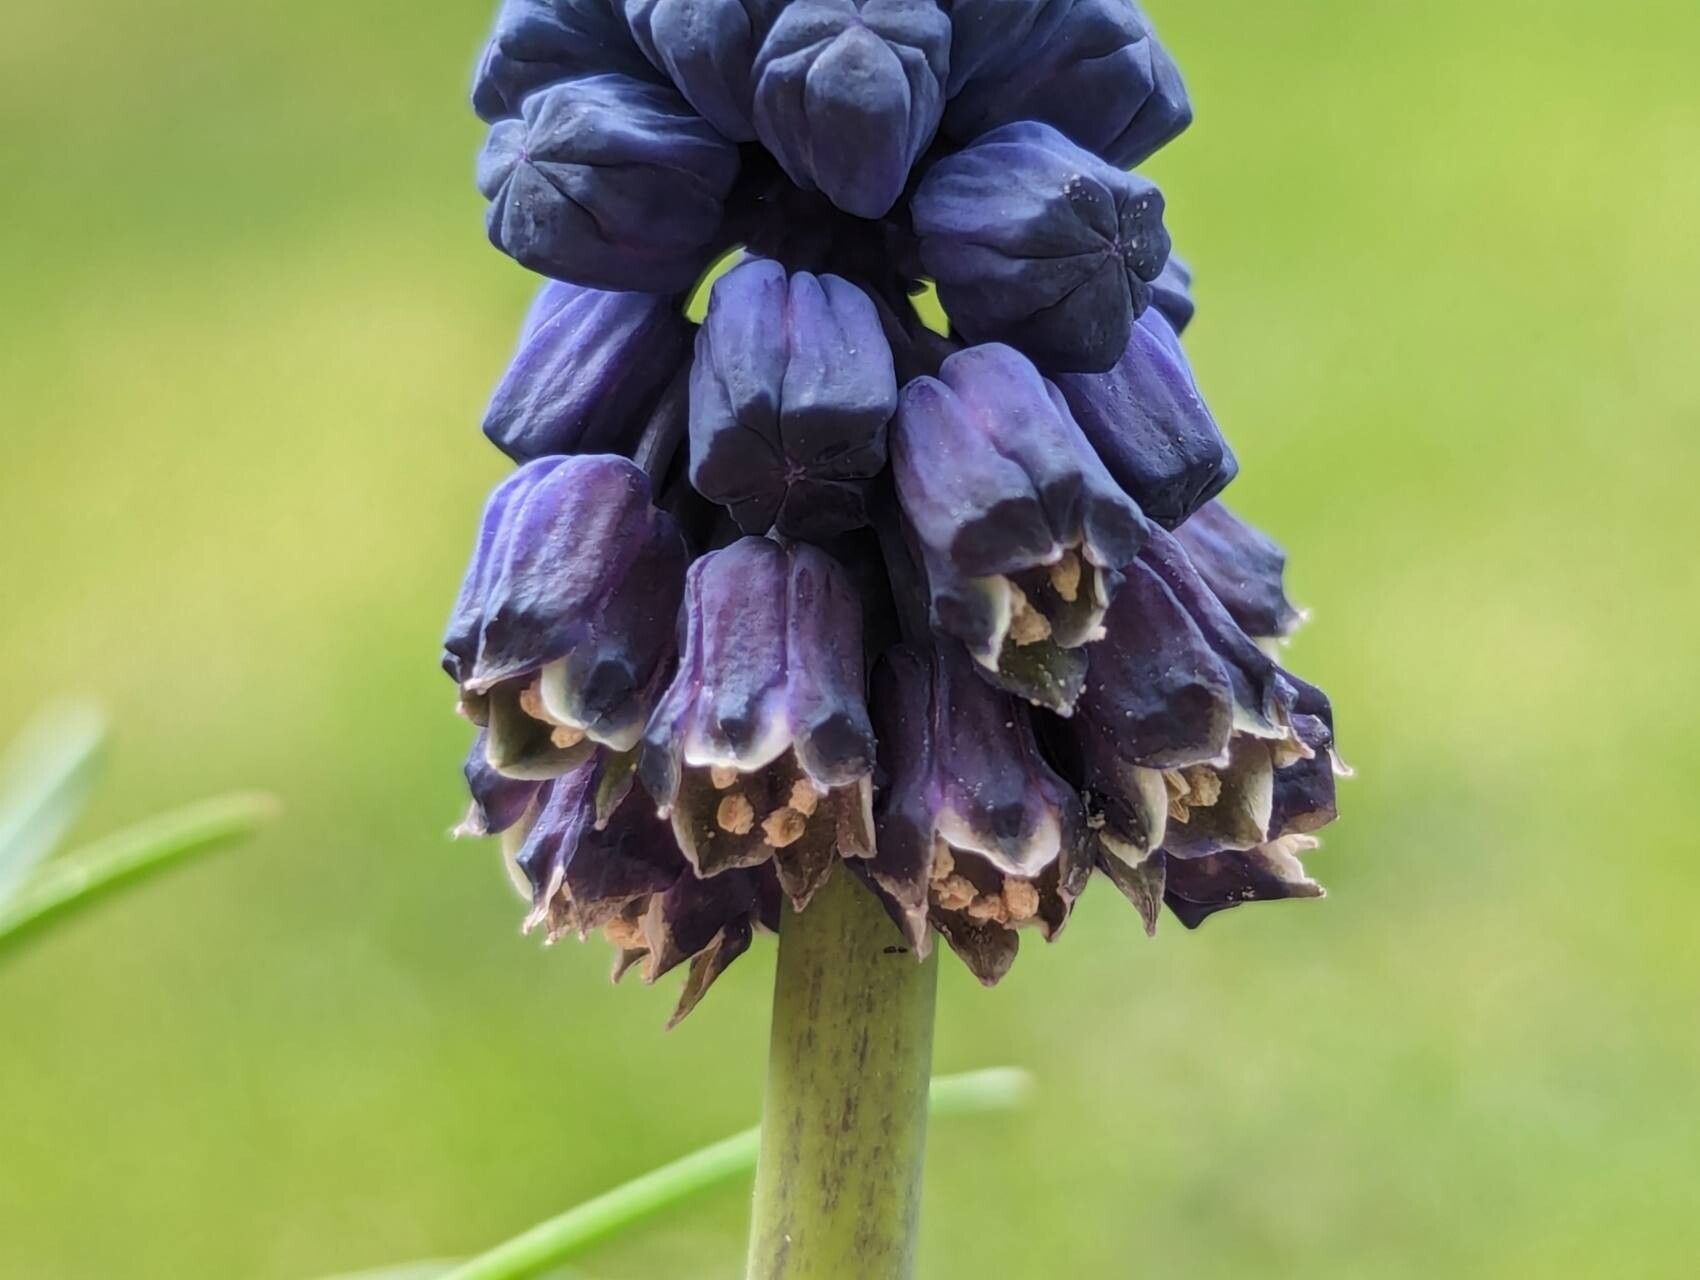
Oh, hello there, fellow plant lover! Pull up a chair and let’s chat about a truly special bloom: Bellevalia paradoxa. If you haven’t met this little gem, imagine bulbs that unfurl into the most charming, pendulous flowers, often in shades of deep purple or dusky blue. They have this almost whimsical way of appearing, a true surprise in the garden. Propagating them is a journey, and I’ve found it to be incredibly satisfying. While not the absolute easiest for a complete novice, with a little guidance, you’ll find success is well within reach.
The Best Time to Start
For Bellevalia paradoxa, the golden rule is to work with their natural cycle. The absolute best time to propagate these beauties is right after they’ve finished flowering and begun to die back, typically in late spring to early summer. This is when the parent plant is storing up energy for its next bloom, and any offsets or bulbs it has produced are also mature enough to be separated and establish themselves. Don’t rush it; wait until those lovely green leaves have turned completely yellow and are starting to wither. This signals they’ve done their job for the season.
Supplies You’ll Need
Gathering your tools beforehand makes the whole process smoother. Here’s what I always have on hand:
- A good quality, well-draining potting mix: I usually opt for a mix designed for bulbs or a blend of potting soil with added perlite and coarse sand.
- A clean trowel or small hand spade: For gently loosening the soil.
- A sharp, sterile knife or secateurs: You want a clean cut to minimize disease.
- A shallow tray or pot: For planting your new acquisitions.
- Gloves: Some plants can be a bit irritating to the skin.
- Optional: Rooting hormone powder: While not always strictly necessary for Bellevalia, it can give a little boost.
Propagation Methods
Bellevalia paradoxa primarily propagates through division of its bulbs and offsets. Think of it like separating a family of little bulb clusters.
Step-by-Step Division:
- Gentle Extraction: Once your Bellevalia has finished its blooming cycle and the foliage is dying back, carefully dig around the parent bulb. You want to get a good amount of soil away from the base so you can see what you’re doing.
- Inspect and Separate: Gently tease away the soil from around the main bulb. You’ll likely see smaller bulbs (called offsets) clinging to the sides, or perhaps new bulbs that have formed slightly away from the main clump.
- The Crucial Cut: Using your sharp, sterile knife, carefully cut or twist away the offsets from the parent bulb. If an offset already has a few tiny roots attached, even better! If you’re separating bulbs that seem well-established and slightly separate, you can sometimes just gently pull them apart. Aim for a clean separation.
- Dry Off (Optional but Recommended): Before replanting, I like to let the separated bulbs sit out of direct sun for 24-48 hours. This allows any cut surfaces to callus over, which helps prevent rot.
- Planting: Fill your shallow tray or pot with your prepared, well-draining mix. Plant the bulbs about 3-4 inches deep, with the pointed end facing upwards. Ensure they have enough space between them so they’re not overcrowded.
- Initial Watering: Water them in gently so the soil settles around the bulbs.
The “Secret Sauce” (Pro Tips)
Here are a couple of things I’ve learned over the years that really make a difference:
- Don’t overwater at first. After the initial watering, let the soil dry out a bit between waterings. These bulbs prefer to be on the drier side, especially during their dormancy. Too much moisture immediately after planting is a sure recipe for rot.
- Give them a dry dormancy. After they finish their growth cycle and you’ve divided them, I like to store the bulbs in a cool, dry, dark place over winter. Think of it as giving them a good rest. Just make sure they’re not getting too warm or humid.
Aftercare & Troubleshooting
Once you’ve replanted your divisions, the real waiting game begins. Keep the soil lightly moist but not soggy. You won’t see much happening above ground for a while, and that’s perfectly normal.
The most common issue you’ll face is rot. If you notice any of your newly planted bulbs turning mushy, black, or smelling foul, they’ve likely succumbed to rot. This is usually due to overwatering or planting in soil that doesn’t drain well. Sadly, if rot sets in, it’s often too late to save the bulb.
If you see new green shoots emerging, that’s a fantastic sign! Continue to care for them as you would a mature plant, providing good light and appropriate watering as they grow.
A Encouraging Closing
So there you have it! Propagating Bellevalia paradoxa is a wonderfully rewarding experience. It takes a little patience, and sometimes a bit of trial and error, but seeing those tiny offsets grow into their own beautiful blooms is a true joy. Don’t be discouraged if a bulb or two doesn’t make it – that’s just part of learning! Enjoy the process, and happy gardening!
Resource: