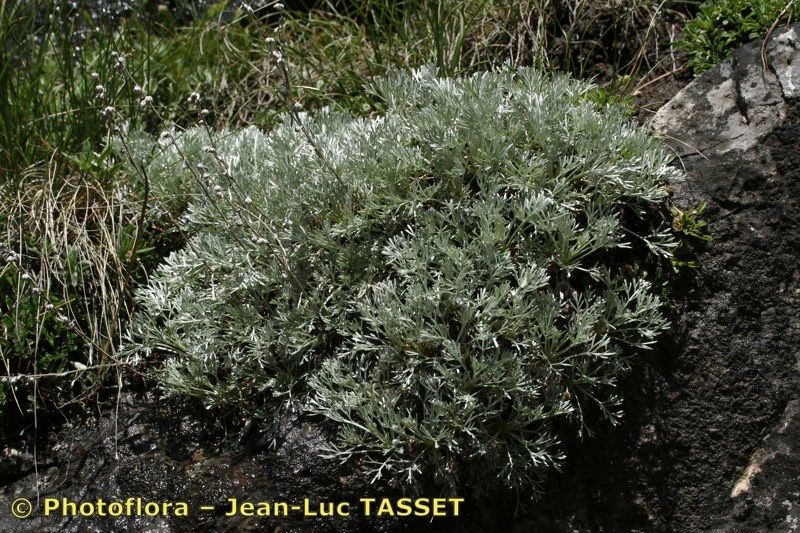
Oh, hello there! Come on in, pull up a chair. I’m so excited to chat with you about Artemisia nitida. This shimmering beauty, with its silvery foliage reminiscent of mist rolling through a meadow, is truly a standout in any garden. Propagating it yourself? It’s incredibly rewarding, like nurturing a little piece of magic to grow. And that’s the best part – while it might seem a bit delicate, Artemisia nitida is actually quite forgiving, making it a wonderful plant for beginners looking to try their hand at propagation. Get ready to fill your garden (or gift your friends!) with this lovely silver delight.
The Best Time to Start
When it comes to getting the most bang for your buck, propagation-wise, I find that late spring to early summer is absolutely prime time. You want to catch your Artemisia nitida when it’s in a vigorous growth spurt. The stems are young, supple, and full of life, making them eager to root. Waiting until after the plant has had a good seasonal boost ensures you’re taking cuttings from healthy, strong material.
Supplies You’ll Need
Before we dive in, let’s make sure you’ve got your essentials ready. Think of it like packing for a little plant adventure!
- Sharp Pruning Shears or a Craft Knife: Clean cuts are crucial for preventing disease and encouraging good root formation.
- Rooting Hormone (Optional but Recommended): A little boost can make a big difference, especially for plants that can be a tad slow to root. I like to use the powder or gel form.
- Small Pots or Seed Trays: Clean ones are a must! Yogurt cups with drainage holes poked in work in a pinch too.
- Well-Draining Potting Mix: A soilless seed-starting mix is ideal, or you can create your own by combining equal parts peat moss or coco coir and perlite or coarse sand. We want good aeration!
- Plastic Bags or a Propagation Dome: This helps maintain humidity for those cuttings.
- Watering Can or Spray Bottle: For gentle watering.
- A Sunny, Bright Spot (but not direct hot sun): Think a bright windowsill or a sheltered spot outdoors.
- A Small Shovel or Trowel (for division): If you choose that method.
Propagation Methods
Now for the fun part! Artemisia nitida is a champ at stem cuttings, and division is also quite straightforward.
Stem Cuttings (My Favorite!)
This is my go-to method for Artemisia nitida. It’s efficient and gives you multiple new plants from a single mature specimen.
- Take Your Cuttings: Early to mid-morning is the best time, after the dew has dried but before the heat of the day sets in aggressively. Look for non-flowering, healthy stems that are about 4-6 inches long. Using your clean shears, make a clean cut just below a leaf node (where a leaf attaches to the stem).
- Prepare the Cuttings: Gently remove the lower leaves, leaving just a few at the very top. This prevents them from rotting in the soil. If your cuttings are a bit floppy, you can even reduce the size of the remaining leaves by snipping them in half.
- Dip in Rooting Hormone: Lightly dip the cut end of each stem into your rooting hormone, tapping off any excess. This is where that little magical boost comes in.
- Plant Your Cuttings: Fill your small pots with your moistened, well-draining potting mix. Make a small hole in the center of the soil with your finger or a pencil. Insert the cut end of the Artemisia stem into the hole, ensuring the leaf nodes are buried. Gently firm the soil around the stem.
- Water Gently: Water your cuttings lightly to help settle the soil.
- Create a Humid Environment: Cover the pots with a plastic bag (making sure the leaves don’t touch the plastic if possible) or place them under a propagation dome. This keeps that much-needed humidity high while the roots form.
- Find the Right Spot: Place the pots in a bright location that gets plenty of indirect light. Avoid direct, scorching sun, which can quickly dehydrate the tender cuttings.
Division
This is a fantastic option if your Artemisia nitida has grown into a lovely clump that you’re looking to manage or share.
- Digging Up Your Plant: In early spring, before new growth really takes off, carefully dig around the base of the established plant. Work your way around, loosening the soil until you can lift the entire clump out.
- Separating Divisions: Gently shake off excess soil to expose the root ball. You can usually gently pull the root ball apart with your hands into smaller sections, ensuring each section has a healthy portion of roots and some leafy stems. If the roots are really tangled, you can use a clean trowel or even a sharp knife to help you separate them.
- Replanting: Immediately replant the divisions into prepared soil in your garden or into pots filled with good potting mix. Water them well.
The “Secret Sauce” (Pro Tips)
Here are a few little nuggets of wisdom that make propagation a bit more successful, in my experience:
- Bottom Heat is Your Friend: If you can, placing your pots on a gentle heat mat (often sold for seed starting) can significantly speed up root development. It mimics the warmth of spring soil and really encourages those roots to say “hello!”
- Don’t Let the Leaves Touch the Water (for water propagation): While I prefer soil for Artemisia nitida, if you do try water propagation, ensure the leaves are well above the waterline. Only the stem should be submerged, as submerged leaves are a fast track to rot.
- A Gentle Breeze is Good, But Not Too Much: Once your cuttings have started to root (you’ll see new growth), slowly begin to acclimate them to normal air. Pop the bag open for a few hours each day, gradually increasing the time. This prevents them from getting a shock when you eventually remove the cover completely.
Aftercare & Troubleshooting
Once you start seeing signs of life – usually new leafy growth! – you know your cuttings are happy.
- Continue Watering Gently: Keep the soil consistently moist but not waterlogged. As the new plant grows stronger, you can begin watering a bit more deeply.
- Watch for Root Development: You can give a gentle tug on a cutting – if there’s resistance, roots are forming! You can also look for tiny roots peeking out of the drainage holes.
- Transplanting: Once your rooted cuttings have a good root system, you can transplant them into larger pots or directly into your garden.
- Rotting: The most common problem is rot. If you see stems turning black and mushy, it’s usually a sign of too much moisture and not enough airflow. Make sure your soil drains exceptionally well and that you’re not overwatering. Sometimes, you can salvage a cutting by trimming off the rotten part and trying again.
- Wilting: A bit of wilting is normal initially. If it persists, it could mean the cutting hasn’t rooted yet and is drying out, or it’s getting too much direct sun. Increase humidity and ensure consistent moisture.
A Encouraging Closing
See? It’s not so daunting, is it? Propagation is a beautiful dance with nature, a patient and rewarding process. Don’t be discouraged if a few don’t make it – that’s all part of the learning curve. Celebrate the successes, learn from the challenges, and most importantly, enjoy the magic of watching your own little piece of Artemisia nitida come to life. Happy gardening!
Resource:
https://identify.plantnet.org/k-world-flora/species/Artemisia%20nitida%20Bertol./data