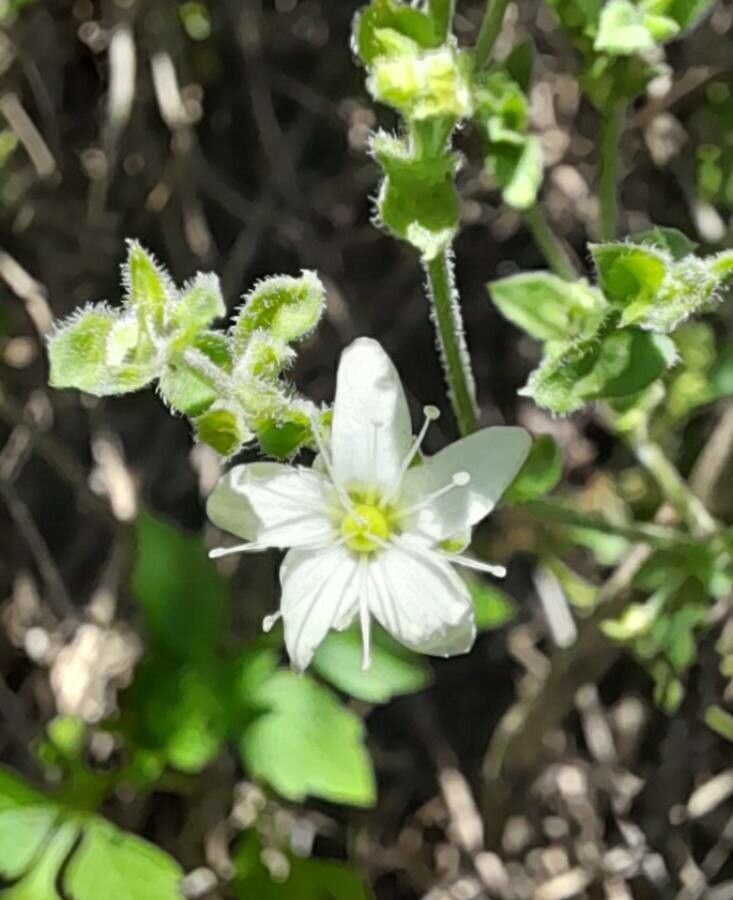
Oh, hello there! So glad you’ve stopped by. Today, we’re diving into the wonderful world of propagating Arenaria catamarcensis. I’ve always been a fan of this little gem. Its delicate, star-shaped white flowers are just so charming, and it forms these lovely, compact mounds that look absolutely delightful spilling over the edge of a pot or a rockery. The best part? Growing more of them yourself is incredibly satisfying.
Now, for the beginners out there, I’d say Arenaria catamarcensis is moderately easy to propagate. It’s not the ‘stick it in water and forget it’ type, but with a little care and attention, you’ll be rewarded with plenty of new plants for your garden or to share with friends.
The Best Time to Start
My absolute favorite time to get busy propagating Arenaria catamarcensis is in late spring to early summer. That’s when the plant is actively growing, and the stems are producing new, healthy shoots. You want to work with material that’s not too old and woody, but not so soft and brand new that it’s overly fragile. Aim for stems that are just starting to firm up, often referred to as semi-ripe cuttings.
Supplies You’ll Need
Before we get our hands dirty, let’s gather our supplies:
- Sharp pruning shears or a clean craft knife: For making nice, clean cuts.
- Rooting hormone powder or gel: This isn’t strictly essential for Arenaria, but it can really give your cuttings a boost.
- Small pots or propagation trays: Make sure they have drainage holes!
- A well-draining potting mix: I like to use a mix of equal parts peat-free compost and perlite or coarse sand. This ensures good aeration and prevents waterlogging.
- A spray bottle with water: For misting.
- A plastic bag or propagation dome: To create a humid environment.
- (Optional) A heat mat: Bottom heat can speed up root formation, especially in cooler conditions.
Propagation Methods
For Arenaria catamarcensis, the most reliable method I’ve found is stem cuttings. It’s straightforward and yields great results.
Stem Cuttings:
- Take your cuttings: Using your clean shears or knife, select healthy, non-flowering stems. Make a cut just below a leaf node (that little bump where leaves emerge). Aim for cuttings that are about 3-4 inches long.
- Prepare the cuttings: Gently remove the leaves from the bottom half of the cutting. You can leave the top leaves on. If the remaining leaves are quite large, you can even tip-prune them by half to reduce water loss.
- Dip in rooting hormone: If you’re using it, dip the cut end of the stem into the rooting hormone, tap off any excess.
- Pot them up: Fill your small pots or trays with your prepared potting mix. Make a small hole with a pencil or your finger and gently insert the cuttings. Firm the soil around them.
- Create humidity: Water the soil lightly from the top. Then, cover the pots with a clear plastic bag or place them under a propagation dome. This creates that vital humid environment.
- Find a bright spot: Place your cuttings in a location that receives bright, indirect light. Avoid direct sun, which can scorch them.
The “Secret Sauce” (Pro Tips)
Here are a couple of little tricks that have served me well over the years:
- Keep the leaves out of the water: If you decide to try water propagation (which can work, but I find cuttings in soil generally do better), make absolutely sure that no leaves are submerged. Any submerged foliage will quickly rot and take your cutting with it.
- Bottom heat is your friend: If you’re trying this project during a cooler time of year, or if your propagation spot tends to get chilly, a gentle bottom heat from a heating mat can make a world of difference. It encourages the roots to start developing much sooner.
Aftercare & Troubleshooting
Once your cuttings are potted, the waiting game begins! Keep the soil consistently moist but never soggy. Mist the leaves every so often, especially if they’re looking a bit limp. Check for signs of rooting by giving a gentle tug on a cutting – if there’s resistance, roots are forming! This can take anywhere from 3 to 6 weeks, sometimes longer.
The main issue you’ll encounter is rot, which is usually caused by overwatering or poor drainage. If you see stems turning black and mushy, unfortunately, that cutting is likely a goner. Remove it immediately to prevent it from affecting others.
When your cuttings have developed a good root system (you might see them poking out of the drainage holes), it’s time to pot them up into slightly larger individual pots. Continue to care for them as you would a young plant, providing bright, indirect light and keeping the soil moist.
A Encouraging Closing
Don’t be discouraged if you have a few failures; that’s all part of the learning process. The joy is in nurturing these little lives from a simple stem cutting into thriving new plants. Be patient, enjoy the process, and I can’t wait to see your Arenaria catamarcensis flourish! Happy gardening!
Resource:
https://identify.plantnet.org/k-world-flora/species/Arenaria%20catamarcensis%20Pax/data